
Listen to this article:
Key Takeaway
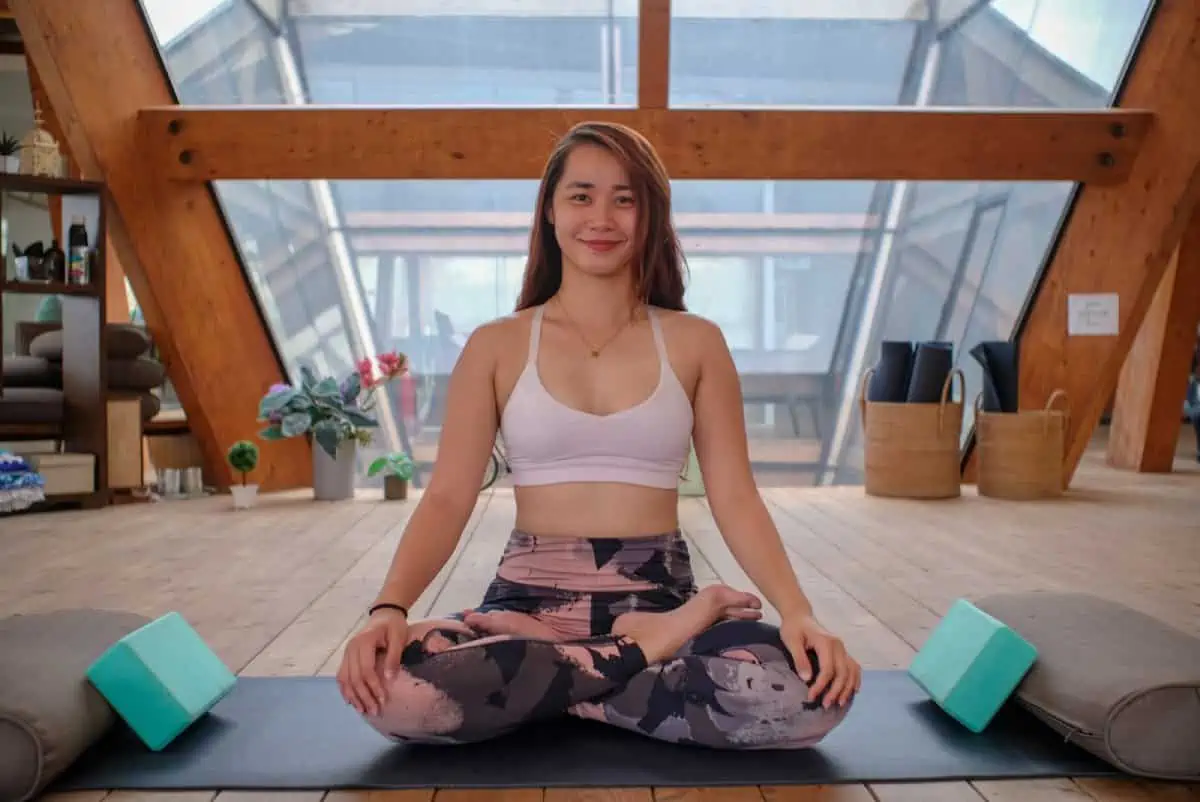
Restorative yoga sequences offer deep relaxation and healing for all levels, using props to support the body in gentle poses that promote physical and mental rejuvenation.
When I first found yoga, I adored dynamic styles like Vinyasa. However, later in my journey, I began practicing and teaching restorative yoga and fell in love with the deeply nourishing practice.
Restorative yoga is good for everyone, both yogis and non-yogis. You don’t need to be fit, flexible, or in top health to practice it.
What’s more, as our lives get busier, the slow, quiet practice of restorative yoga becomes more and more essential.
So today, I’m sharing 10 simple restorative yoga poses accessible to all. I’ll also explain what this practice is good for and how to get the most from it.


Contents
What Is A Restorative Yoga Class?
Restorative yoga is a slow, passive style focusing on healing and relaxation. In a restorative yoga class, you’ll practice only floor-based (seated and reclined) postures, which you will hold for extended periods (several minutes each).
One of the fundamental principles is using props to support the body. Unlike yin yoga, you don’t apply stress to the tissues in restorative yoga. Instead, the aim is to fully relax the body and promote healing and rejuvenation (physically, mentally, and emotionally).
Thus, by supporting your body with multiple props, you can stay in each position for long periods without engaging the muscles.
Benefits Of Restorative Yoga Sequences

Restorative yoga perfectly complements a more active yoga practice and fitness regimen and balances the yin and yang energies. Moreover, it is highly beneficial to our modern-day lives as it gives us a chance to slow down, reset, and switch off—something most of us don’t do enough of.
When we practice restorative yoga poses, the sympathetic nervous system (fight-or-flight mode) shifts to the parasympathetic nervous system (relaxation response). This signals the muscles to relax and the brain to slow mental activity.
The benefits of this yoga practice include the following:
- Promotes deep relaxation in the body and mind
- Anxiety and stress relief
- Can lower high blood pressure
- Improves sleep quality and can reduce insomnia
- Boosts mood and general wellbeing
- Reduces tension and pain
- It boosts the immune system
Another massive benefit of restorative yoga is that it is the most accessible yoga style, suitable for all. In fact, it’s ideal if you have health concerns or injuries, as the gentle and supported restorative yoga poses promote healing.
Various studies have found that restorative yoga can help reduce the symptoms of different health conditions, including cancer. It has also been shown to help alleviate chronic pain, such as low back pain.
A 40-Minute Restorative Yoga Sequence For All Levels
Want to give restorative yoga a go? Below, I’ve listed 10 common restorative yoga poses in order of how I would teach them in a class.
While you can do these postures without props, I recommend doing the supported versions to experience deep relaxation and healing. If you’re unfamiliar with yoga props, read until the end for a list of what you’ll need and my recommendations.
Reclining Bound Angle Pose

The reclining bound angle pose, also known as Supta Baddha Konasana, is a profoundly relaxing posture that gently stretches the hips while opening the chest and improving spinal flexibility. You can do it near the end of the class, but it also works nicely at the start of a session. The reclined position helps you center and bring your awareness to the breath.
- Place a bolster lengthwise on your yoga mat and lower your back over it so that it supports your entire spine and head.
- Open your knees and bring the soles of your feet to touch in a diamond shape. Place a block under each knee for support.
- Bring one hand to your belly and the other to your heart, close your eyes, and practice deep belly breathing, observing the movement of your stomach and chest as you inhale and exhale.
- Stay here for 5 minutes. Once you’re ready to release, hug the knees to your chest, roll to your side, and then slowly come up to sit down.
Child’s Pose

The child’s pose is another excellent posture to do near the beginning of a restorative yoga sequence. It is introspective; thus, it helps you go within and connect to your body, moving away from the mind. Physically, it stretches the back and hips and is particularly good for menstrual pain or poor digestion.
- Sit on your heels and open your knees wide, keeping your feet together.
- Place a bolster between your thighs and slowly lower your chest over it.
- Turn your head to one side and extend your arms forward, resting your forearms on the mat.
- Stay here for 5 minutes, then slowly release back to seated.
Seated Cat Cow Pose

As most restorative yoga poses are static holds, I like to include one or two gentle movements into a restorative sequence to break it up. The seated cat-cow pose is an excellent choice as it loosens the spine, helps to release tension and pain in the back, and improves blood circulation and flow in the prana.
- Begin in an easy pose (seated with the legs crossed). Sit on a pillow or folded blanket to keep a straight spine.
- Place your hands on your knees, inhale, draw the elbows back, and press the chest forward. Slightly tilt the head back to create a gentle throat stretch too.
- As you exhale, slowly round your back, starting from the lower back and moving to the neck. Tuck your chin to your chest to stretch the back of the neck.
- Move between these two movements five times, going as slowly as possible and pausing between each one.
Thread The Needle Pose

I like to include thread the needle pose in my restorative practice as it targets the upper body and helps relieve tension in the upper back and shoulder blades. It also gives a light twist to the spine, which helps prepare for the next pose. This pose is especially beneficial for people who work on computers and suffer from tight shoulders and poor posture.
- Come onto all fours in a tabletop position, with the shoulders over the wrists and the hips over the knees.
- On an inhale, reach the right arm up to the sky, opening the chest and looking up at the hand.
- As you exhale, lower the right arm and thread it through the left side.
- Release the right shoulder to the yoga mat. Place a folded blanket or pillow underneath if it doesn’t reach the ground.
- The right hand should be extended to the left side with the palm facing up. Then, walk the left fingers forward, extending the arm.
- Looking towards the left side, rest the right side of the head on a pillow or blanket.
- Hold for 3 to 4 minutes, release, then change sides.
Bolster Twist

Bolster twist is one of my favorite restorative yoga poses and is always a hit in my classes. It feels incredibly nourishing (think hugging a pillow in bed), improves spinal mobility, and tones and stretches the core muscles. As a twist, this posture is also great for improving digestion.
- Sit on your heels and face the side of your mat. Place a bolster lengthways with the bottom close to your hips.
- Keeping your knees bent, adjust your legs and hips so that the thigh of the leg most relative to the bolster lines up directly with the base. The shin should be parallel to the side of the mat.
- Draw your other foot towards your hip until that knee is next to the foot of the opposite leg. At this point, your upper body and hips should be facing the side, not the bolster.
- Now, gently twist your torso towards the bolster. Slowly release your chest and belly over it with the arms alongside it, and the elbows bent.
- Turn your head to one side and fully relax your entire body, allowing the bolster to hold your weight. Stay here for 5 minutes, then change sides.
Supported Forward Fold

The seated forward fold stretches the entire back of the body, including the hamstrings. It also improves spinal flexibility and has a highly calming mental effect.
- Start in staff pose (seated position with the legs straight and feet together). Place a folded blanket or pillow under your sitting bones to elevate your hips and help keep the spine straight.
- Bring your legs hip-distance apart, enough to fit a bolster lengthways in between them. Alternatively, you can keep your legs together and put the bolster on your thighs.
- Slowly lower your upper body down, resting it over the bolster. If your flexibility is limited, create a bolster ramp by placing a block under the bolster by your feet.
- Rest your head on the bolster, turning it to one side. Relax your arms by your sides.
- If your hamstrings feel tight, place a rolled blanket under the knees to ease that tension and find a deeper fold in the spine.
- Allow your body to relax and stay here for 4 to 5 minutes, taking slow, deep breaths. Turn your head to the other side at the halfway point.
Supported Banana Pose

The supported banana pose is one of the only restorative poses focusing on opening the side body. It creates space in and around the ribs, gently stretches the hip flexors, and relieves pelvic tension.
- Place a bolster width-wise on your mat (opposite to how you did in the bound angle pose).
- Place a folded blanket where your knees and ankles will be, then on your side with the bolster of your right ribcage.
- Extend your legs with a micro-bend in the knees. If this feels uncomfortable, bend your bottom knee and keep the top leg straight.
- Reach your arms overhead, bringing the palms together. Again, if this feels too much, slightly bend the bottom arm.
- Stay here for 3 to 4 minutes, then change sides.
Supported Bridge Pose

The supported bridge pose is a gentle heart opener and backbend, re-energizing and lifting your mood. It is also great for relieving tension and fatigue in the back.
- From a reclined position, bend your knees, bringing the heels to the buttocks.
- Press into your feet to lift your hips, and place a block (on any of the three levels) or a bolster (width-wise) under your lower back.
- Ensure you set it at the base of the spine, not the flesh of the buttocks. If using a block, you can choose the height based on how deep of a backbend you want to experience.
- Adjust your prop as needed so that you feel entirely stable and can fully release your body.
- Relax your arms alongside your body and close your eyes. Stay here for 4 to 5 minutes.
- To come out, lift your hips to slide the prop out, then gently roll your spine onto the ground. Hug your knees to your chest and rock side to side for a few breaths as a counterpose.
Supported Fish Pose
Like the bridge pose, supported fish is a replenishing, heart-opening pose that opens the front body and improves spinal health. The fish pose also opens and stretches the throat, stimulating the thymus gland, which plays a crucial role in stress regulation.
- Like with the bridge pose, you can use a block or bolster. The difference is the placement of the prop. Place it under your upper back (thoracic spine) rather than the lower back. This will raise your chest higher than your hips.
- If using a block, I recommend the long, thin edge, as this gives a deep enough chest opening but is still comfortable to hold for a few minutes.
- For a deeper throat opening, drop your head back and rest it on a pillow. For a gentler variation, rest your head on another block.
- Stay for 3 to 4 minutes. When ready to come out, slowly lift up, remove the props, and lower back down with the spine on the mat.
Legs Up The Wall

Legs up the wall is a gentle inversion that sends fresh blood and oxygen around the body and brain. This relieves headaches and fatigue. Moreover, the inverted position reduces swelling in the ankles and helps tired legs. You can do this as your final resting pose or before savasana.
- If using a wall, shuffle your hips as close to it as possible, then lift your legs. Press your buttocks against the wall so your legs are at a 90-degree angle. Option to place a pillow or bolster under the hips.
- If you lack wall space, you can do this posture in the middle of the room. Place a bolster under your hips and extend your legs to 90 degrees.
- Relax your feet and release your arms alongside your body. You can also place a pillow under your head. Close your eyes and stay here for 5 minutes or longer.
Delving into the Importance of Breathing in Restorative Yoga
Breathing plays a role in yoga, serving as a valuable tool to transition the nervous system from tension to calmness. By focusing on our breath, we prompt our bodies to unwind, allowing the postures to penetrate deeply. It’s not about taking breaths; it involves employing specific methods to enhance the advantages of each pose.
One method that I’ve found particularly effective is the 4 7 8 breathing technique. Inhale for 4 seconds, hold for 7 seconds and exhale for 8 seconds. This approach is recognized for reducing anxiety and aiding in sleep, making it ideal for yoga. Implementing this technique during poses like the supported child’s pose or legs up the wall can intensify the feelings of relaxation and release.
Another beneficial practice is Ujjayi breath, also known as “ocean breath,” which entails narrowing the back of your throat to produce a sound while breathing in and out. This can be especially calming during poses that stretch out the chest and shoulders, such as the supported fish pose.
Through my experience, I’ve observed that combining these breathing techniques with poses amplifies their effects. Many of my students have shared feeling more centered and peaceful after incorporating these practices.
Restorative yoga serves as a nudge to remember that it’s not only about the physical act of maintaining poses but also about the way we intertwine our breath with these poses.
Integrating breathing techniques into a yoga routine has the power to elevate the entire practice. This aspect merits exploration, given its potential to enrich the yoga journey. By centering our attention on our breath, we open doors to profound healing and tranquility within our practice.
Restorative Yoga Props Checklist
If you’re new to restorative yoga, you probably don’t yet have all the props needed. Here’s what I recommend investing in to get the most out of these restorative yoga poses.
Large bolster

#1. Hugger Mugger Large Bolster
See latest priceWhile most traditional bolsters are cylinder-shaped, the newer, rectangular style is best for restorative yoga and gives gentler stretches but with just as much support.
I recommend the Hugger Mugger Standard Yoga Bolster, which has a flat top and bottom to create stability. It also has a firm core but a soft outer to help you find maximum comfort in every restorative pose. The latest model linked here has an easy-to-clean cover!
Yoga blankets

#2. Manduka Cotton Blanket – Premium Yoga Blanket
See latest priceYoga blankets are used a lot in restorative yoga poses, as they can be folded or rolled to give padding. Therefore, I recommend having two on hand and choosing thick yet soft ones like the Manduka Cotton Yoga Blanket.
This blanket is made from 100% recycled materials, including 75% wool, making it incredibly soft. It also has a dense, weighty feel for extreme support and warmth.
Yoga blocks

#3. lululemon’s Lift and Lengthen Yoga Block
As yoga blocks are great for supporting under the knees, it’s best to have two. Most yoga blocks are made from foam (soft) or cork (harder). The former is best for comfort, while the latter is better at holding your body.
I find the Lift and Lengthen Yoga Block by lululemon is the best of both worlds. It is made from dense foam, so it doesn’t feel as flimsy as most foam blocks. Yet its extra weight doesn’t compromise on comfiness either.
A thick yoga mat

#4. Manduka PRO 6mm Mat
See latest priceWhile not a prop, I want to mention that for restorative yoga, you will need a thick mat with lots of cushioning. If you usually use a 3mm rubber mat for hot yoga or Ashtanga, I recommend getting a new one for restorative practice.
For example, I use the Manduka PRO Premium 6mm Thick Mat. It gives ample cushioning, is made from eco-friendly materials, and is highly durable, so it will last a lifetime.
Final Thoughts On Restorative Yoga Poses
Restorative yoga is for everyone and anyone. This deeply nourishing practice will help you find more silence and stillness in your fast-paced life, complement yang activities, and improve your overall health and well-being.
Have you tried restorative yoga before? What did you think of it?
Pop quiz! 🧘🤔
Restorative yoga requires intense physical activity.
Props are essential in restorative yoga to support the body.
Restorative yoga can only be practiced by experienced yogis.