
Key Takeaway
Yin Yoga poses offer a meditative practice that targets deep connective tissues, promoting balance, flexibility, and stress relief through long-held, floor-based postures.
Are you always on the go, rushing from place to place or task to task without a moment’s pause?
If so, you’re likely suffering from a yin-yang imbalance and need more yin in your life. Yin Yoga is a slow, passive, and meditative practice that provides this much-needed equilibrium. It not only replenishes your energy but can also save you from burnout, fatigue, and the many physical and mental ailments that follow.
As a certified yin yoga teacher who adores this nourishing yoga style, I’m sharing everything you need to know about the practice. Read on to discover the most common yin yoga poses, astonishing benefits, and my top tips for getting the most from yin yoga.
Contents
What Is Yin Yoga?
Yin Yoga practice features primarily floor-based postures (seated or reclined) that target the deeper connective tissues of the lower body.
The main difference between yin and other styles of yoga, like Hatha and Vinyasa, is the length of time each posture is held.
As Yin Yoga is about stretching the deeper connective tissues like the fascia, poses are held for longer, typically 1 to 5 minutes. This is significantly different from more “yang yoga styles,” where you hold postures for, on average, 5 breaths, targeting only the muscles.
Although Yin Yoga contains Indian influences, it also incorporates traditional Chinese medicine principles. For example, holding yin yoga poses stimulates particular meridian pathways (energy channels). Targeting these centers helps to free up energy and release physical, mental, and emotional tension.
What Is Yin Yoga Practice Good For?

All styles of yoga are calming, but yin serves as an antidote to a fast-paced, high-stress lifestyle. This is partly because of the impact it has on the nervous system.
When we practice yin yoga, the combination of slow breathing and deep stretches evokes the relaxation response of the parasympathetic nervous system. This signals our muscles to relax and tells our brain that we are safe and at ease. In turn, our body begins to heal, and vital processes like digestion can occur undisturbed.
By practicing regularly, you can experience some of the following physical and mental benefits of yin yoga:
- Lower stress levels
- Reduced anxiety
- Improved sleep quality and reduced insomnia
- Improved flexibility and mobility (Yin yoga is proven to be better for increasing flexibility than other yoga styles as it lengthens the connective tissue and releases fascia)
- Improved blood circulation
- Better flow of chi/prana (life force), leading to many energetic benefits.
There has also been some scientific research done on this style of yoga. For example, a 5-week study followed two groups, one that practiced yin yoga and the other that didn’t. The study found that the yin yoga group dealt with high-stress situations significantly better than the other group.
10 Yin Poses To Try Today
Below are ten common yin yoga poses. I’ve put them in the correct order to create a “mini yin yoga sequence” for you to follow.
Butterfly Pose

The butterfly pose is a popular posture at the beginning of yin yoga classes. It gently opens the inner hip flexors, preparing them for the deeper stretches to follow.
- Bend your knees out the side and bring the soles of the feet together.
- Adjust your feet’ proximity to your body depending on what feels good for you. The closer the feet are to your body, the more intense the stretch will be.
- Sit upright, placing a pillow or folded blanket under your sitting bones if you feel like you are leaning back or slouching.
- Bring your hands to the floor in front of you and take an inhale. As you exhale, gently fold forward, keeping your spine straight.
- Once at your maximum, hold here for 2 to 3 minutes, trying to find physical and mental stillness. Feel free to rest your forehead on a block or bolster.
Square Pose

The square pose targets the outer hips, groin, and gluteus and improves the mobility of the knee joint. You should feel a stretch along the hip and thigh, similar to the sensation in the pigeon pose.
- From a seated position with straight legs, bend your left knee, bringing the shin parallel to the front of your mat.
- Bend the right leg and stack the shin over the bottom one.
- The shins should be stacked, with the right foot over the left knee and the right knee over the left foot. However, don’t worry if yours doesn’t look exactly like this; all our bodies are different.
- If you have a gap between the top knee and bottom foot, place a folded blanket or block underneath for support.
- Stay upright for 2 to 3 minutes as the outer hips gradually open up. Send your breath to your hips to release tension there.
- Slowly release and switch the legs to repeat on the other side.
Shoelace Pose

Shoelace pace, which you may know as cow face legs, is a more intense version of the square pose, requiring more external rotation. However, if it is too much, you can do the half variation instead.
- From the seated position and straight legs, bend your right knee and stack it over the left, so the foot comes towards your left hip. This is the half variation, so if you already feel a lot of tension, stay here.
- If it feels okay, bend the bottom leg, bringing that foot towards the right hip. Keep both knees stacked over each other, and feel free to place a blanket between the knees if there is a gap.
- Either stay sitting upright or start to fold forward. Hold for 3 to 4 minutes, stretch out the legs, and switch them over to do the other side.
Lizard/Dragon Pose

The well-known lizard is known as the dragon pose in yin yoga. It gives deep stretches to the inner hips and thighs and opens the back quad.
- Start from a tabletop position/all fours. Step your right foot forward and bring it to the outside of your right hand/arm.
- Keep the right knee hugging close to your shoulder and armpit. Either stay with your palms on the mat or bend your elbows and lower them to a bolster or the ground if you want to come deeper.
- If there is any discomfort in the knee or ankle, place a blanket underneath.
- Hold for 3 to 5 minutes, then change sides, bringing the left leg forwards.
Swan/Pigeon Pose

Swan is the yin name for the pigeon pose, another deep outer hip stretch, and gentle quad opening. You can hold the pose keeping the spine upright to add a gentle backbend or fold forwards into a sleeping swan.
- From a tabletop position, slide your right knee forward to the right hand. Swivel the foot to the left side, bringing it close to the left wrist.
- Press your right sitting bone down and take any micro-movements here to find more comfort. If the right hip is far from the ground, place a block or pillow underneath to give you more stability.
- If doing the upright version, keep your arms extended and press your chest forward for a gentle backbend.
- For a sleeping pigeon, gently lower your upper body, release your arms, and rest your forehead on the ground or a prop.
- Hold for 3 to 5 minutes, slowly roll up and release, then switch sides to the left leg.
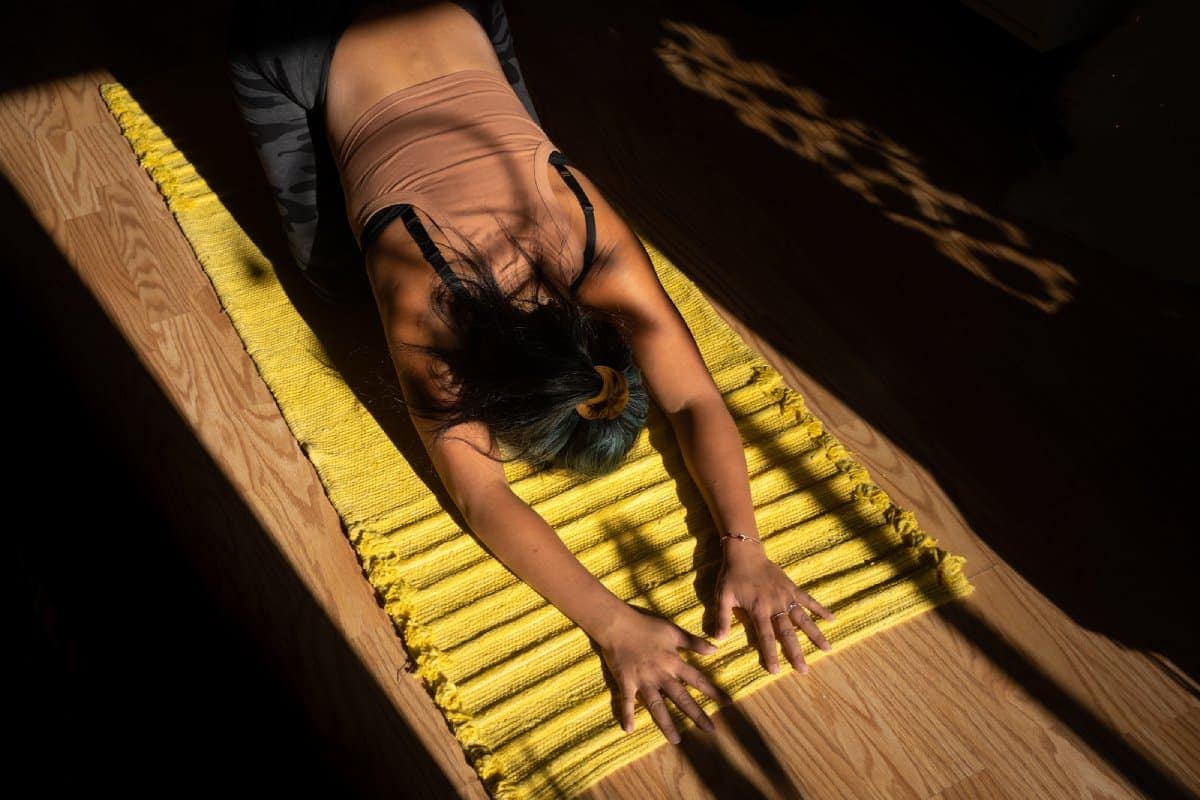
Caterpillar Pose/Seated Forward Fold

The Caterpillar pose is a seated forward fold with the legs together. It is a much-needed counter pose after all those hip openers. It also brings a deep stretch to the hamstrings and spine and can release tension in the lower back.
- From a sitting position, extend the legs straight with the knees and feet together.
- Notice if you are slouching or leaning back here. If so, elevate the hips by sitting on a prop. The tighter your back and hamstrings, the more height you will need.
- Once you have a straight spine, take a deep inhale with your hands by your sides. As you exhale, slowly fold forward, walking your hands alongside your legs.
- Take as many breaths as you need to come down to your maximum, then relax your head or rest it on a block or bolster.
- Try to keep the legs straight, but if the hamstrings are very tight, you can bend your knees slightly.
- Stay here for 3 to 5 minutes, using your breath to open your body further.
Supported Child’s Pose

While you can do a standard child’s pose in yin yoga, I love the supported version; it allows you to rest your upper body on a bolster and feels extra nourishing. In addition, it gently opens the back and inner thighs, is incredibly calming for the mind, and helps relieve headaches, insomnia, and menstrual pain.
- Sit on your heels, then open your knees wide.
- Place a bolster between your thighs, then slowly lower to release your chest, torso, and head. Turn your head to one side.
- Relax your arms on the mat in front of you and keep your hips pressing against your heels.
- Hold for as long as you like, turning your head to the other side at the halfway point.
Supported Fish Pose

Supported fish pose is excellent for opening the chest, heart, and throat. In addition, it stretches the chest, shoulder, abdominal, and neck fascia and stimulates the organs in the belly and throat.
- Place a bolster lengthways on the mat, then lower your back over it with the legs extended in front of you.
- Depending on the bolster size, your head will rest on the bolster or hang over the top, deepening the throat opener further.
- Open your arms to the side with the palms facing up, and stay here for 4 to 5 minutes.
Banana Pose

As the name suggests, the banana pose involves making a banana shape with your body. This reclined position brings a deep stretch and opening to the side body and the deeper connective tissues around the ribs. It also stimulates multiple meridian channels, as many run up and down the legs.
- Laying on your back, walk both feet as far to the right as possible, keeping the legs extended and the back on the ground.
- Reach your arms overhead and walk your hands to the right side to find a banana shape.
- For a deeper side stretch, place your left ankle over the right foot and grab your left wrist with your right hand.
- Hold for 4 to 5 minutes, keeping the back, hips, and shoulders firmly on the mat.
Reclining Twist

Like in other yoga styles, a supine twist is a lovely way to end a yin yoga session. It neutralizes the spine, stimulates digestion, and promotes further relaxation.
- Bend your knees, hugging them to your chest (in a reclined position).
- Drop both knees to the right side as you open your arms wide in line with your shoulders.
- Keep your back and shoulders on the ground and gaze at your left hand. Place a block under the knees if you have a lot of tension.
- Hold for 4 to 5 minutes, then drop your knees to the other side.
Yin Yoga Props
My number one tip for getting the most out of these yin yoga poses is to use plenty of props.
You can light candles, diffuse incense, and put on relaxing music, but if your body does not feel supported, you will struggle to fully relax your muscles, which is essential for reaping the benefits of yin yoga.
Here are the three props every yin practitioner should have:
Bolster

Bolsters are the best prop to use in the supported versions of poses, such as fish and butterfly. They match the spine’s length, giving full support to the back. They are also soft and padded, so they feel cozy.
Note that bolster sizes vary. For yin, choose a larger one like this one from YogaAccessories, which is 28 inches long and 10 inches in diameter. It also has a very soft cotton batten filling that molds to your body’s shape.
You can also find rectangular-shaped bolsters like this luxurious velvet bolster by Florensi. These have a lower height than the cylinder-shaped ones, so they are a good choice for those who lack spinal mobility or have back issues – as they create a more gentle opening of the chest and backbend.
Yoga Block

Yoga blocks prove very useful in yin yoga poses, so I recommend getting two. You can use a block to:
- Create a supported version of the bridge pose.
- Support the knees in a reclined butterfly, shoelace, or square pose (for those with tight hips).
- Rest your head on during seated forward folds. This is important to prevent tension in the neck during the long holds.
I love using the lululemon Inner Flow Yoga Block for yin yoga as it has an innovative, extra-smooth, rounded edge that gives superior comfort for extended holds. This makes postures like the Bridge pose extra comfortable as, unlike some harder yoga blocks, it doesn’t dig into the spine.
Blanket

Yoga blankets are traditionally used in restorative yoga but are just as valuable for yin. Like blocks and bolsters, they serve many purposes, such as:
- To keep you warm in Savasana
- To provide a thin layer of padding for your head in reclined postures
- To fill in gaps between your knees in hip stretches
- To elevate the hips slightly in seated poses
- To add more padding to your yoga mat and make it a bit thicker and, thus, more comfortable
I use the Halfmoon Cotton Yoga Blanket in my practice as it is large, thick, and super soft, made from 100% cotton. As it measures 60 inches by 80 inches, you can make a small pillow by folding it up multiple times.
3 Additional Tips For Practicing Yin Yoga Postures
Find Your Edge
A fundamental concept in yin yoga is finding your edge. This means the point where you feel some sensation but not pain. Thus, we want to feel something when holding yin yoga poses; we shouldn’t simply hang out there. But we shouldn’t be pushing ourselves too far so that we cause harm. Feeling sharp or shooting pains clearly shows we have gone past our edge.
Focus On Slow, Deep Breathing
When you hold the poses for so long, it’s normal for tension to arise. However, your breath can help you move through that tension and release it.
Whenever you enter a pose, consciously deepen your breath and keep your awareness of it. For example, breathe in for four and out for four; if you feel tension arise, try to send your breath to that body part.
Come Out Of The Poses Slowly
When we hold yin poses, we initially weaken the tissues (which allows them to strengthen later – like with weight training). However, this means if you come out of a posture too fast, you can risk tearing or damaging tissue. So take your time transitioning between poses and sides.
Final Thoughts On Yin Yoga Poses
Yin yoga allows us to find much-needed balance in this fast-paced modern society. It prompts us to slow down, connect to our breath, and find stillness. This, in turn, allows us to cultivate a deeper connection to ourselves and the world around us, so we no longer spend our days rushing around in an unconscious, mindless state.