
Listen to this article:
Key Takeaway
Elevate your yoga practice with these 18 intermediate yoga poses that enhance core strength, balance, and flexibility, ensuring you use proper form and props to prevent injury and maximize benefits.
Have you practiced yoga for a while now and feel confident in your downward-facing dog and warrior 2?
If so, why not challenge yourself by including a few intermediate yoga poses in your practice?
Intermediate yoga poses, or medium yoga poses, are noticeably more difficult than beginner poses. They require more core strength, balance, spinal flexibility, or a deeper opening of a specific body part.
However, as a yoga teacher, I see many yogis getting confused between intermediate yoga and advanced yoga poses. And let me tell you, trying to attempt a handstand when you have just mastered mountain pose will only end in one thing: injury!
So to help you safely level up from a beginner yogi to an intermediate yoga practitioner, I’m detailing 18 awesome intermediate yoga poses you can gradually introduce into your practice. And be sure to read until the end, as I’ll share my top tips for practicing these trickier poses safely and effectively.


Contents
- 1 Intermediate Yoga Poses For Leg Strength & Balance
- 2 Intermediate Yoga Poses For Hip & Shoulder Opening
- 3 Intermediate Yoga Poses For Core Strength
- 4 Intermediate Yoga Poses For Spinal Mobility
- 5 How To Safely Practice Intermediate Yoga Postures
- 6 Integrating Pranayama with Intermediate Yoga
- 7 Final Thoughts On Intermediate Yoga Postures
Intermediate Yoga Poses For Leg Strength & Balance
Chair Pose
The chair pose is a heat-building posture that strengthens the entire lower body, including the legs, ankles, knees, hip flexors, and back. Plus, with the arms raised, it also builds strength in the shoulders and upper body while stretching the chest.
Stand with your feet together, bend your knees, and sink your hips like sitting on an actual chair. Be careful not to bend your knees too much, as this can compromise your joints. You should still be able to see your toes when you look down.
Reaching the arms alongside the ears makes this pose even more challenging. With the palms facing inward, try to bring the upper arms in line with the ears without rounding the spine.
Half-Moon Pose

Half moon pose is an excellent asana to include in your usual standing sequence. It involves balancing on one leg with your body in a lateral position. Thus, it is both strengthening for the standing leg and excellent for improving balance.
I recommend first trying this posture with your lower hand on a yoga block for support. Then, if your balance and alignment are good, try bringing your hand to the floor.
From a triangle pose, bend your front knee and place your front hand about one foot ahead of your front foot. Then, with your upper hand on your top hip, firmly engage your standing leg as you float the other leg up, so it is parallel to the floor and in line with your body.
Flex the foot of the floating leg and reach your top arm up to the ceiling. Draw the shoulder slightly back so the chest can open to the side.
For an extra challenge, bend the lifted leg and try to grab the inside of the foot for a quad stretch. Next, lift the knee high and ensure the chest remains open.
Revolved Triangle Pose

The revolving triangle pose features the same leg position as a standard triangle but with a deep twist in the spine. This immensely improves your balance and stability, enhancing spinal mobility and strengthening leg muscles.
- Step your left leg back from the mountain pose, turning the foot out to 45 degrees.
- With both legs straight and the hips facing forward, inhale to lift your left arm up.
- Exhale to tilt forward from the hips, lowering the left arm halfway.
- Take an inhale here, then twist to the right on the exhale, bringing the left hand to your shin or a block outside the front foot.
- Keep the core and leg muscles engaged as you draw your right shoulder back, opening the chest to the right side.
- Finally, extend the right arm up and look up to the top hand.
Revolved Extended Side Angle Pose

Like in a revolved triangle, the revolved side angle pose is a deep twist and chest opener. It also challenges your balance, strengthens the leg and abdominal muscles, and profoundly stretches the hip flexors.
- Step your right leg back from the mountain, turning the foot out to 45 degrees.
- Bend your front knee, stacking it over the ankle. Keep your hips facing forward and inhale to reach both arms up.
- Exhale to lower your arms and torso forward as you twist to the left. Place your right hand on the floor or a block outside your left foot. Aim to hug your torso to the thigh so that the right forearm is pressed against the outer left shin.
- Draw your left shoulder back to open the chest to the side and extend the left arm.
- An alternative variation is to have the palms in a prayer pose at the heart center, with the bottom elbow hooking to the outside of the front knee.
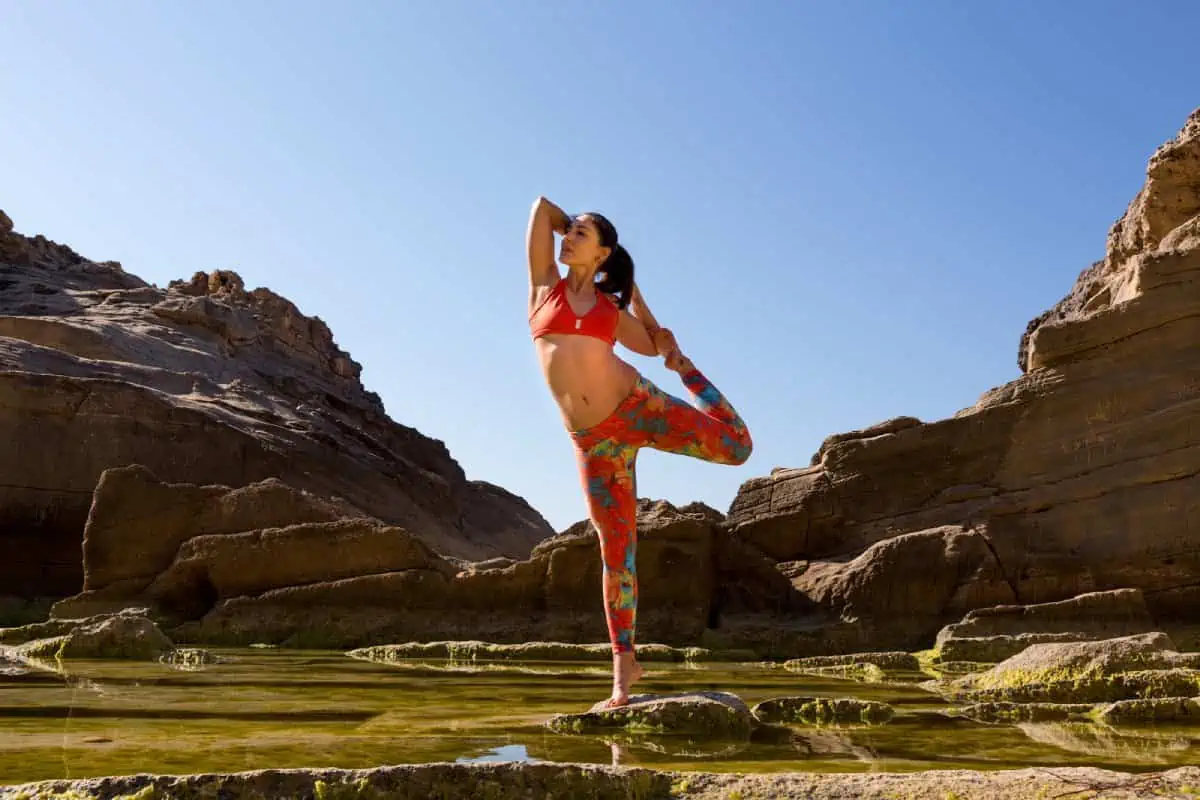
Standing Hand-To-Big Toe Pose

This balancing pose challenges your balance, stability, and concentration and deeply stretches and opens the hamstrings.
From a mountain pose, shift your weight into your right leg as you bend and lift your left knee, hugging it into your chest. Take a moment to find your balance, then hook the peace fingers of the left hand to the big toe and slowly extend your leg.
If you cannot extend the leg fully, use a yoga strap. Ensure your spine is straight and your shoulders are not hunching up to your ears.
Eagle Pose

This balancing posture is a deep hip and shoulder opener, stretching the outer hips and upper back while strengthening the lower legs. Practicing this pose will also help you work towards your first arm balance.
- From a standing pose, shift your weight into the right leg and lift the left foot.
- Wrap the left leg around the right, crossing at the thighs, and bend the knees to sink your hips.
- Bend your knees and try to come into the full leg bind by wrapping the left foot around the right calf muscle.
- From here, extend both arms and wrap the right arm under the left. Bend the elbows and bring the right fingertips to the left palm.
- Pull the hands away from your face and lift the elbows slightly, so you feel the shoulder blades pulling apart.
- Fix your gaze and breathe deeply for five breaths.
Intermediate Yoga Poses For Hip & Shoulder Opening
Humble Warrior

This standing pose strengthens the legs, glutes, and core while deeply stretching the hips, chest, and shoulders. It is an excellent pose to include in your standing sequences and after backbends.
- With a solid foundation in your legs and feet, start Warrior I.
- Take a breath out and move your hands behind you. Fold the fingers together and open the chest. Visualize the back-and-down motion of your shoulder blades.
- Fold your torso softly over your front leg while utilizing your core. Maintain a bent front knee and an active rear leg.
- Allow your front hip to roll out and your torso to collapse even more between your legs as you release the breath.
- For 4-6 breaths, hold.
- Tighten your core as you inhale, then slowly raise yourself back up. Release your hands and return to Warrior I. You can choose to perform a sun salutation and then switch to the opposite side.
Bird of Paradise

This challenging balancing pose requires open hips and shoulders, immense balance, and concentration. Try using a strap if you cannot bind your arms or have tight hips or shoulders.
- From a side angle with the right foot forward and knee bent, reach your right arm under the bottom thigh and your top arm up and over, bringing it behind the back, aiming to join the hands.
- With the hands clasped (or holding a strap), look to your front foot and step your back foot forward next to the front foot.
- Shift your weight to your left foot as you slowly lift your right leg, keeping the bind.
- Keep the right knee bent as you straighten your spine and find your balance. Then gradually extend that leg, pointing the toes up. Draw the right shoulder back to open the chest.
Cow-Face Pose

The cow face pose gives a deep stretch to the shoulders, arms, chest, hips, and ankles while improving your posture and reducing pain and tension in the spine.
- From a seated position with both legs straight, bend your right knee and stack it over the left, bringing the right foot to the left hips.
- Bend the bottom leg so that the foot comes to the right hip.
- Reach your right arm behind your back, bend the elbow, and reaching the fingers to the upper back.
- Reach your left arm up and turn the elbow to clasp both hands.
- Sit with a straight spine and point your top elbow up as you breathe into your heart center.
Garland Pose

While the garland pose (Malasana) may look like a simple posture, it requires very open hips and, thus, is challenging for most yogis. In addition to the hip flexors, it also stretches the inner thighs, groin, and spine.
From a standing position, bring your feet mat-width with the toes out and heels in. Bring your hands to the prayer pose and lower your hips as you exhale, with the knees bending slightly out to the side.
Bring your hips as low as possible without the heels lifting off the ground. Keep your spine straight, press your elbows into your inner knees to open the hips further, and hold for 5 to 10 breaths.
Reclined Hero Pose
The reclined hero pose gives a deep stretch to the quads, hip flexors, knees, ankles, and abdominal organs. The full variation with the arms overhead also opens the chest and shoulders.
Come into a kneeling position with your feet to the outside of your sitting bones, allowing you to sit directly on the yoga mat or a folded blanket. The knees should be close together.
Lean back onto your forearms and take a few breaths. Then, if it feels okay, come down onto your back. However, if your knees lift off the ground, stay on your forearms.
If you can comfortably come onto your back, reach your arms overhead and grab the opposite elbows.
Intermediate Yoga Poses For Core Strength
Boat Pose

Boat pose (Navasana) is one of the most dreaded seated poses as it requires a lot of core strength, something many of us lack. However, by including this in your regular yoga practice, you will significantly improve stability and power in the core, which will help you when you move on to more advanced poses.
From seated, bend your knees and draw the soles of the feet close to your buttocks. Find a straight spine as you hold onto the back of your thighs. Engage your abdominal muscles as you float your feet off the ground and bring your shins parallel to the floor.
Release your arms alongside your legs and then straighten the legs, maintaining your balance.
Chaturanga Dandasana

You may have practiced Chaturanga Dandasana as a transition in the Sun Salutations or a vinyasa flow. However, I see many yogis performing this pose incorrectly, which can lead to injury.
Learning the correct form of Chaturanga is essential, as it helps to build the strength and stability needed for many advanced yoga poses, such as the crow pose and peacock pose.
Start in plank pose with the shoulders directly over the wrists and the hips in line with the body. Next, engage your core as you bend your elbows and hug them into your rib cage. Then, using your arm strength, slowly lower your body toward the floor in one line until you hover off the floor. From here, you can push into an upward-facing dog.
Dolphin Pose

Dolphin helps to build the upper body strength needed for arm balances and forearm stands. It also tones the core muscles, regulates digestion, and strengthens the quads.
From the downward-facing dog, lower one forearm to the ground, followed by the other. The elbows and hands should be aligned shoulder-width apart, and the palms should be firmly planted. Next, walk your feet in as much as possible, bringing your hips high.
Intermediate Yoga Poses For Spinal Mobility
Wild Thing

This fun posture opens the entire front body and the hips while strengthening the back, shoulders, and upper arms. It also works on building stability in the core.
From the downward-facing dog, extend your left leg up to the sky. Bend the knee of the lifted leg and open the hip by drawing the foot towards the buttocks and pointing the knee up. Turn your body to the left side and look to your left armpit.
Slowly lower and drop the left foot behind you as you turn your torso and chest to the sky. Keep the left leg bent and extend the right leg with the foot firmly on the ground. Focus on lifting the chest as you reach your left arm behind you.
Mermaid Pose

Mermaid is an advanced variation of the pigeon pose with an additional quad stretch and shoulder opening. It is also a backend, opening the heart and stretching the chest and torso.
From a pigeon pose with the right knee forward, bend your back leg, grabbing the foot with your left hand. Arch your spine as you slide the foot down your forearm to hook into the inner elbow.
From here, reach your right arm up and over, clasping the hands behind your head. Keep your hips neutral as you breathe into your heart center.
Camel Pose

Camel pose is one of the deepest backbends and heart openers that improves spinal mobility and can release tension in the back and neck. However, you should also practice this with care and practice the modified variation with the hands on the lower back first before coming into the full pose.
From a kneeling position with your hips lifted, tuck your toes and place your hands on your lower back (fingers pointing down). Lengthen your spine then start to arch your back on an inhale as you actively press your hips forward.
If you have good spinal flexibility, move your hands to your ankles and drop your head back, finding a deeper backbend. To release, bring your hands back to your lower back before straightening the spine, then come to child’s pose for at least 5 breaths.
Wheel Pose

The wheel is another challenging backbend that requires flexibility in the spine and strength and opening in the shoulders.
Lay on the floor with your knees bent, and bring your feet close to your buttocks with the soles on the mat. Place your hands next to your ears with fingers pointing to your shoulders and elbows pointing up.
Engage your thighs as you lift your hips and chest, pressing into the hands to lift the head. Next, straighten the arms and legs, lifting the chest and hips while letting the head hang. Hold for 5 breaths and then slowly lower back down.
How To Safely Practice Intermediate Yoga Postures
Here are some tips for avoiding injury when practicing these intermediate yoga poses.
Learn About Preparatory and Counter Poses

Most intermediate-level asanas require a deeper opening of a body part, such as the back, hips, or shoulders. Thus, it is essential to ensure you fully warm up for a posture before trying it.
Therefore, if you want to practice intermediate yoga poses at home (along with classes with a certified yoga instructor), learning how a yoga session is sequenced is a good idea.
For example, let’s say you want to learn the mermaid pose. This yoga asana requires open outer hips, quads, hamstrings, and shoulder and spinal flexibility. So you should practice preparatory poses targeting these areas, such as pigeon, butterfly, seated forward bend, thread-the-needle, and low lunge with cactus arms.
Counterposes (the poses you do immediately after a yoga asana) are just as crucial as they bring the body back into balance by gently moving muscles and joints in the opposite direction to what they were just working on.
I recommend having a copy of The Yoga Bible by Christina Brown. It features images and cues for over 170 yoga poses and a list of preparatory and counterposes for each.
Don’t Forget About Props
One common mistake I see yogis make as they progress in their practice is the misconception that they do not need to use props anymore. Yoga props are for all levels of yogis, not just beginners, and just because you don’t need a block in the triangle pose anymore doesn’t mean you’ll never need props again.
Likely, you won’t master all the yoga postures listed above on the first, second, or third try. Thus, props serve as a helping hand in transitioning from beginner to intermediate yoga poses and intermediate yoga to advanced poses.
Let’s take the bird of paradise, for example. Many yogis cannot fully bind their arms in this position when they first start practicing it. Without using a prop, you will increase your risk of injury and compromise your posture and spinal alignment as you’ll naturally hunch forward to hook your fingertips.
However, if you use a yoga strap to assist you instead, you can practice the yoga asana with the correct alignment. This allows you to work on your hip and shoulder opening until, one day, you realize you don’t have to reach for your strap anymore.
Integrating Pranayama with Intermediate Yoga
When I began incorporating pranayama, the art of yogic breathing, into my yoga routine, I experienced a transformation. It’s not, about advancing to challenging poses; it’s about the way you breathe through them.
Pranayama has the power to enhance your practice, sharpen your focus, and enhance the circulation of energy, known as prana, throughout your body.
One particular technique that I find especially valuable is Ujjayi breathing. This method involves inhalation through the nose while maintaining a constriction in the throat.
The resulting soothing sound resembles ocean waves, aiding in maintaining rhythm and concentration during demanding postures. It feels like having an internal compass guide you with stability and presence.
Another beneficial technique is Nadi Shodhana, also known as nostril breathing. This practice can serve as an introduction to a yoga session before attempting poses that demand balance and mental focus.
It entails closing one nostril while inhaling and then switching to exhaling through the nostril. It is believed to harmonize the brain’s right hemispheres. Ideal preparation for poses requiring both creativity and logic, such, as the Half Moon pose.
Practicing pranayama techniques is often overlooked in discussions, about yoga. It can truly make a difference. It’s not just about the poses themselves; it’s also, about infusing them with the essence of your breath.
Consider beginning your practice session by incorporating a period of Ujjayi or Nadi Shodhana breathing and observing how it enhances your experience.
Final Thoughts On Intermediate Yoga Postures
While there are no easy poses in yoga, these intermediate yoga asanas require additional strength, stability, and flexibility compared to beginner yoga poses.
If you’ve been practicing for a while and feel ready to level up, why not give them a go? However, remember that it’s best to practice them during a yoga class under your instructor’s guidance and introduce just one or two postures per session.
Pop quiz! 🧘🤔
Chair Pose is primarily a lower body strengthening pose and does not engage the upper body.
Using props such as yoga blocks or straps in intermediate yoga poses is a sign of weakness and should be avoided to progress in practice.
Practicing Chaturanga Dandasana incorrectly can lead to injury, making it essential to learn the correct form of this pose.