
Listen to this article:
Key Takeaway
Master one-leg yoga poses to enhance balance and stability in your practice and life, with variations for all levels to progress safely and effectively.
As a yogi, you know that what you do on your yoga mat coincides with life.
When you cultivate calmness and patience in yoga, you notice how you better deal with stressful situations at work and home.
The same goes for balance. By learning how to stabilize your physical body, you can better cultivate balance in life.
As we all know, our fast-paced modern lifestyles have resulted in a chronic, collective work-life imbalance, so if there is one thing we all need more of, it is equilibrium.
However, balancing on one leg is more challenging than it looks. One-leg yoga poses require strong engagement of many different muscles, full coordination between all bodily systems, and a clear, focused mind.
Luckily, the one-leg standing poses in yoga help us improve our balance on (and off) the mat. So let’s explore the best standing one-leg yoga poses to build stability and body awareness quickly.
Contents
10 Awesome Balancing Poses In Yoga
These 10 one-leg standing poses will improve your ability to remain steady and stable while balancing on one leg. I’ve included variations for each, allowing you to adjust your practice to fit your current level.
Tree Pose

Tree pose is one of the most commonly practiced standing yoga poses and is a beginner-friendly way to master balancing on one leg. What I like about tree pose is that you can try four different variations to find the one that best suits your balancing ability.
- Variation 1 – Keep the toes and ball of the foot on the floor, lifting the heel and placing it against the opposite ankle. This is the easiest option.
- Variation 2 – Place the sole on the inner shin.
- Variation 3 – Place the sole on the inner thigh.
- Variation 4 – Bring the heel close to the groin, resting the foot on the front of the upper thigh, as in a half lotus pose. This is the most complex option.
Once you decide which variation to try, here’s what to do:
- From the mountain pose, shift your weight into your right leg, pressing the foot firmly into the ground.
- Slowly turn your left knee to the side and take your chosen leg position. For variations 3 and 4, you’ll need to grab the foot to lift it up and position it, so be cautious not to lose your balance.
- Now, engage your core and lengthen your spine. Bring your hands into a prayer pose at the heart center.
- If your balance feels good, you can extend your arms overhead. For an extra challenge, sway side to side like a tree in the wind.
Warrior III

Warrior III is another of the most popular standing yoga poses that work on balance and building strength in the standing leg. You can try four different arm variations, ranging from easy to hard.
- Hands-on the hips
- Arms by the side, palms facing in
- Aeroplane arms out to the side (in line with the shoulders)
- Arms reaching forward in full extension (in line with the ears)
You can work through each variation, finding the one that challenges you but doesn’t compromise your balance.
- From the mountain pose, shift your weight into your left leg, pressing the foot firmly into the ground.
- Starting with the hands on the hips, slowly lift your right leg and extend it straight behind you while lowering your upper body.
- Aim to bring your lifted leg and body into one straight line, creating the shape of a letter “T” with your body. Keep your hips squared on the floor.
- If your balance is good, release your arms to the side or forward. Keep activating the back leg muscles to keep it lifted.
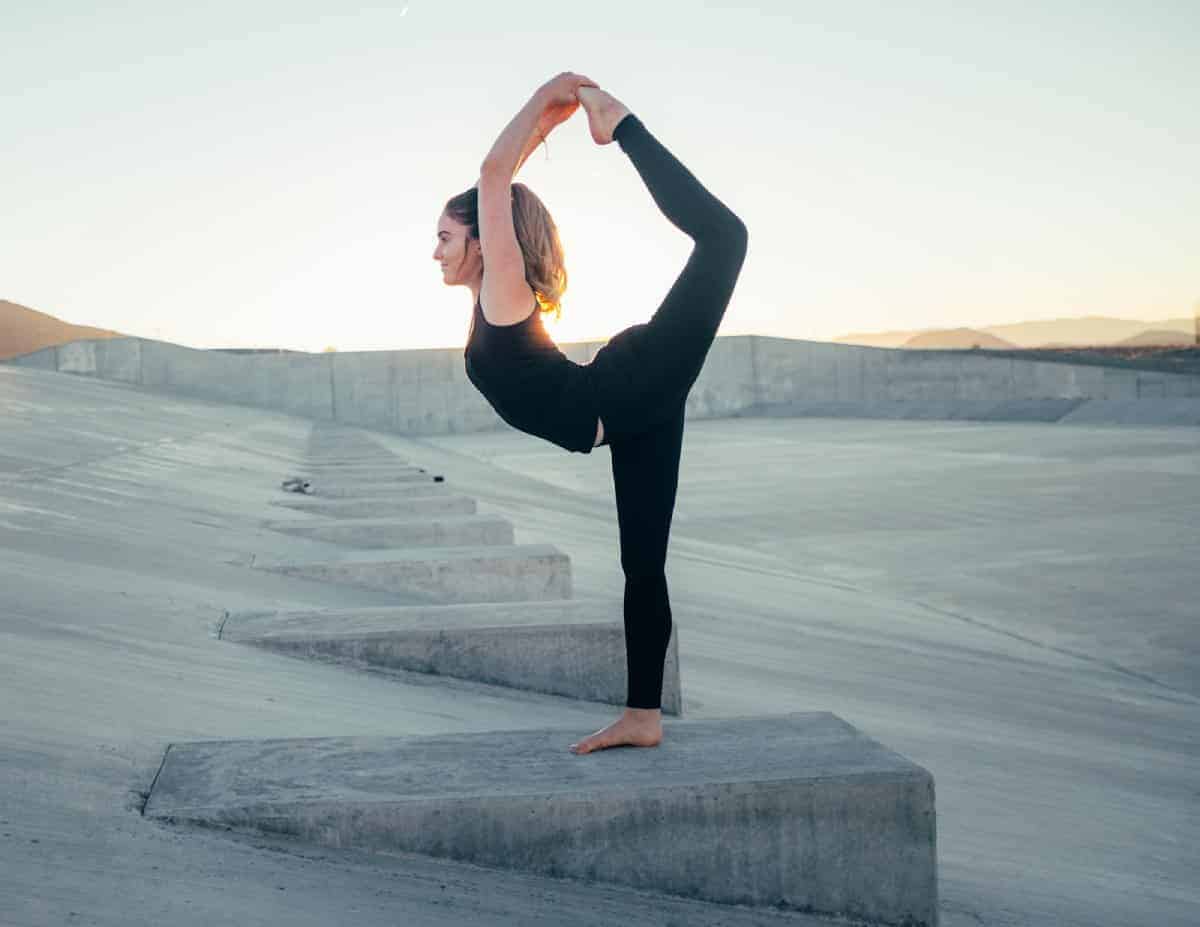
Dancer Pose

The dancer’s pose is one of the most beautiful-looking standing yoga poses and has many benefits. It opens the hips and shoulders, stretches the quads, and improves balance and focus.
- From a mountain pose, press your weight equally into all four corners of your left foot.
- Bend your right knee and grab the inside of the foot with your right hand.
- Extend your left arm, bringing the thumb and index finger into Gyan mudra.
- Slowly kick your right foot into your hand while you lean forward, arching your spine.
- Keep kicking into the hand until you feel a deep quad stretch. Press your chest forward and up.
Eagle Pose

Eagle is one of the trickiest standing yoga poses, which involves maintaining balance while the arms and legs are bound. It also stretches the outer hips, glutes, shoulders, and upper back.
- From a mountain pose, lift your left leg and cross it over the right as you bend that knee. Try to bring the left foot behind the right calf to create a bind. If not possible, cross the thighs and relax the foot.
- Sink your hips like you are coming into a chair pose.
- Next, reach both arms forward and bring the right arm under the left. Bend both elbows and touch the right palm to the left.
- While holding the bind in the arms, lift the elbows slightly and bring the hands away from your face, so you feel a stretch in the shoulders and upper back.
Half-Moon Pose

This fun balancing asana is often practiced as part of a standing sequence, usually after the triangle or extended side angle pose. Here’s how to do it.
- Start from an extended side angle with the right knee bent. Bring your right hand to the ground or a yoga block about one foot ahead of the right foot. Bend deeper into that front leg as needed.
- With your left hand on your left hip, slowly float your back leg off the ground, keeping it straight.
- Keep the hips facing out and bring the leg parallel to the ground with the foot flexed to maintain muscle engagement.
- Draw your top shoulder back to open the chest. If you feel stable, reach your arm up to the ceiling and look up.
A more challenging variation of Half Moon is the sugarcane pose. Once you are in position, bend the lifted leg and grab the foot with your top hand. You then kick the foot into the hand, like in the dancer pose, adding a deep quad stretch.
Standing Figure 4 Pose

This standing balance features an excellent hip opening while strengthening the quads, ankles, and feet.
- From a mountain pose, bend and lift your left knee to grab the foot. Turn the knee out to the side and place the left ankle on the front of your right thigh. Flex the foot to hold it in place.
- Slowly bend your standing leg like you are coming into a chair pose, placing your right hand on your left foot and your left hand on the left knee.
- Stay here, bring the hands into a prayer position, or fold forward.
- If folding forward, straighten the standing leg first, then tilt from the hips and release the hands to the floor or a block. To come out, rebend the knee before rising.
Extended Hand To Big Toe Pose

This intermediate standing balance requires open hamstrings and a high level of focus and balance. However, if you have tight hamstrings, you can keep the knee bent or use a yoga strap, as detailed below.
- From a mountain pose, bend your right knee, hugging it into your chest. For beginners and those who lack balance or flexibility, it might be enough to stay here with the hands clasped around the shin. Hugging the thigh to the chest stretches the hamstring while strengthening the muscles in the standing leg.
- If you want to go further, grab the big toe and extend the right leg as much as possible.
- If you cannot fully extend the leg or this throws you off balance, place a yoga strap around the sole, holding it with both hands. Walk your hands up the strap until the leg is extended, the spine is straight, and the shoulders are relaxed.
- Hold your right leg in front of you for five breaths, then, if you like, open it to the right side for a hip stretch.
Bird Of Paradise

Bird of Paradise is one of my favorite standing yoga poses, but it requires open hips and shoulders, so do some preparatory poses like tree, dancer’s, and figure 4 before trying this one. As it is a challenging pose, you can use a strap to get into the correct position.
- For this asana, start from a side-angle pose with the left knee bent. Lower your side body to the left thigh and place the left hand on the floor next to the foot.
- From here, wrap your right arm around your back, then thread your left arm under the left thigh to clasp your hands. If you cannot do this, use a strap.
- Once you are clasping the hands of a strap, shift your weight into the front foot and step your back foot slightly forward.
- Now work on pulling the top shoulder back to open the chest.
- Next, step your back foot in, placing it next to the front foot. Shift your weight into the right leg as you lift your left foot off the floor, keeping the knee bent.
- Straighten your spine to rise to stand, then slowly extend the left leg with the toes pointing up.
- Draw your shoulders back to open the chest and hold for 5 breaths in this elegant pose. Release the same way you entered.
Standing Splits

The standing split is a hip-opener and a balancing standing asana combined with a deep forward fold.
- Start from Uttanasana (standing forward fold) with the feet hip distance apart. Place your hands on a block if they do not reach the ground.
- Shift your weight into your left leg and slowly lift your right leg behind you as high as possible. Keep the right leg straight and the hips square, facing down.
- Slowly walk your hands closer to your left foot as you bring your torso closer to the thigh.
- Bring one hand to the left calf to test your balance and go deeper into the forward fold.
- If your balance feels good, try to bring both hands to the calf so that you are balancing on one leg completely.
Revolved Triangle Pose

Although this is not a standing-on-one-leg yoga pose, I wanted to include the revolved triangle twist as it requires immense stability and balance to hold the posture. It also involves a deep twist in the spine, working the abdominal muscles, and relieving tension in the back.
- From the mountain pose, step your left foot back, turning the toes out slightly while keeping the hips square to the front of the mat.
- With both legs straight, lower your upper body over the front leg and bring your left hand to the floor or a block.
- With your right hand on your hip, draw the right shoulder back to open the chest and twist the spine to the side. Take an inhale and then twist again, going deeper.
- Press into the left foot to engage the muscles in the back leg, and then reach the right arm up to the ceiling, following with your gaze.
If this posture feels easy, challenge yourself further by moving into a revolved half-moon. Move the left hand one foot forward, then float the back leg up, keeping the twist in the spine.
Tips For Improving Your Balance
Find your “Dristhi”

One part of the alignment of all yoga poses is the “Dristhi,” which means a focal point. While holding a posture, you fix your gaze on one point, which may be looking up, directly in front of you, or at a particular body part.
The idea of Dristhi is to increase your focus, concentration, and meditative awareness.
While Dristhi is used in all yoga poses, it is vital in one-legged standing yoga poses to find balance and maintain it. In most balanced asanas, your Dristhi will be directly in front of you; it is key to focus on a point that is not moving.
Also, note that your gaze should be soft to not strain the eyes. Avoid moving your eyes or looking at your body to check your alignment, as this will compromise your balance. And if you want to test your balance further, try closing your eyes. It is much more difficult than you would think!
Focus on your breath
Along with focusing on your Dristhi, maintain awareness of your breath, breathing a slow, rhythmic pattern.
Have you ever noticed how you suddenly become unstable whenever your mind wanders in a balance pose?
Like our gaze, our breath serves as a point of focus, as well as keeping our body relaxed and preventing over-engagement of the muscles. So by focusing on your breath, you’ll stay present and focused on the balance.
Use props

Yoga blocks are helpful in several of the one-leg yoga postures listed above. For example, in Warrior III, you can place blocks on either side of your foot (on the highest level). Keep your hands on the blocks for support as you work on lifting the back leg and creating that “T” shape.
Another balancing asana where a block is usual is in the half-moon pose. Many yogis place their bottom hand on a yoga block rather than the floor, as the latter compromises their balance.
I like to use the Inner Flow Yoga Block by lululemon as it has a unique smooth edge design. This takes the pressure off your palm when using it to hold your weight in balance poses. Plus, as there is a smooth edge on two sides, it gives the perfect comfort and stability at multiple heights.
Another prop that will help you when balancing on one leg is a strap. It can assist where you lack flexibility or help you work towards more advanced variations.
For example, you can do a deeper variation of the dancer’s pose with a yoga strap.
Place the strap around the outside of the lifted leg, then reach your other arm behind your back so that both hands hold the strap. Then, rotate your shoulders to bring your arms overhead with your elbows bent. You’ll get a deeper shoulder stretch and backbend as you kick the foot back.
The No Limits Stretching Strap by lululemon is ideal as it is sturdy, easy to adjust, and comfortable to hold.
Final Thoughts On One-Leg Yoga Poses
Balancing on one foot is challenging for the body and the mind, but the more we practice, the better we become. And remember, the benefits of improving our balance extend well beyond yoga. Each time we practice yoga poses to strengthen our physical steadiness, we reflect on the importance of equilibrium in life and uncover how to find more of it!