
Listen to this article:
Key Takeaway
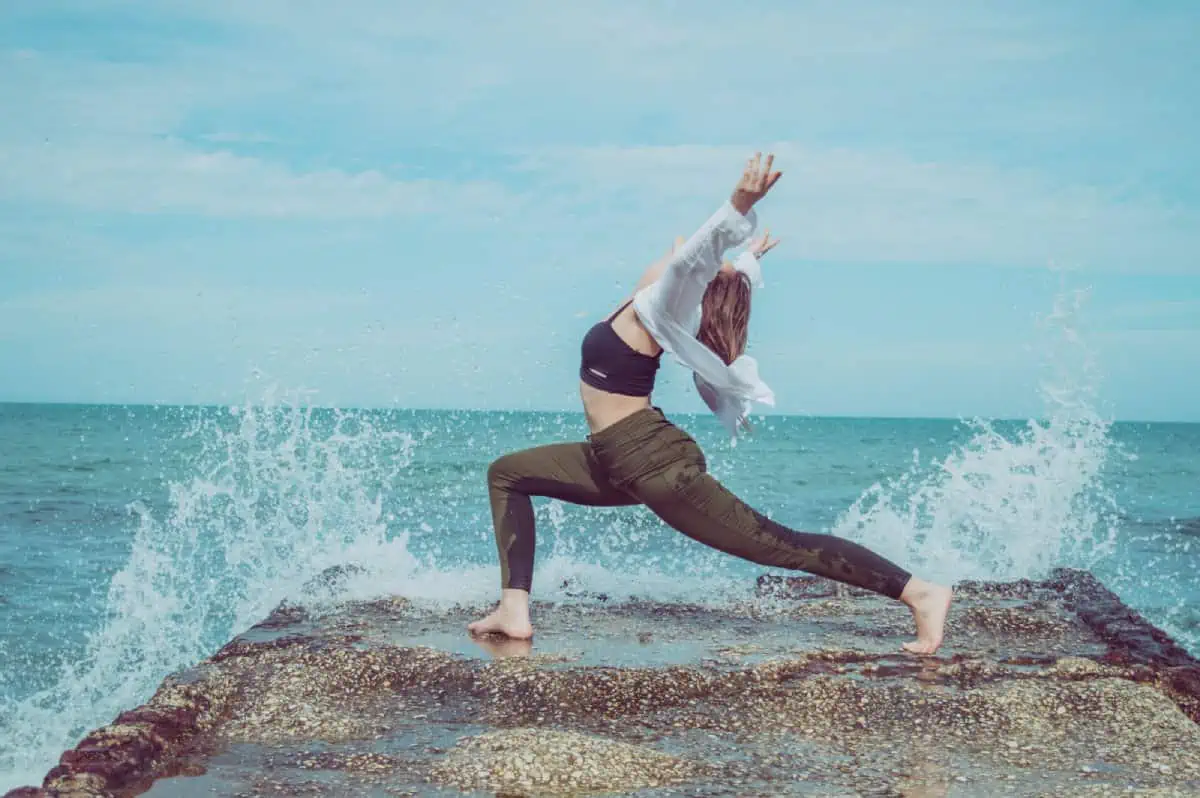
Vinyasa Flow is a dynamic and creative form of yoga that emphasizes smooth transitions between poses, offering a meditative experience that enhances flexibility and strength.
Have you recently been to a vinyasa yoga class where you felt like you were in heaven for an hour?
That’s how I felt when I first discovered Vinyasa flow! This dynamic, flowing practice improves your body awareness, flexibility, and strength, along with providing a blissful “work-in” for your mind.
But what is it that makes vinyasa yoga so unique? And how can you recreate its magic yourself at home?
As an experienced vinyasa flow teacher and practitioner, I’m revealing how a vinyasa class is sequenced and the most common vinyasa yoga poses you will encounter. With this insider knowledge, you can experience vinyasa yoga therapy at home whenever you want!
Contents
What Is the Difference Between Hatha and Vinyasa Yoga?
Vinyasa yoga is best described as a modernized version of traditional Hatha yoga. Vinyasa is a flowing, dynamic practice where you often stay in one pose for one breath rather than five or more breaths.
Aside from having a quicker pace, Vinyasa flow focuses more on the transition between the postures than the asanas themselves. Moreover, vinyasa yoga poses are creatively linked together, making the flows almost “dance-like.” Many Vinyasa students adore this style, as it feels like a moving meditation and has many benefits for the body and mind.
As Vinyasa originates from Hatha yoga, you’ll find many of the same asanas. However, because vinyasa teachers have freedom for creativity, many like to incorporate different things, such as pilates moves or poses from newer yoga styles.
How Is a Vinyasa Flow Sequence Structured?

While Vinyasa yoga doesn’t follow a set sequence, every Vinyasa class follows the same basic sequencing structure.
- Warm-up
- Sun Salutations
- Standing Sequences
- Peak Posture
- Seated Poses
- Reclined/cool-down poses
In the following sections, we’ll explore each part of a vinyasa yoga sequence.
Warm Up Poses

While many yoga styles, like Ashtanga or Bikram, start standing, Vinyasa yoga typically begins seated. Still, this style has total freedom, so you can start standing, reclined, or prone.
However, you must begin your practice with gentle stretches and movements to warm up the muscles and open the joints. Typical poses you will find at the start of a vinyasa practice are:
- Neck stretches
- Gentle Twist
- Child’s Pose
- Cat/cow
- Gate Pose
- Thread The Needle
- Downward dog
If you are doing a one-hour practice, this section will typically last about 5 minutes.
Sun Salutations

After a few warm-up poses, you come to standing to begin the sun salutations. In vinyasa yoga, you can practice Surya Namaskar A, B, or the Hatha variation, or combine a few rounds of each.
3 to 5 rounds of any variation are usually sufficient. For example, I like to do 3 of Surya Namaskar A, then 2 of Surya Namaskar B.
Surya Namaskar A features the following postures:
- Mountain Pose (Tadasana): Feet together, thighs and core engaged, and spine lengthened.
- Upward Hands (Urdhva Hastasana) – Inhale to sweep your arms overhead.
- Standing Forward Fold (Uttanasana): Exhale to fold forward from the hips.
- Halfway Lift (Ardha Uttanasana) – Inhale to straighten your spine and lift halfway, bringing your fingers to the shins.
- Four-Limbed Staff Pose (Chaturanga Dandasana) – Exhale to step or jump back to plank and lower your body halfway to the floor.
- Upward Facing Dog (Urdhva Mukha Svanasana) – Inhale to straighten your arms and arch the spine, with the hips and knees hovering off the ground.
- Downward Dog (Adho Mukha Svanasana) – Exhale to press your hips up and back.
- Halfway Lift (Ardha Uttanasana): Inhale to step or jump forward.
- Standing Forward Fold (Uttanasana) – Exhale to fold.
- Upward Hands (Urdhva Hastasana) – Inhale to rise.
- Mountain Pose (Tadasana) – Exhale to release the hands by the sides.
Surya Namaskar B is an extended version of the above with a couple of additional postures; warrior 1 and chair pose.
Also note that, as vinyasa yoga teachers, they do not have to teach the sun salutations the traditional way; they may instruct a modified variation. For example, you can add “knee to nose pose” to build core strength, swap upward dog for cobra pose, or practice high lunge instead of warrior 1.
Standing Sequence

After a few sun salutations, your body will be warm enough to move into the standing poses. As mentioned, in vinyasa yoga, standing asanas are linked to form a dance-like flow.
Depending on the yoga teacher, you might hold each pose for 5 breaths before moving to the next one, or you may follow the same “breath to movement” style as in the sun salutations.
I repeat the standing sequence at least two times when I teach vinyasa yoga. The first time, I had the students hold each posture for 5 breaths to find the correct alignment and notice how it felt in their bodies. The second time, we do it at a faster pace. After that, I may repeat it a third time, adding new, more advanced poses.
Another thing to note is that while standing postures are typically practiced from the mountain pose in Hatha and Ashtanga yoga, you tend to enter them from a downward dog in Vinyasa flow.
Here is an example of a short sequence that links together several standing poses.
- Three-Legged Dog – From a downward-facing dog, inhale to reach your right leg up. Exhale to step it in between your hands.
- Low Lunge – Drop your back knee to the mat. Inhale to reach your arms up alongside your ears and sink your hips. Exhale to bring your hands to the mat, framing your front foot.
- Twisted Lunge – On your next inhale, sweep your right arm up, draw your right shoulder back, and open your chest to the side. Twist your spine and look up at your top hand. Exhale to release the hand back to the mat and release the twist.
- Warrior 2 – Lift your back knee, turn your toes out to the side, and plant the sole firmly on the ground. Inhale to lift your upper body as you open your hips to the side and reach your arms to shoulder height. Exhale to bend the front knee over the ankle and sink the hips.
- Reverse Warrior – Flip your right palm, and as you inhale, sweep that arm up and over, reaching the hand behind you. Walk your left hand down your left thigh, leaning towards it to create a stretch in the right side body. Look up to your top arm and keep the front knee bent.
- Extended Side Angle Pose – Keeping the legs in the same position, sweep your right arm back down, placing the hand on a block or the ground to the inside of the right foot. Extend your left arm up and over towards the front of the mat, roll your left shoulder back, and look up.
- Triangle pose – Inhale to straighten your front leg and reach your left arm directly up, creating one straight line with both arms. Your chest and hips should be open to the sides.
- Vinyasa* – See below
*In vinyasa yoga, it is standard to “take a vinyasa” between sides or sequences. For example, once you finish the final posture of a flow, such as a triangle pose, you’ll bring your hands to the mat, step back to the plank pose, come into an upward-facing dog, and then press back into the downward dog.
Traditionally, you should take Chaturanga to transition from plank pose to upward dog. Still, as this is quite a strenuous pose, beginners are encouraged to drop their knees and lower their bodies.
A downward-facing dog is the home base where you return after every flow and a resting posture where you reconnect to your breath.
Peak Posture

In Vinyasa yoga, the standing sequences typically lead to a more advanced asana, the peak pose. The peak pose requires a deep opening of a particular body part, such as the spine or hips.
Some common examples of peak poses are the dancer’s pose, half-moon pose, crow pose, wheel pose, or headstand. The specific peak posture will determine where it is placed in the sequence. Some peak postures (like dancers and half moon) are incorporated towards the end of the last standing sequence.
However, peak poses like a headstand or wheel will come later in the sequence and will be included in the seated poses section, which we will discuss next.
Seated Poses

Seated poses include hip openers, back bends, forward folds, and twists. If the peak pose comes in the standing sequence, the seated poses will focus on cooling down the muscles just used.
For example, if the dancer’s pose (a deep spine and shoulder opener) was the peak pose, you would want to include many forward folds and shoulder stretches in the seated sequence.
However, if the peak posture is yet to come, the beginning of the seated sequence will focus on preparing the body for that pose, with a few asanas reserved to cool down the body afterward.
Here are some common seated poses you will find in a vinyasa class. I’ve sequenced them in the order I would teach them in a class, so you can try them as a flow:
- Locust pose
- Bow Pose
- Child’s Pose
- Boat Pose
- Cow Face Pose
- Lizard Pose
- Pigeon Pose
- Seated Spinal Twist
- Seated Forward Fold
As you can see, the seated sequence can also include prone or kneeling poses.
Reclined Postures

For the final part of a vinyasa flow practice, you should do a few reclined postures to calm the mind and relax the body.
It is common to start the reclined sequence with a gentle backbend, like the bridge pose, followed by a calming inversion, like the shoulder stand or legs up the wall. Supine twist and happy baby are often the last postures before the final resting pose.
Here is what a typical supine/cool-down vinyasa sequence will look like:
- Bridge pose
- Shoulderstand
- Plow Pose
- Fish Pose
- Supine twist
- Happy Baby
- Savasana
Tips For Creating An At-Home Vinyasa Practice
Vinyasa flow sequencing is complex, and while this article serves as a good foundation, it only covers the basics. Here are a couple of tips for how you can improve and deepen your vinyasa flow practice at home.
Listen To Your Body

A common misconception that many beginner vinyasa yoga practitioners have is that vinyasa yoga must be fast. However, this is not true. While specific flows, like sun salutations, involve one movement to one breath, the rest of the practice can be slower.
For example, slow-flow vinyasa classes are now popular. These classes involve longer holds and more breaks between the flows. If you are practicing at home, check in with how you feel before starting your practice.
Your current energy level should determine the pace of your practice. By listening to your body this way, you meet its needs and nourish it rather than push it to its limits and cause fatigue.
Study Vinyasa Sequencing Further

The more you understand the sequencing structure of vinyasa yoga, the more effective and beneficial your practice will be.
Online resources, such as videos and short courses, will help you better understand why and when to practice certain vinyasa yoga poses.
There are also several excellent books on the subject, though the best is Yoga Sequencing by Mark Stephens. It breaks down all the components of a Vinyasa flow sequence and uses many images and diagrams, making it easy to understand. I read this book to prepare for your yoga teacher training, but it is just as suitable for beginners as advanced practitioners.
Final Thoughts On Vinyasa Yoga Poses
While it’s great to do a few yoga poses every day, the key to experiencing a wonderful and effective practice as you do in class is knowing how to properly sequence vinyasa yoga poses.
So, with your new-found knowledge, why not try some of the vinyasa flow sequences in this article?