Listen to this article:
Key Takeaway
Ashtanga yoga poses offer a structured path to strength, flexibility, and focus through a series of dynamic sequences.
Are you interested in trying Ashtanga yoga but worry this style will be too difficult?
There’s no denying that Ashtanga is a challenging practice, with many advanced poses requiring high flexibility. However, this doesn’t mean you must be super bendy to become an “Ashtangi.”
The practice is designed to help you progress steadily as you repeatably practice the same asanas. With every class, you’ll become stronger and more flexible, while improving your focus, discipline, and balance.
So why not give it a go? Read on for a full list of the Ashtanga yoga poses found in the first series and my tried-and-tested tips for learning the sequence.
Contents
What Is Ashtanga Vinyasa Yoga and Why Should You Do It?
Ashtanga yoga was developed by K. Pattabhi Jois in 1932. It is based on the traditional eightfold path (eight limbs of yoga), detailed in Patanjali’s sacred scriptures, the “Yoga Sutras.”
The Ashtanga Yoga Research Institute of Mysore was founded in 1948, and since then, this yoga style has become increasingly popular.
One reason for its popularity is its disciplined style. Traditionally, you are supposed to practice yoga six days a week, following a set sequence. Thus, in every Ashtanga class, you will do the same poses in the same pattern.
Ashtanga yoga is a physically demanding and challenging practice, excellent for building strength and flexibility. While holding each pose for 5 breaths, you practice the Ujjayi pranayama, which helps to build internal heat and prevent fatigue.
Thus, this style of yoga will make you feel strong and energized while improving your body awareness and breath control.
Ashtanga Yoga Primary Series
In traditional Ashtanga yoga practice, there are four different set sequences. However, everyone starts on the primary series and continues practicing it until they have mastered every pose—literally! Only then can an “Ashtangi” continue to the intermediate series.
In the primary series, there are around 50 asanas (excluding the sun salutation sequence performed at the beginning of the class). However, some poses, such as Marichyasana, have multiple variations.
Here is a complete list of asanas in the primary series of Ashtanga yoga, shown in the order they are meant to be practiced.
Warm-up sequence
An Ashtanga class begins in Tadasana, the standing position. Then, depending on the yoga teacher, you might first chant the opening mantra or bring your hands to the prayer position for an Om.
You will then perform five rounds of Surya Namaskar A and B. These dynamic sequences help to warm up all the muscles in the body and calm the mind. As you link each breath to each movement, you become centered and focused for the rest of the practice.
Surya Namaskar A
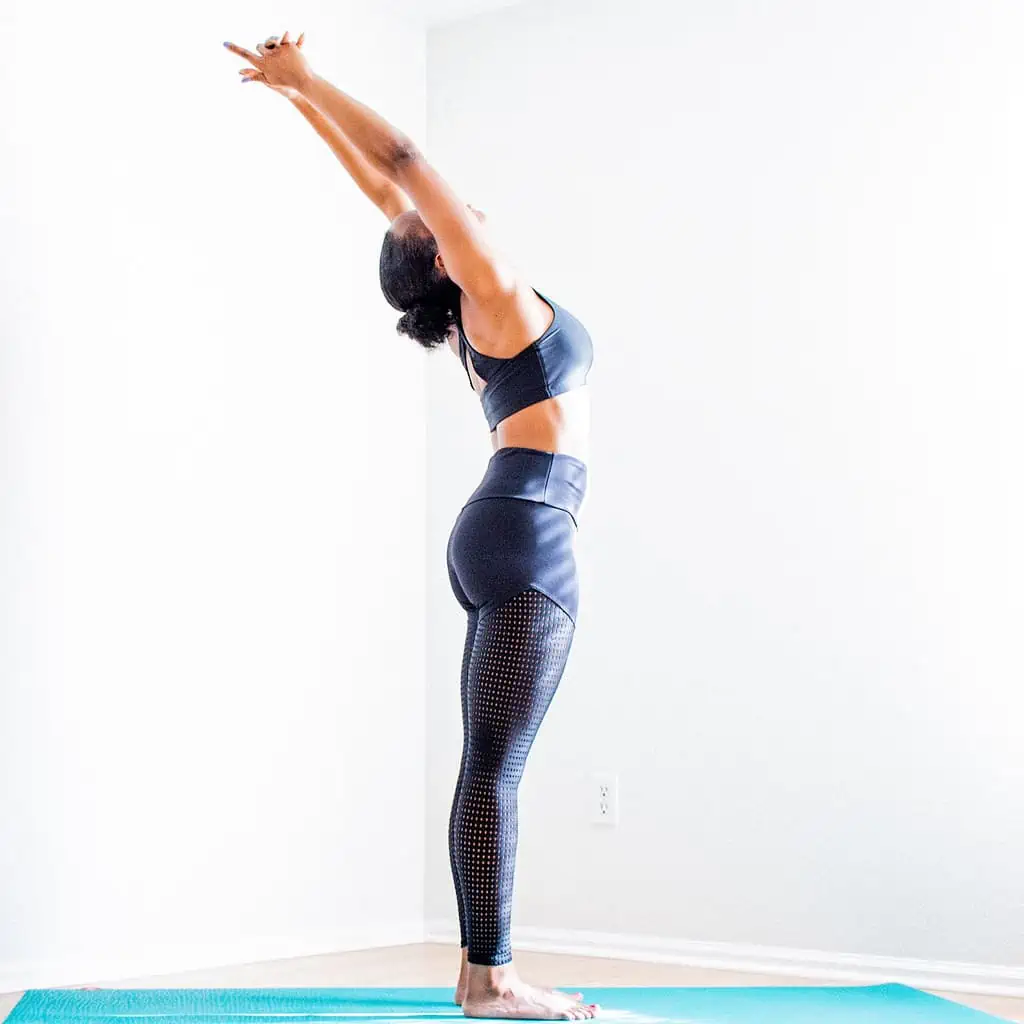
- Sun salutation A begins by standing tall in Tadasana.
- Inhale to reach your arms overhead with your upward hands.
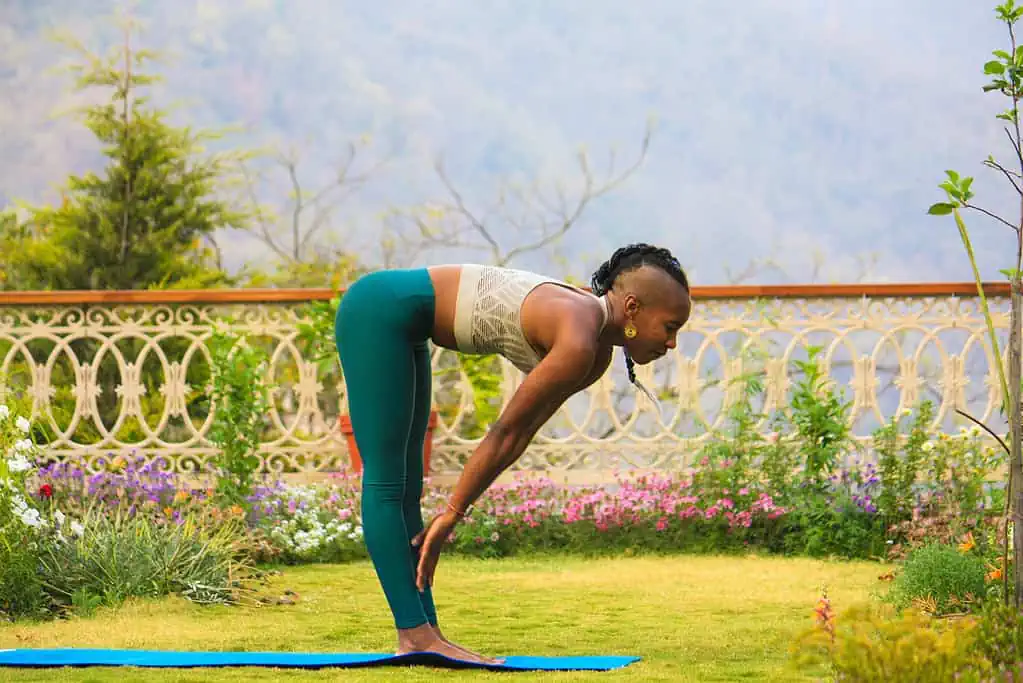
- Exhale to fold forward into Uttanasana.
- Inhale to the halfway lift. Straighten the legs and look forward with the fingers on the ground or shins.
- Exhale to bend the knees and step or jump back to the four-limbed staff pose (Chaturanga).
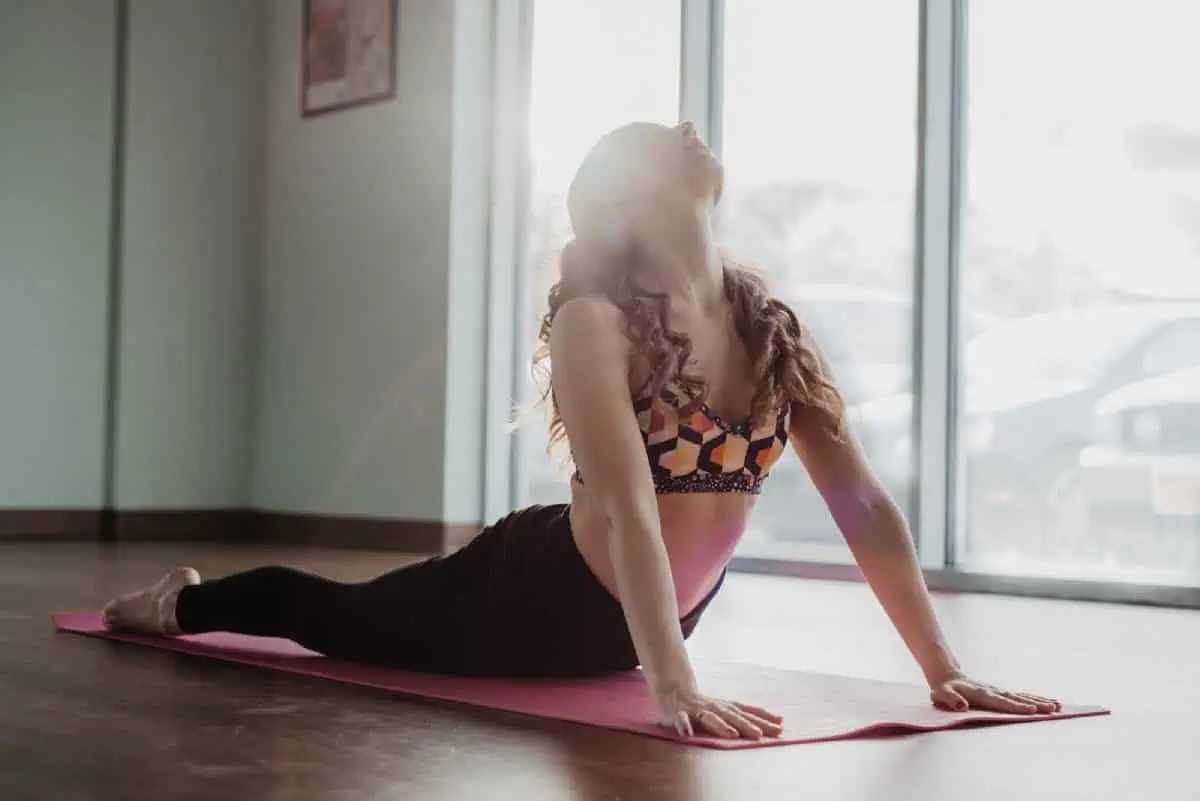
- Inhale to an upward-facing dog, straightening the arms, arching the back, and pressing the chest forward.
- Exhale to push the hips back and up into a downward-facing dog. Arms and legs are straight, and the chest is pressing towards the thighs.
- Hold here for 5 breaths, then on your inhale, step or jump forward to the halfway lift.
- Exhale to Uttanasana.
- Inhale with upward hands.
- Exhale to tadasana to complete the first round, then repeat four more times.
Surya Namaskar B
Sun salutation B is similar to variation A but with some additional postures.
- Sun salutation B is similar to variation A but with some additional postures.
- From Tadasana, inhale to Chair Pose, bending your knees and sinking your hips while reaching your arms alongside your ears
- Exhale to fold forward into Uttanasana.
- Inhale to the halfway lift.
- Exhale to step or jump back to the four-limbed staff pose (Chaturanga).
- Inhale into an upward-facing dog.
- Exhale to a downward-facing dog.
- Inhale to step your right foot between the hands and rise to Warrior 1. Bend the front knee, keep your hips forward, and reach your arms up to the ceiling.
- Exhale to release the hands to the mat and step back to the plank for Chaturanga.
- Inhale into an upward-facing dog.
- Exhale to a downward-facing dog.
- Inhale to step your left foot between the hands for Warrior 1 on this side.
- Exhale to Chaturanga.
- Inhale into an upward-facing dog.
- Exhale to a downward-facing dog. Hold here for 5 breaths.
- Inhale to the halfway lift.
- Exhale to Uttanasana.
- Inhale into the chair pose.
- Exhale to tadasana to complete the first round, then repeat four more times.
Ashtanga Standing Series
After the sun salutations, you move to the standing series of Ashtanga Yoga. Note that some of the more challenging standing yoga poses may be omitted if doing a beginner-level or open-class style.
All standing poses are typically held for five breaths.
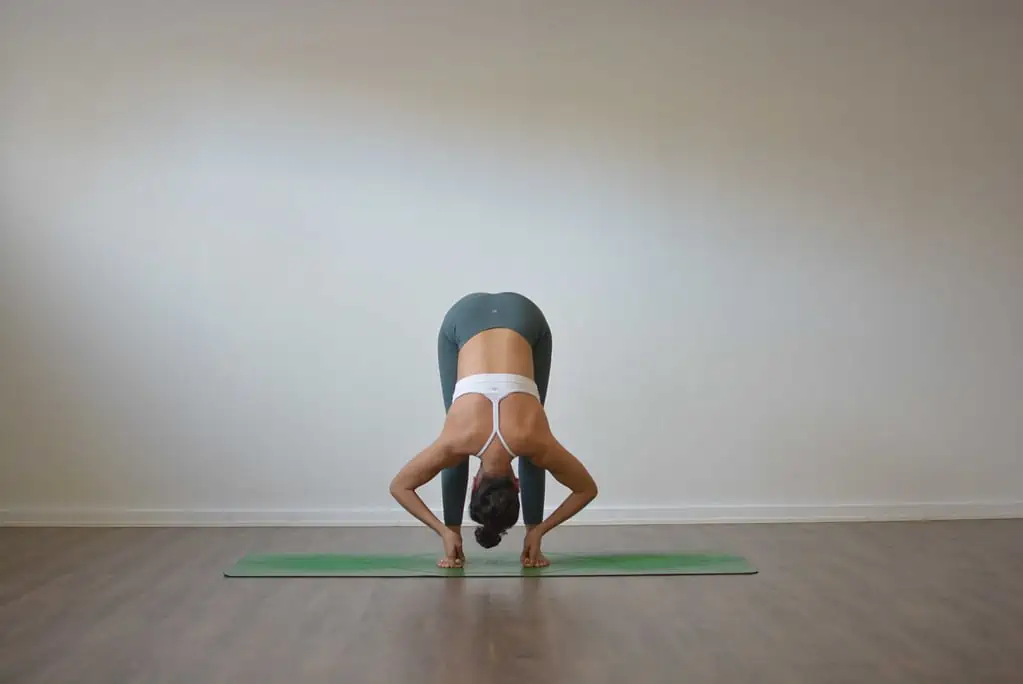
Padangusthasana – The standing sequence begins with two forward folds; the first is the hand-to-big-toe forward fold. Grab your big toes with your peace fingers and gently pull your torso towards your thighs.
Pada Hastasana – Place your hands under your feet for deeper spinal flexion in this forward fold variation.
Trikonasana – This is the classic extended triangle pose, which gives an intense stretch to the side body. Aim to bring your hand to the ground or a yoga block as you reach the opposite arm to the ceiling and open your chest.
Parivrtta Trikonasana – The revolved triangle pose gives a deep stretch to the spine, opens the heart, and improves balance.
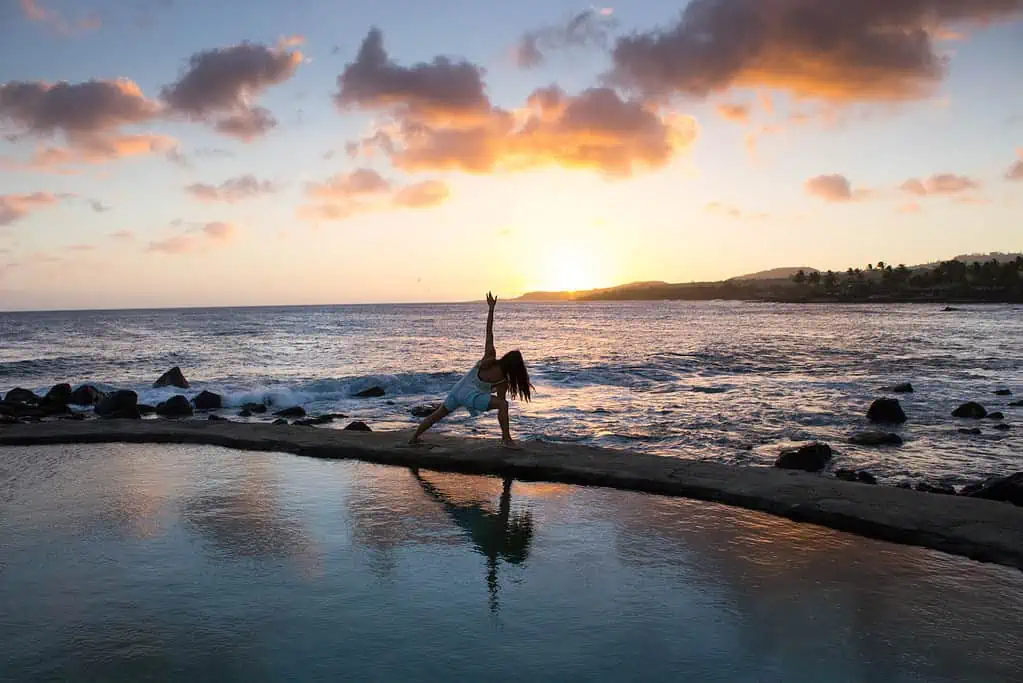
Utthita Parsvakonasana – The extended side angle gives a side stretch similar to a triangle pose. However, you bend the front knee for a deeper hip stretch.
Parivrtta Parsvakonasana – The revolved side-angle pose features the same leg positioning as the previous posture, but the upper body twists towards the front knee rather than away from it.
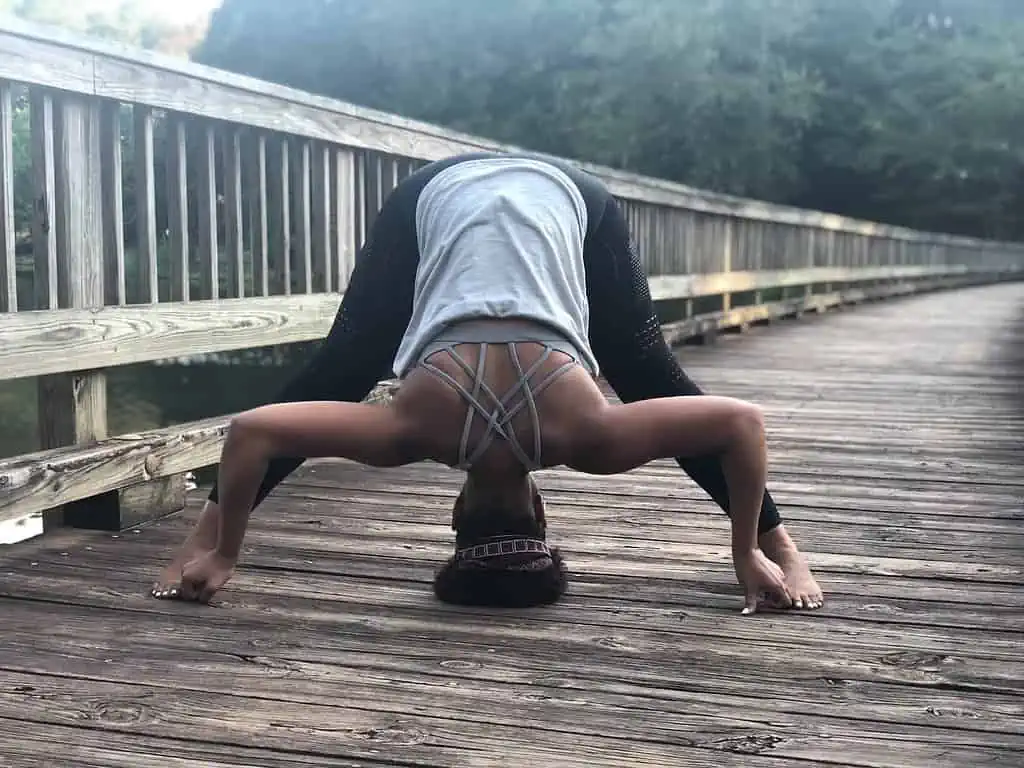
Prasarita Padottanasana A, B, C, and D – In the classic wide-leg forward fold, you fold between the legs. There are four variations of this; the hands on the floor with the elbows bent, hands on the hips, hands clasped behind the back for a shoulder stretch, and peace fingers under the big toes.
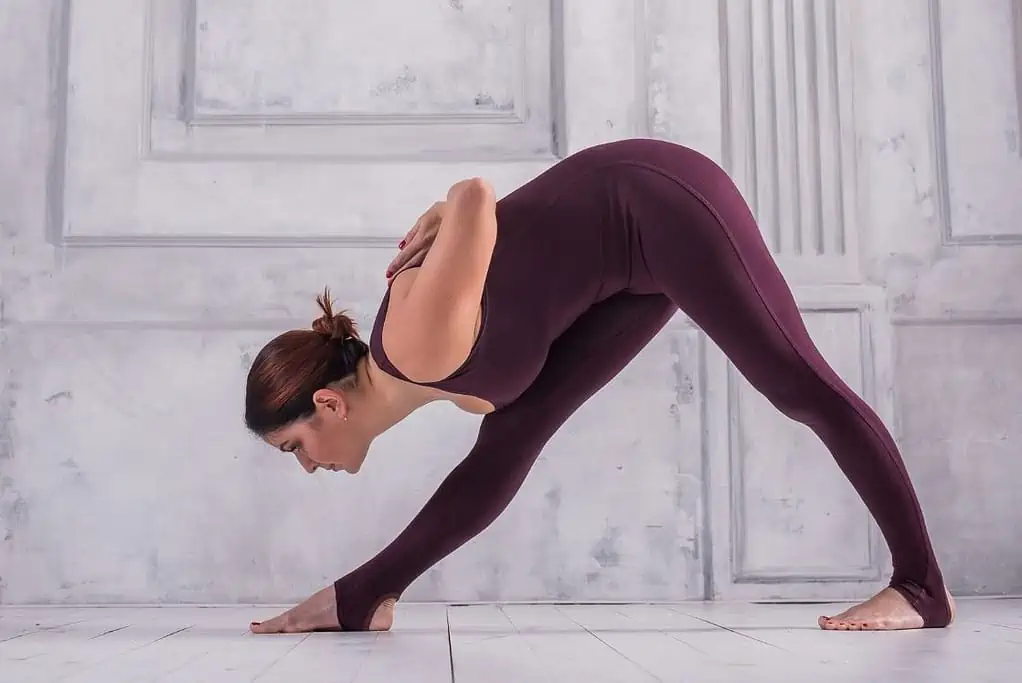
Parsvottanasana – Pyramid pose is a forward bend where you stretch over the front leg, giving a deep hamstring stretch.
Utthita Hasta Padangusthasana A, B, and C – Extended hand to big toe pose combines balance with a deep hamstring stretch. Variation A is holding the foot directly in front of your body with a straight spine. Variation B is opening the leg to the side, and variation C is letting go of the leg (directly in front of you) but keeping it lifted.
Ardha Baddha Padma Uttanasana – In this balance pose, also known as the half-bound lotus intense stretch, you place the heel of one foot in the opposite groin (like in the half lotus). You then fold forward and place one hand on the floor.
Utkatasana – Practice chair pose (as performed in sun salutation b).
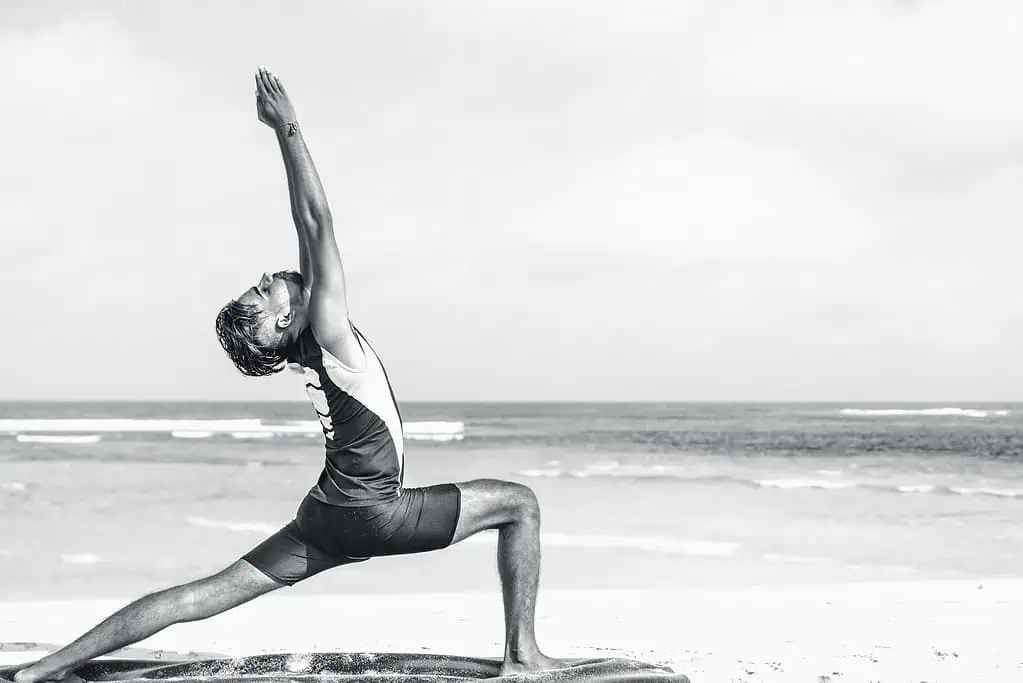
Virabhadrasana I – Move onto the classic Warrior 1 pose, with the front knee bent and the back leg straight. The rear toes should be pointed at a 45-degree angle while the front toes face forward. Ensure the hips are facing forward and reach the arms up overhead.
Virabhadrasana II – From here, open the hips for the Warrior 2 pose, turning the back foot out to 90 degrees. Then, bend deeper in the front knee and bring the arms out to shoulder height.
Seated Poses
Once you complete the standing poses, move to the floor for the seated yoga pose series. Again, each asana is typically held for 5 breaths, and some postures/variations may be omitted for beginners.
Dandasana – Start in staff pose with the legs straight out in front of you and the feet together. Focus on straightening the spine.
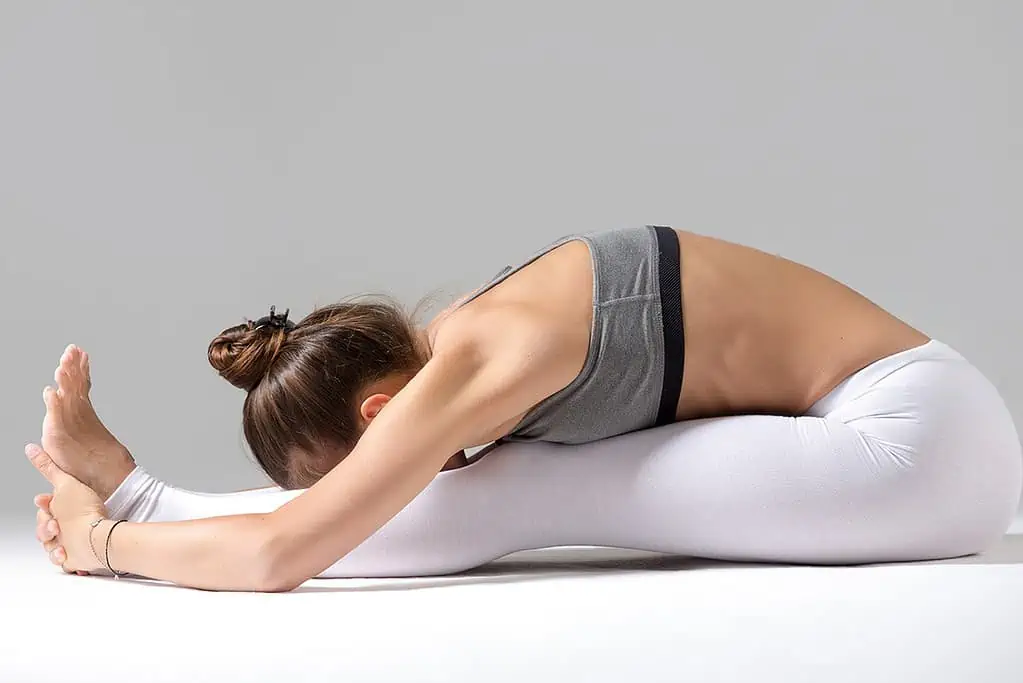
Paschimottanasana – From the staff pose position, fold forward, grabbing the feet or big toes to increase spinal flexion.
Purvottanasana – Open the front body with an upward plank. Ensure your fingertips are facing your feet and hips align with your body.
Ardha Baddha Padma Paschimottanasana – This half-bound lotus forward fold is the seated version of the standing balance. Place the foot of the bent knee close to the opposite groin and reach your arm behind your back to grab the toes before folding forward.
Trianga Mukhaikapada Paschimottanasana – In this forward fold, the knee is bent and folded back, so the foot is to the outside of the sitting bone, with the sole facing up.
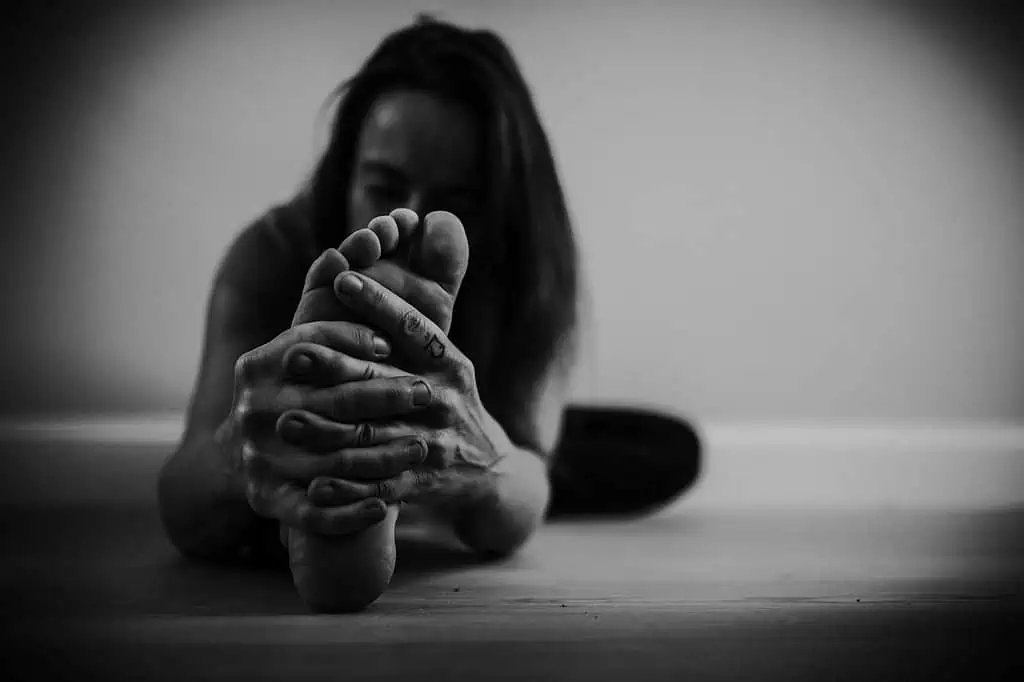
Janu Sirsasana A – In the first variation of the head-to-knee forward bends, place the sole against the inner thigh.
Janu Sirsasana B – Place the foot underneath the thigh in the second variation.
Janu Sirsasana C – In the third variation, press the foot against the thigh with the toes facing down and the heel facing up.
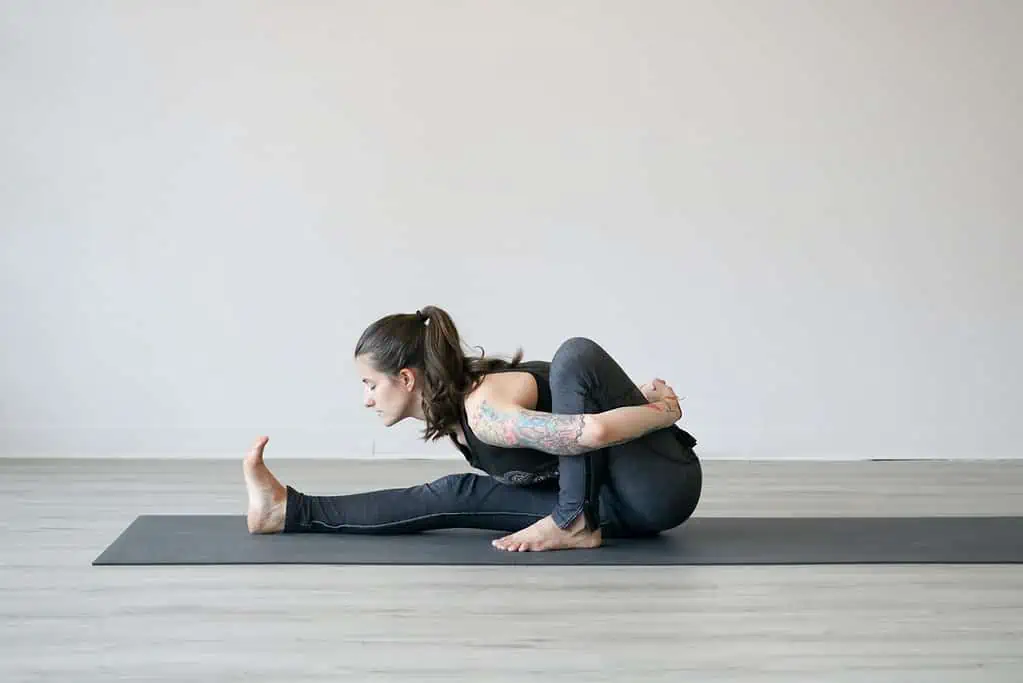
Marichyasana A – In the first variation of Sage Twist Pose, bend one leg, placing the foot as close to the buttocks as possible. With the knee pointing up, wrap your arm around it, reaching to your lower back where you bind with the other hand.
Marichyasana B – The previously straight leg is bent in this variation.
Marichyasana C – In this variation, one leg is straight, and the spine twists towards the bent knee, with the arms bound behind the back.
Marichyasana D – Same as above but with the other leg bent (foot tucked into the thigh).
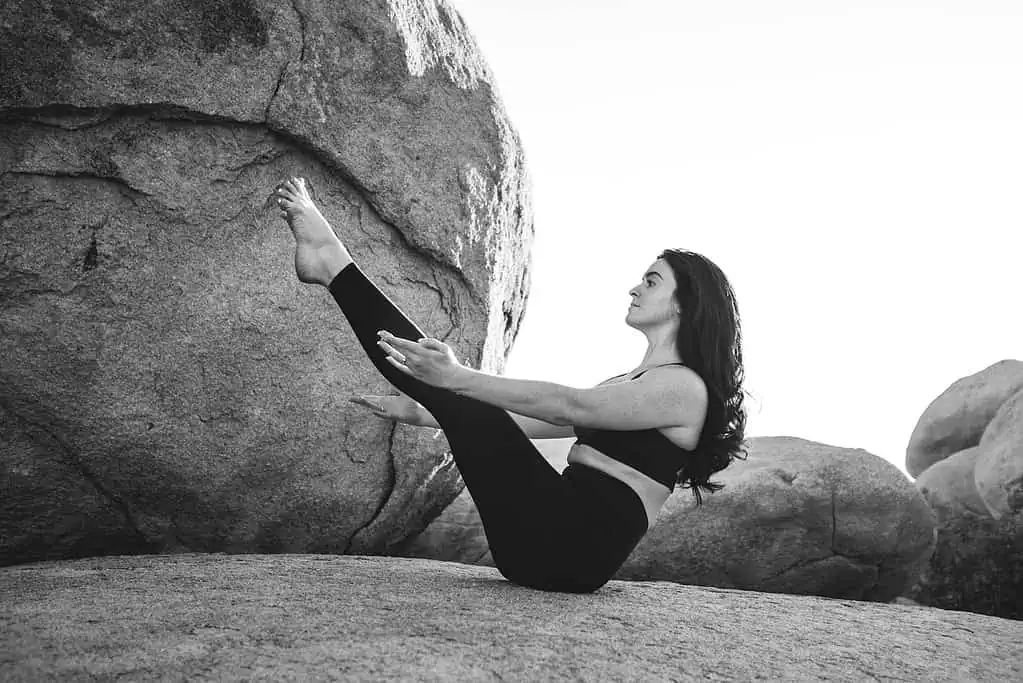
Navasana – Practice 5 rounds of boat pose with the legs straight. Ensure your back doesn’t round and engage your abdominal muscles and thighs.
Bhujapidasana – The arm pressure pose is a challenging arm balance where you lift your hips off the ground with your legs crossed.
Kurmasana – Tortoise is one of the most difficult poses to master in this series. The aim is to fold forward in a wide-leg position with arms and shoulders under the legs.
Supta Kurmasana – An even more intense variation of the Tortoise pose. Bbind your hands behind your back and cross your ankles over your head.
Garbha Pindasana – Also known as the embryo in the womb, this pose involves balancing on your sitting bones while binding the arms and legs.
Kukkutasana – An arm balance with crossed legs bound around the arms.
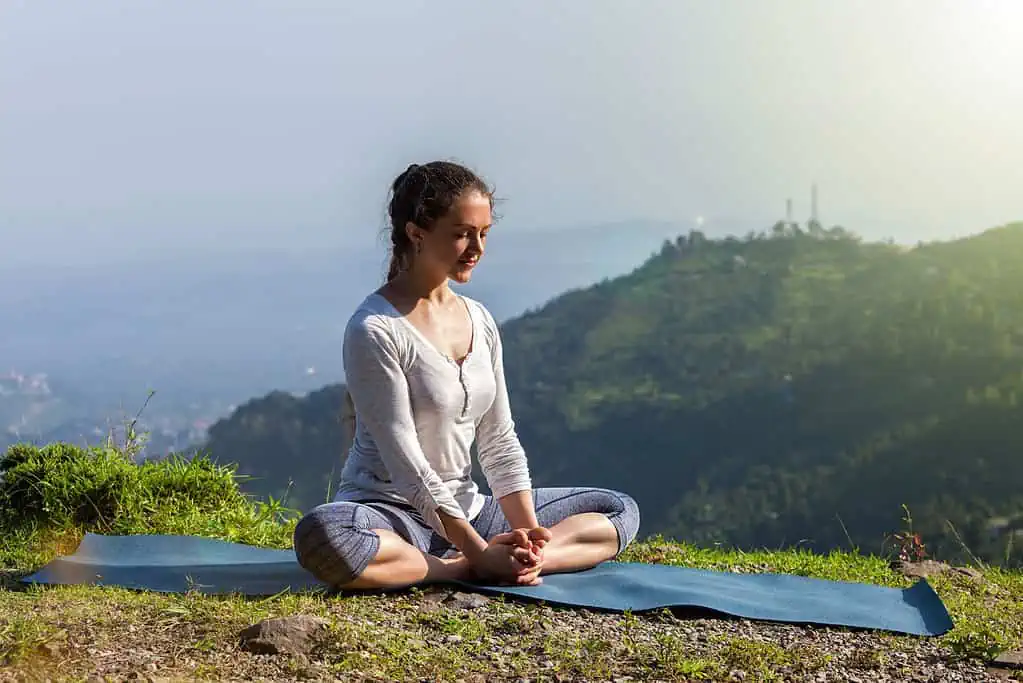
Baddha Konasana – Bound angle is a gentle hip opener to stretch the muscles after the previous postures. The soles of the feet are together, with the knees out to the side.
Upavistha Konasana – Wide angle seated forward fold with the legs wide apart. Grab your big toes or feet as you fold forward.
Supta Konasana – A reclined version of the bound angle pose.
Supta Padangusthasana A – A reclined version of big toe pose variation A. Keep your spine and shoulders on the ground as you extend your leg and hold the big toe.
Supta Padangusthasana B – From the previous position, open the leg to the side for a hip stretch.
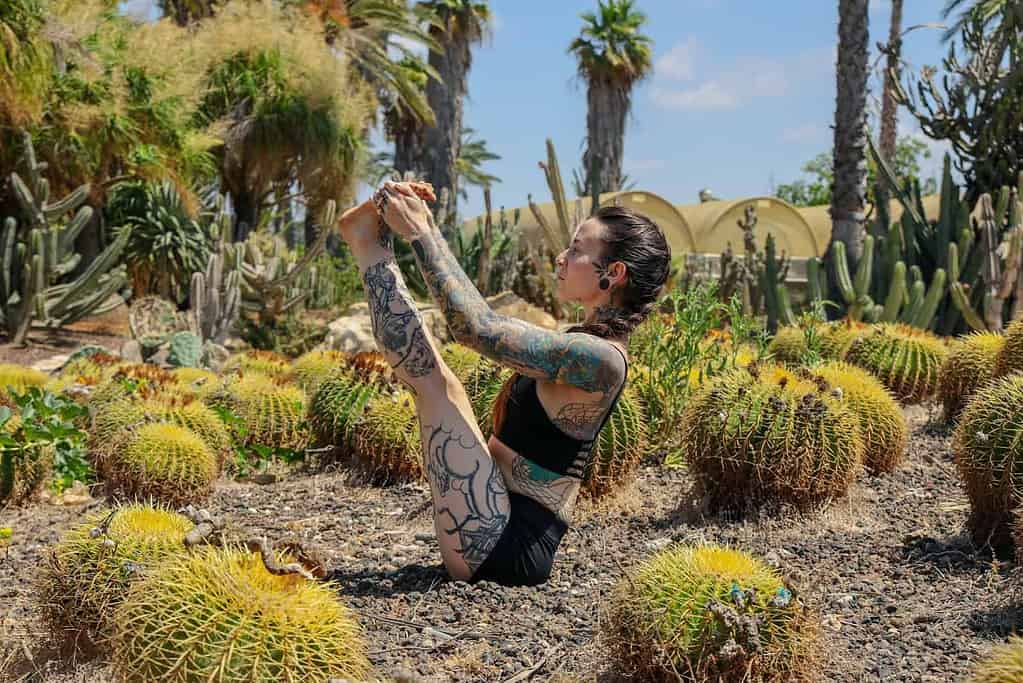
Ubhaya Padangusthasana – In this posture, grab both big toes, extend your legs, and balance on your sitting bones with a straight spine.
Urdhva Mukha Paschimottanasana – A deeper variation of the posture above. Pull the legs closer to you, hugging the torso to the thighs and forehead to the shins.
Setu Bandhasana – The classic bridge pose, done in a reclined position. With the feet close to the sitting bones, lift the hips high to extend the spine.
Finishing Sequence
The remaining yoga poses are known as the finishing asanas.
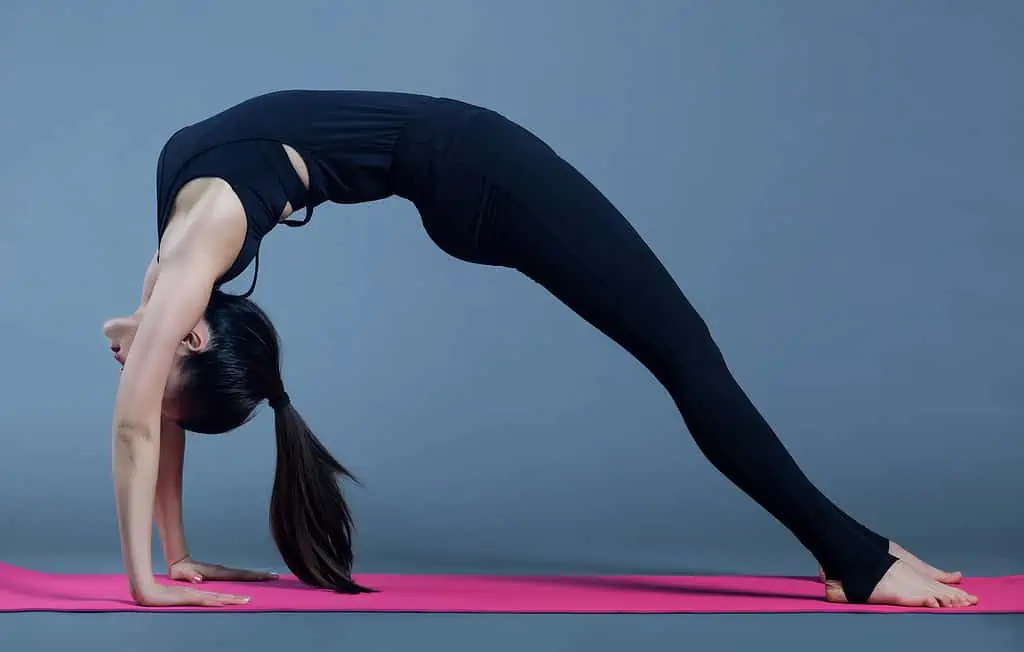
Urdhva Dhanurasana – The wheel pose is a deep backbend that opens the spine, hips, and shoulders.
Paschimottanasana – Seated forward bend practiced as a counterpose to the wheel.
Savasana – Take a brief rest in corpse pose.
Salamba Sarvangasana – In shoulder stand, keep your hands on your lower back for support as you extend the legs up.
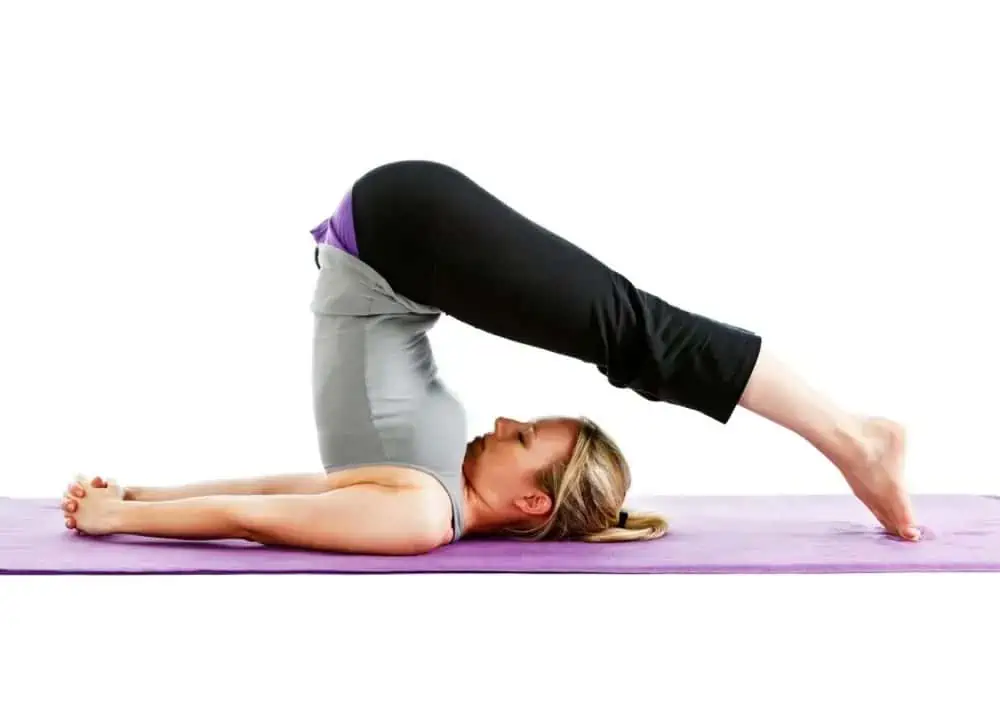
Halasana – From shoulder stand, lower your legs overhead into a plow pose, keeping them straight.
Karnapidasana – From the plow, bend the knees, hugging them to the ears for the ear pressure pose.
Urdhva Padmasana – From the plow, cross the legs in the lotus position for the upward lotus pose.
Pindasana in Sarvangasana/embryo – Keep the legs crossed as you hug them towards your ears from the previous position.
Matsyasana – After those intense forward folds, open the chest, torso, and neck with the fish pose.
Uttana Padasana – Keeping the position of the fish pose, raise the legs about 45 degrees off the ground with the legs together. In addition, extend the arms in front of you with the palms together.
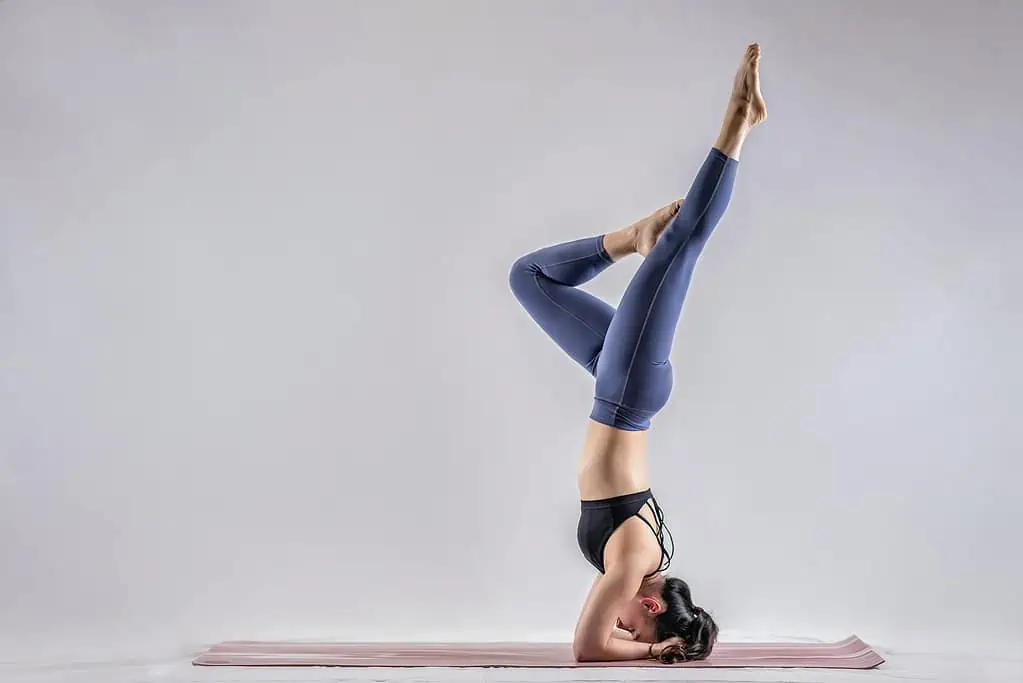
Sirsasana – Practice the supported headstand with the hands clasped around the back of the head and the forearms pressing into the ground to take pressure off the neck.
Balasana – Rest in a child’s pose for 5 breaths.
Baddha Padmasana – Bring the legs into lotus pose and then cross your arms behind you, grabbing the opposite big toes.
Padmasana – Classic lotus pose with the hands resting on the knees in Gyan (meditation) mudra.
Tolasana – For the final pose, keep the legs in the lotus pose, place the hands by your sides, and press into the ground to lift the hips and legs.
Savasana – Finally, take a well-deserved rest in corpse pose!
The Many Ways Ashtanga Yoga Enhances Well-Being
Enhanced Mental Clarity and Concentration
Engaging in Ashtanga yoga demands a level of concentration that can truly sharpen one’s acuity. Each pose necessitates no alignment. A deep focus on breath control. This dual emphasis serves to divert attention from the stream of daily thoughts.
Over time, honing this skill of awareness during practice can translate into improved concentration abilities beyond the confines of the yoga mat.
Alleviation of Stress
The flow inherent in the Ashtanga series functions akin to a dynamic form of meditation. The rhythmic synchronization between breath and movement has a soothing effect on the mind, significantly reducing stress levels.
Following a session, I often experience a sense of tranquility that lingers for hours or even days.
Development of Emotional Strength
Embarking on an Ashtanga yoga journey is no walk in the park; it presents challenges that push you to your limits and sometimes beyond them. Confronting these obstacles during practice imparts lessons in perseverance and resilience.
Learning to confront discomfort with a demeanor is a skill. This ability to bounce back can have an effect on various aspects of your life enabling you to navigate challenging situations with composure.
Enhancing Self-awareness and Mindfulness
Engaging in regular Ashtanga yoga practice fosters self-awareness. It heightens your sensitivity to the messages your body communicates, facilitating decision-making, in scenarios as you become more conscious of your behaviors and their repercussions.
Experience of Happiness and Contentment
Ultimately, there is a feeling of happiness and contentment that accompanies Ashtanga yoga practice. It transcends achievements; it encompasses the journey, personal growth, and self-discoveries made along the path.
This joy has the power to imbue your existence with purpose and fulfillment.
To sum up, while the physical advantages of Ashtanga yoga are significant, its psychological benefits run deep. They possess the potential not only to transform your physique but also to significantly enrich your emotional well-being significantly.
The Significance of Bandhas in Ashtanga Yoga
Uddiyana Bandha
This technique involves drawing your stomach upward, like attempting to touch your belly button to your spine. In the realm of Ashtanga yoga, this movement plays a role. It assists in strengthening your core, improves breathing, and enhances stability during poses.
Mula Bandha
Moving on to Mula Bandha, envision it as a method to anchor your energy in the parts of your body. Achieve this by engaging the muscles in your floor—similar to when you’re holding back from using the restroom.
While it may seem peculiar, this practice is highly beneficial. It contributes to balance. Provides a grounded sensation in your postures.
Both of these practices extend beyond benefits; they also aid in sharpening focus and raising awareness of your body’s internal mechanisms.
Additionally, they elevate energy levels throughout your practice sessions. When you’re next on the yoga mat, consider experimenting with these bandhas—they could well revolutionize your Ashtanga yoga journey.
Tips For Learning Ashtanga Yoga Poses
As you can see, the Ashtanga yoga primary series is pretty long. So if you’re new to this practice, it’s natural to feel overwhelmed and confused.
The best way to learn any series of Ashtanga yoga is under the guidance of an experienced and certified Ashtanga yoga teacher. So I recommend seeking out Ashtanga yoga classes near you.
However, as Ashtanga yoga is meant to be an (almost) daily practice, it’s good to start practicing the yoga poses at home, too. You can use various resources to learn the order and alignment of the Ashtanga yoga poses.
Books
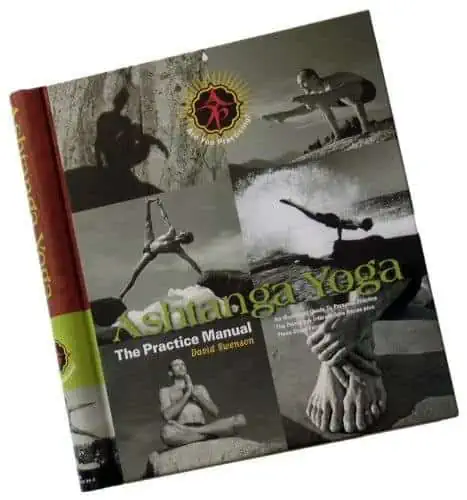
Ashtanga Yoga: The Practice Manual by David Swenson is a must-have for any aspiring “Ashtangi.” It gives the most thorough breakdown of the primary and intermediate series, with large colorful images of each posture.
This helpful guide also shows variations you can do for some of the more challenging asanas and gives three alternative short forms of each series. I find these super handy for the days I don’t have time to do a full Ashtanga practice.
Posters
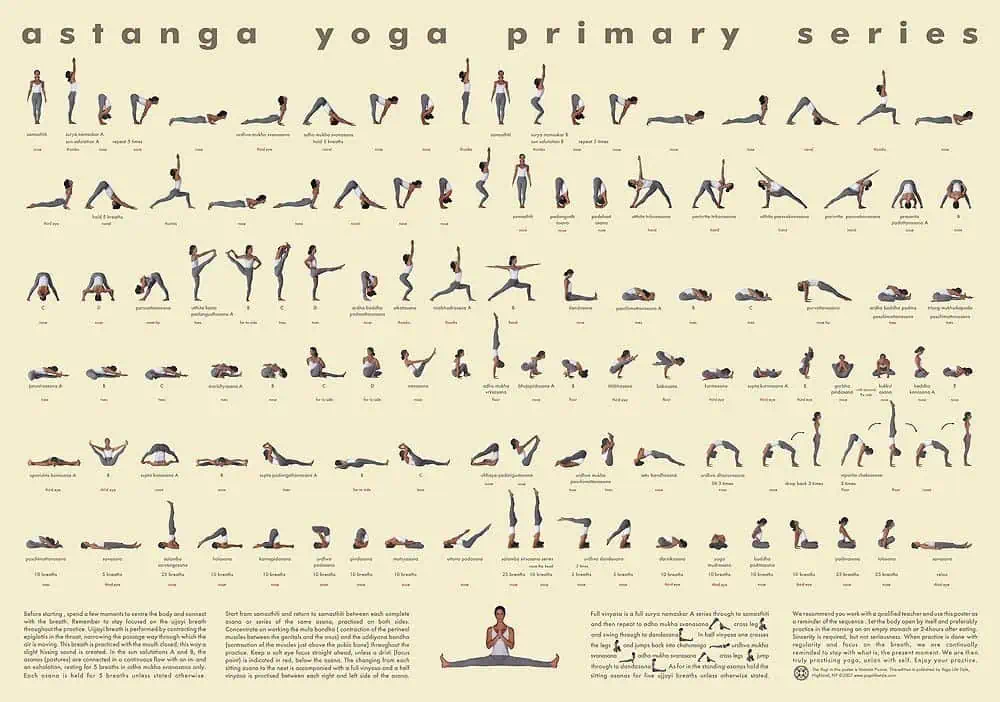
If you keep forgetting what pose is next when doing your yoga practice, you might find having a poster of the poses helpful. For example, I have this Ashtanga Primary Series Poster on my wall directly in front of my yoga mat, so if I get stuck, I quickly look up and get straight back on track.
The 20″ x 28″ poster shows images for all 112 postures in the primary series, including a breakdown of the sun salutations. It’s the most comprehensive and easy-to-follow poster I’ve found, as the images are large and clear, and the design is simple and non-distracting.
Flash Cards
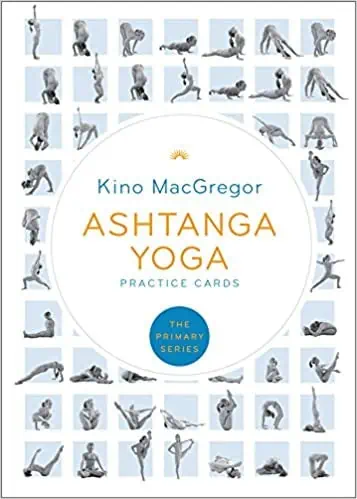
Another cool way to learn and remember each yoga pose is with flashcards, like the Ashtanga Yoga Practice Cards by Kino MacGregor. In this deck, you’ll find a card for each yoga pose in the primary series, featuring a full-color image, instructions, the Drishti (point of focus), and a list of benefits.
I find these cards make my yoga practice fun, and if you’re a visual learner, you’ll pick up the sequence much faster. The idea is to lay them all out in order and do your practice, using them as a guide, like with a poster.
Online Videos
Of course, many online resources can help you learn the sequence and alignment of the Ashtanga yoga poses. You’ll find many YouTube videos that guide you through the primary series, such as this one by La Yoga Vita. You will also find shorter sequence variations for beginners, like this one by David and Jelena Yoga.
Final Thoughts On Ashtanga Yoga Poses
While there are many Ashtanga yoga poses to learn (including some challenging ones), Ashtanga is an enjoyable and rewarding practice. As you repeat the same asanas every day, you will quickly notice your body becoming stronger and more flexible, and thus, the postures will slowly become more achievable.
Pop quiz! 🧘🤔
Ashtanga yoga was developed in the early 20th century.
Ashtanga yoga does not include any seated poses.
Ujjayi Breathing is a key component of Ashtanga yoga practice.

