
Listen to this article:
Key Takeaway
Fish Pose, or Matsyasana, is a beginner-friendly backbend that opens the chest and improves spinal flexibility.
| FISH POSE | |
|---|---|
| Alternate name: | Matsyasana |
| Difficulty level: | Beginner |
| Pose category: | Backbend |
| Muscle groups: | Pectoral muscles (chest) Abdominal muscles (abdomen) Spinal extensors (back) Hip flexors (hips) Quadriceps (thighs) Intercostal muscles (rib cage) Neck extensors (neck) |
| Physical benefits: | Increases spinal flexibility and improves posture. |
| Therapeutic applications: | Relieves respiratory ailments and mitigates negative effects of poor posture. |
| Preparatory poses: | Bridge Pose (Setu Bandhasana) Staff Pose (Dandasana) |
| Counterposes that follow well: | Savasana (Corpse Pose) Shoulder Stand (Sarvangasana) Camel Pose (Ustrasana) |
| Chakras activated: | Throat Chakra (Vishuddha) Heart Chakra (Anahata) Solar Plexus Chakra (Manipura) |
| Most helpful prop: |  Yoga block under upper back - supports shoulder blades, enhances chest opening. See latest price |
For new yoga practitioners, backbends might look intimidating. However, virtually any yoga pose is attainable with proper technique, guidance, and of course — practice!
You might not believe it, but you can absolutely practice backbends without being super bendy! There are many yoga poses that help you build strength and spinal flexibility without having to contort yourself into a precarious, back-crunching position.


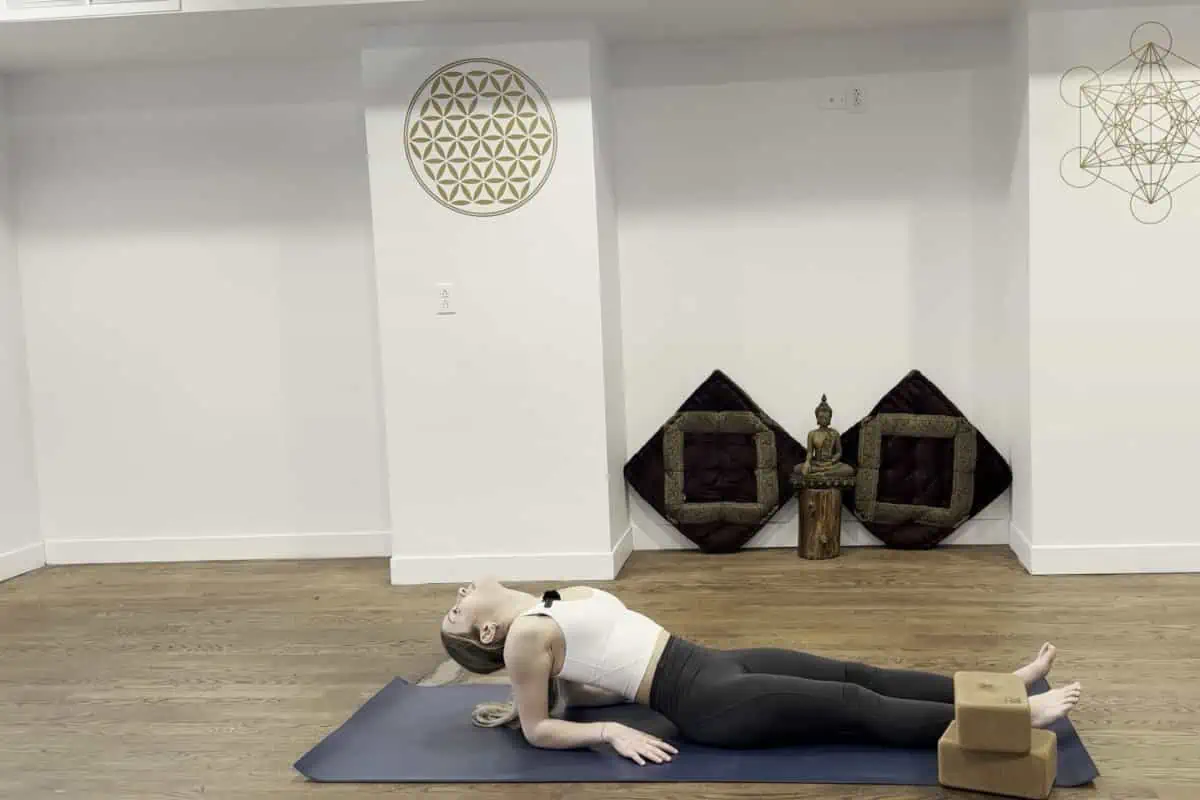
Here, we’ll break down the Supported Fish Pose: the perfect introductory back-bending yoga posture.
Watch our recommended steps for entering, holding, and exiting the pose.
Contents
- 1 What Is Fish Pose (Matsyasana)?
- 2 Supported Fish Pose Benefits
- 3 How to Do Fish Pose (Matsyasana)
- 4 Important Fish Pose Alignment Cues for Yoga Teachers
- 5 Incorporating Breathing Techniques with Supported Fish Pose
- 6 Modifications of Fish Pose
- 7 Contraindications of Fish Pose
- 8 Advanced Variations of Fish Pose (Matsyasana)
- 9 Preparatory Poses
- 10 Follow Up Poses to Practice After Fish Pose
- 11 The Dangers of Fish Pose in Yoga
- 12 Fish Pose Common Questions
What Is Fish Pose (Matsyasana)?
Fish Pose is a reclined backbend suitable for beginner-level yogis all the way up to advanced practitioners. You might also hear it called by its Sanskrit name Matsyasana, coming from matsya or “fish,” and asana meaning “posture.” The name of the pose comes from a legend about Lord Vishnu, who transforms himself into a fish named Matsya in order to save the world from a disastrous flood.

Many people practice Fish Pose as a first backbend as it is easily modified in order to feel fully supported as you build confidence and strength. Traditionally, Fish Pose is used as a as a counter pose for shoulder stand or headstand or plow pose, but with its many benefits is worthwhile to practice in its own right.
Supported Fish Pose Benefits
The Hatha Yoga Pradipika, a classic text from the 15th century, describes Matsyasana as “the destroyer of all diseases.” The physical benefits of Fish Pose are numerous, but with regular practice it can boost your overall well being and even may prompt emotional growth.
Anatomically, Matsyasana lengthens your pectoral and abdominal muscles, and stretches the front of the neck while strengthening the back muscles (spinal extensors) and the muscles at the back of the neck. Metaphysically, it stimulates the solar plexus, heart, and throat chakras which are related to self-confidence, self-compassion, and self-expression.
Here is an overview of the most notable benefits of Fish Pose:
- Can relieve respiratory ailments: Fish Pose opens the chest and expands the intercostal muscles along the sides of the rib cage, helping you to breathe easier.
A regular yoga practice (including chest openers like Matsyasana) showed improved symptoms and quality of life in asthma patients, while in another case reduced shortness of breath and improved sleep quality in study participants with chronic respiratory issues. - Mitigates negative effects of poor posture: by opening up the front body, you can release tension held in your neck, chest, and shoulders. Additionally, your lengthen your hip flexors, which can become shortened and tight after long periods of sitting.
- Stimulates the abdominal organs: backbends like Matsyasana increase blood flow to the abdominal region, which can help improve digestion and relieve constipation. Fish Pose in particular has been shown to reduce the severity and duration of menstrual pain.
- Benefits the brain: the spinal extension of this reclined backbend produces a reported energizing effect, reducing fatigue. By increasing blood flow to the major organs (including the brain), Fish Pose can help address hypotension (low blood pressure), which reduces blood flow and deprives internal organs of blood and oxygen.
- Improves posture, spinal flexibility, and mobility: as a largely sedentary society, our posture has suffered greatly. Even worse, poor posture habits start early on in adolescence with the dreaded “text neck,” a common neck injury arising from too much smartphone use.
Fish Pose helps counteract the rounded shoulders stemming from slouching in front of a computer, as well the forward-bracing head position acquired from staring down at a phone, which ultimately causes strain on the neck muscles.
As you age, spinal health becomes increasingly important. In order to avoid developing a severely curved spine when you’re older, research supports that practicing yoga poses which focus on the upper back can help straighten the spine and maintain mobility.
How to Do Fish Pose (Matsyasana)

If you haven’t been including Fish Pose in your yoga practice, now you have all the reasons to justify why you should try it for yourself! Follow these step-by-step instructions:
- Lie flat on your yoga mat with your legs extended with slight inner rotation. Place your arms next to your sides, palms facing down.
- Prop yourself up on your elbows, raising your upper torso to about a 45-degree angle.
- Point your toes and pull up on your kneecaps to engage your quad muscles.
- Firmly press your palms and forearms into the floor.
- Tilt your pelvis slightly forward to create the beginning curve of your spine, starting in your lower back.
- Next, lift your chest slightly, puffing out through your heart space. Draw your shoulder blades together as your upper body and rib cage expand.
- Finally, carefully tilt your head backward until you can gently bring the crown of your head to the floor, with the front of your neck extended.
- Press down even more through your forearms and palms to keep very little weight on your head. Keep the muscles of your legs engaged, thighs active.
- Hold your Fish Pose, breathing smoothly as your chest continues to open.
- After a few breaths, tuck your chin slightly to place the back of your head on the floor and release, lowering your upper body to your mat and allowing your legs to relax in Savasana.
If you benefit from a visual guide and verbal cues, watch this short Fish Pose video tutorial:
Important Fish Pose Alignment Cues for Yoga Teachers
As a reclined backbend, Fish Pose is rather safe; as long as you follow proper alignment, you should have no issues practicing Fish Pose on your own without a yoga teacher. However, you must maintain careful body awareness, especially if you are new to practicing yoga. Alternatively, if you are a certified yoga instructor, these tips will help your students pay attention to their body and avoid any potential neck injury.

Here are a couple of crucial cues to remember when practicing Fish Pose:
- Do not place too much pressure on your head: your arms and hips should be supporting most of your weight.
- Avoid straining your neck in order to bring your head to the floor. As with all backbends, the spine should have an evenly distributed curve, rather than a sharp angle in your cervical spine as you let your head hang back.
- Think: press down to lift up! Pressing down through your forearms will help engage the muscles surrounding your shoulder joint, so that you can lift your chest higher.
Incorporating Breathing Techniques with Supported Fish Pose
Through my practice, I have discovered that combining Supported Fish Pose with breathing not only intensifies the stretch but also promotes relaxation and alleviates stress. Here’s how you can integrate breathing techniques into your routine while performing Supported Fish Pose.
Start by getting into your Supported Fish Pose, using props as needed for comfort. Once you are settled in the pose, focus on your breath. Start by engaging in breathing, allowing your abdomen to rise and fall significantly with each breath. This form of breathing activates the system, fostering relaxation and reducing stress levels.
After a round of breathing, transit to Ujjayi breath, also known as “ocean breath.” This technique involves constricting the back of your throat to create a sound while inhaling and exhaling through your nose.
The soothing flow of Ujjayi breath can deepen the quality of Supported Fish Pose aiding in calming the mind and turning inward.
Incorporating breath techniques into Supported Fish Pose provides a method for engaging in yoga that brings together the body, breath, and thoughts. This integration not only enhances suppleness and alignment but also nurtures mental and emotional health. Experiment with it during your practice session to experience its effects.
Modifications of Fish Pose
If you experience pressure on your head or strain on your neck as mentioned above, you can still practice Matsyasana using modifications.
Some yoga teachers may instruct you to place your hands underneath body. This brings your elbows and forearms more directly under your torso to better support you.

Of course, yoga props are always a welcome addition to most yoga poses. Here are some ways you can use props to practice Supported Fish Pose:
- Blocks: place a yoga block underneath your upper back, positioned horizontally to support your shoulder blades. If your neck feels stiff or strained when you drop your head back, you can also place a yoga block underneath your head. Stand it on end and let the base of your skull rest on the block so your upper body is fully supported.
- Blanket: instead of a block, try using a rolled blanket across your mid back, just below your shoulder blades (parallel to the short end of your yoga mat). A thickly folded blanket under the top of the head can also provide some extra cushion, and will shorten the distance required to tip your head back.
- Bolster: position a bolster vertically underneath your upper torso, with the short end of the bolster aligned with your low back. Your entire spine will be supported by the bolster, so you can let your head hang back towards the floor to focus on spinal flexibility in the top cervical region of your spine.

Contraindications of Fish Pose
Performing any back bending yoga posture requires considerable care and special attention to alignment in order to prevent injury. There are several cases in which Fish Pose might be risky. If yoga practitioners are experiencing any of the following health concerns, it is best to avoid fish pose:
- Neck injuries, including neck stiffness
- Diastasis Recti (a separation of the abdominal muscles most common in postpartum women)
- Migraine
- Unregulated high blood pressure
- Vertigo
- Herniated discs or other back injury
- Recent abdominal surgery
In some of these cases, a restorative and fully supported version of Fish Pose might be accessible, but be sure to consult a medical professional prior to attempting any backbends.
Advanced Variations of Fish Pose (Matsyasana)
If you can comfortably hold your Fish Pose safely and comfortably for a minute or more, you might be ready to try one of these advanced variations.
Fish in Lotus Pose

Bringing your legs into Lotus Pose adds a deep stretch for your hips along with all the other benefits of Fish Pose.
- Sit on your mat with your legs straight in Dandasana.
- Bend your right knee and bring your right foot to the top of your left hip, with the sole of your foot facing the sky.
- Bend your left knee and cross your left ankle over your right shin. Bring your left foot to your right hip, with the sole of your foot facing up.
- From here with your lower body in Lotus Pose, lean back and come down onto your elbows. Press your forearms and palms into the floor.
- Follow the same instructions as in regular Fish Pose to move into your backbend: puff out your heart and lift your chest, and carefully drop your head back until the crown of your head rests on the floor.
- Once you arrive in the full expression of the pose, hold for a few breaths. Then, gently lower your torso to your mad and extend your legs, coming into Savasana.
Flying Fish Pose

This challenging version of Matsyasana will definitely test the strength of your core and hip flexors!
- Follow the instructions above to bring yourself into regular Fish Pose.
- When you feel stable in your backbend with the top of your head resting on the floor, extend your arms diagonally up in front of you with your palms together.
- Then, pull your low belly in and up to activate your core. Engage your hip flexors and thigh muscles to raise your legs up off the floor at a 45-degree angle.
- Hold your Flying Fish Pose for a few breaths. Then, lower your legs down with control. Release your arms to your sides and gently come down from your back bend, resting in Savasana.
Preparatory Poses
Practicing Fish Pose safely requires you to warm up your spine, as well as to be acutely aware of your alignment. Bridge Pose and Staff Pose will help prepare your body for Matsyasana properly.
Bridge Pose

- Lie on your yoga mat with your knees bent and feet on the floor at about a hip-width distance.
- Bring your arms by your sides, palms facing down.
- Ground your upper back and shoulder blades into your mat.
- Press down through the soles of your feet, engage your glutes and hamstrings, and lift your hips.
- Keep your hands pressing into the floor, or deepen your backbend by bringing your hands underneath yourself and interlacing your fingers. Draw your shoulder blades together and open across the front of your chest.
- Hold for a few breaths, then bring your arms to your sides and lower yourself gently down to the floor.
Staff Pose

- Sit on your mat with your legs straight out in front of you.
- Place your palms on the floor beside your hips.
- Grow tall through the crown of your head and pull your low belly in and up to engage your core.
- Flex your feet, pulling your toes back toward you. Pull up on your kneecaps to engage the muscles of your thighs.
- Hold your Staff Pose for a 5-10 breaths as you bring your attention to your spine. Then, you can easily transition into Fish Pose or another preparatory pose.
Follow Up Poses to Practice After Fish Pose
Matsyasana is a posture fit for all levels of yoga practitioners. To that end, it may be used as a peak pose, or a warm up pose for other backbends. Here are a few different options of poses you can try after Fish Pose; each one serves a different purpose, depending on the intention of your yoga practice.
Savasana or Knees Into Chest

Either one of these yoga poses allows the spine to neutralize and let the back muscles rest after a back bending yoga posture.
- Lie flat on your back on your mat with your legs separated at a hip-width distance.
- Bring your arms by your sides, palms up.
- Soften all the muscles in your face, jaw, and neck.

- If you’d like, draw both knees into your chest, placing one hand on top of each shin. Maintain the natural curve of your lower spine by reaching your tailbone forward and down. Hold for 5 or so breaths, then release your legs back down to the floor.
- Stay in your Savasana, breathing smoothly, for a minute or so, or up to 10 minutes if you’ve reached the end of your yoga practice.
Shoulder Stand

Considered the traditional counter pose to Fish, you might practice Shoulder Stand before or after Matsyasana.
- Begin lying on your mat with a folded blanket placed underneath your shoulders and neck (this will avoid putting too much pressure on your cervical vertebrae when you invert your body).
- Place your feet on the floor with your knees bent. Bring your arms to your sides, palms down.
- Lift your chest slightly and walk your shoulder blades together underneath yourself.
- Lift your heels, coming up onto the balls of your feet. Extend one leg up.
- Bring your hands to your low back, fingers pointing up, creating a shelf with your elbows. Extend your other leg skyward.
- Extend through your ankle joint, keeping the toes flexed. Walk your hands a bit further up your back to create a straighter line with your body. Try to stack your fit and hips directly over your shoulders.
- Hold your Shoulder Stand for at least 5 breaths, then bend your knees bringing your legs into a tuck position, and roll down onto your back.
- Extend your legs and rest in Savasana.
Camel Pose

After Fish Pose, your back will be opened up enough to try another backbend like Camel Pose.
- Begin in a kneeling position, with your shoulders stacked over your hips and your toes tucked.
- Bring your hands to your low back at the bottom of your rib cage, fingers pointing down.
- Lengthen through the front side of your body and open your chest toward the sky. Reach your right arm behind you to grasp your right heel.
- Repeat the same with your left arm, reaching back to grasp your left heel.
- With your arms straight, press your hips forward to align them over your knees. Lift your chest and draw your shoulder blades together.
- Lift your chin and take your head back as far as is comfortable, maintaining length in the upper portion of your spine.
- Hold Camel Pose for 5 or so breaths, then release your grip on your heels, lower your hips down, and return your spine to a neutral upright position.
The Dangers of Fish Pose in Yoga
When delving into the realm of yoga, safety is a topic to address, especially when it comes to poses like Fish Pose. While not everyone may emphasize this aspect, its significance cannot be understated. Let’s delve deeper into this matter.
To begin with, individuals with neck concerns must exercise caution when attempting Fish Pose as it can exert pressure on that area. Moreover, if you have a back, this pose may not be suitable for you. It’s essential to tune in to your body’s signals.
Another consideration is blood pressure. If this is a condition you contend with, proceeding cautiously is paramount. Additionally, individuals prone to migraines may find that this pose could potentially trigger episodes. Therefore, it might be advisable to forego it during those times.
Lastly, if you’re expecting one, congratulations! However, it might be wise to avoid practicing Fish Pose for the time being. There are yoga postures that are deemed safer during pregnancy.
Recall that the essence of yoga lies in promoting well-being and comfort. Hence, if a pose doesn’t resonate well with your body or feels uncomfortable, there’s no harm in skipping it or making modifications as needed. Stay safe. Continue relishing your yoga expedition!
Pop quiz! 🧘🤔
Fish Pose is only suitable for advanced yoga practitioners.
Supported Fish Pose can help improve posture and spinal flexibility.
Matsyasana should never be modified with props.
Fish Pose Common Questions
What should I do if I feel dizzy while practicing Fish Pose?
If you feel dizzy, you might be compressing the nerves at the base of your skull due to dropping your head back with too much flexion at the neck. Try using props (see above) under your head and supporting your shoulders to keep your neck extended.
How do I know if I should modify my Fish Pose?
Unsure if you should modify your Matsyasana? Here are some clues you might benefit from using props: your chest and shoulders are excessively tight, you experience pinching or compression in the lower back, stiffness or discomfort in the neck, or are unable to place your head on the floor. Review the “Modifications” section above and try different variations until you find the one that feels best in your body.
How long should I hold Fish Pose?
In unsupported Fish, start with 15-30 seconds (3-5 breaths). If you are using props in a version of Supported Fish Pose, aim for a minute or as long as is comfortable.