Joanne Highland is a 500-hour certified yoga and barre fitness teacher. Originally from the central coast of California, she attended the University of Southern California, graduating in 2007 with a degree in music and a minor in health promotion.
Follow me:Instagram | LinkedIn | Personal Website
Jagpreet Kaur is a certified yoga instructor/therapist (Ministry of AYUSH, YCB, Govt. of India), nutritionist (from INFS), skilled marketing copywriter, and content writer. She is also an expert in pre-and postnatal care. Jagpreet seamlessly blends her knowledge of nutrition, yoga, and writing with a passion for spirituality that fuels her commitment to wellness, evident in her holistic approach and dedication to meditation.
Follow me:Instagram | LinkedIn
Published Date:
Estimated reading time:
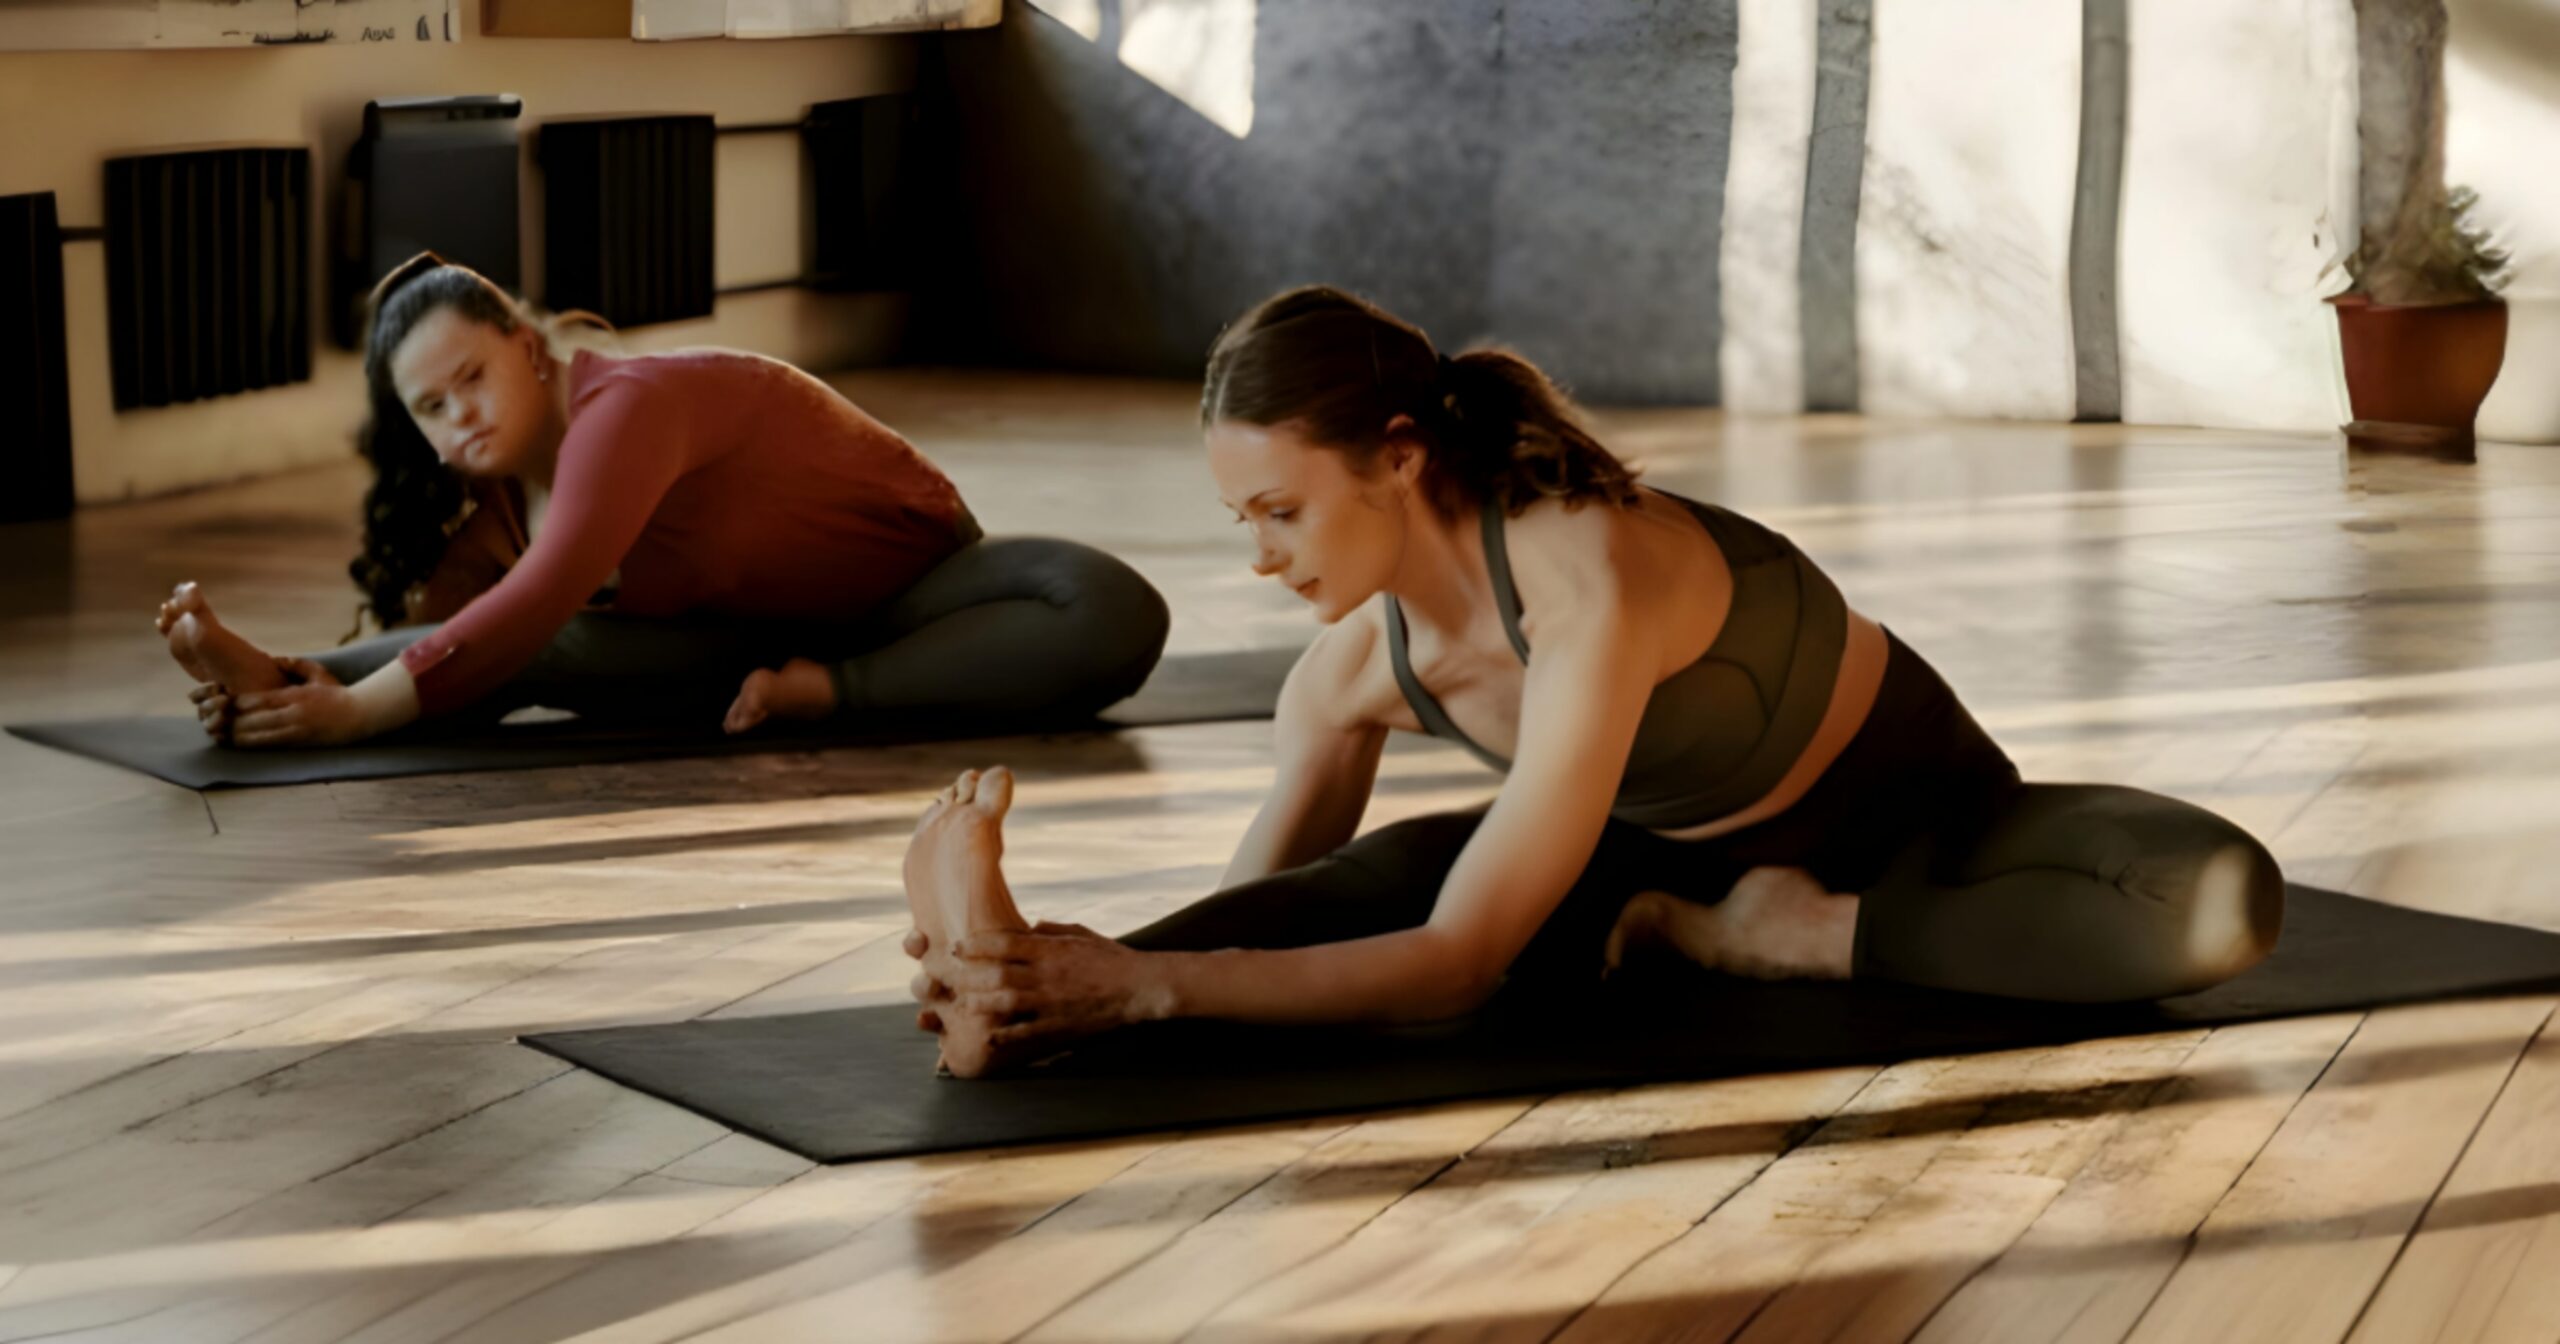
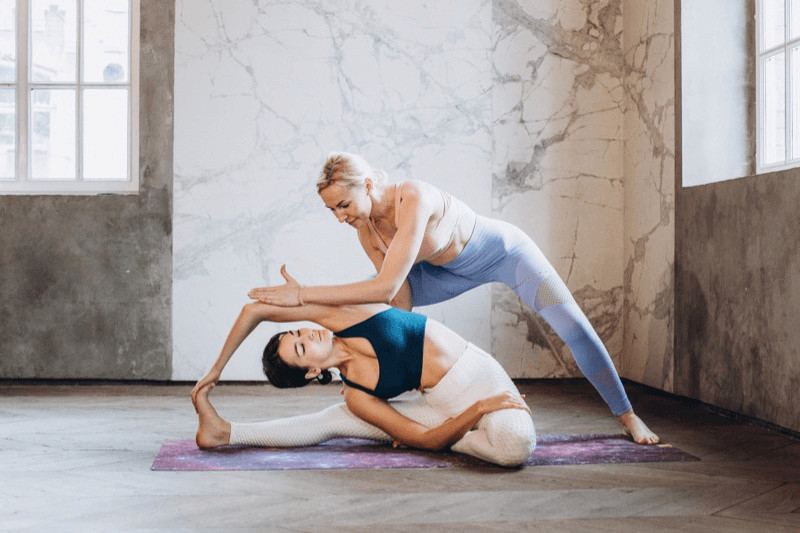
Head to Knee Pose
Listen to this article:
Key Takeaway
Janu Sirsasana, or Head to Knee Pose, is a classic asana that brings physical improvements in flexibility and mental benefits like stress reduction. Follow step-by-step instructions to ensure proper alignment and to get the most out of the Head to Knee Pose, reducing the risk of injury. Learn how to integrate this pose into your routine to experience its many advantages.
HEAD TO KNEE POSE
Alternate name:
Janu Sirsasana
Difficulty level:
Beginner
Pose category:
Seated
Muscle groups:
Hamstrings (legs)
Back muscles (back)
Hip muscles (hips)
Inner thigh muscles (thighs)
If you’re like most people, you started practicing yoga to become more flexible or to help yourself feel more grounded in daily life. What if I told you there was a pose that could assist you with both?
Head to Knee Pose is a beginner-friendly seated forward folding stretch staple in many yoga sequences. This asana is fantastic for releasing tension in the back and hips and is the perfect remedy for tight hamstrings.
But that’s not all — this posture also offers profound benefits for your mind. I’m left feeling calm and grounded whenever I spend a few minutes in this forward bend stretch.
There’s a lot to unpack about this pose, from the intricacies of safe and correct alignment to the many ways you can combine it with other yoga poses to achieve the best results. So let’s jump right in, starting at the beginning and returning to the origins of Janu Sirsasana or Head to Knee Pose.
Time Left:
00
:
00
:
00
HRS
MIN
SEC
Time Spent: %%TIMESPENT%%
Time expired. Sorry, you will not be able to continue with this quiz. Please opt-in to see the result.
SEC
HRS
MIN
SEC
SEC
Total Time
[SQBTimeSpent]
0
HRS
0
MIN
0
SEC
What are you most interested to learn about Head to Knee Pose?
Where can we email you the results? Please enter details below.
You've come to the right place! This comprehensive guide will cover all you need to know about Head to Knee Pose, from its origins and benefits to step-by-step instructions including modifications. Keep reading!
Lorem Ipsum is simply dummy text of the printing and typesetting industry. Lorem Ipsum has been the industry's standard dummy text ever since the 1500s.
Continue
%%CATEGORY_TOTAL_PERCENT%%
%%CATEGORY_TOTAL_NUMBER%%
[CATEGORY_TOTAL_PERCENT]
[CATEGORY_TOTAL_NUMBER]
You've come to the right place! This comprehensive guide will cover all you need to know about Head to Knee Pose, from its origins and benefits to step-by-step instructions including modifications. Keep reading!
Lorem Ipsum is simply dummy text of the printing and typesetting industry. Lorem Ipsum has been the industry's standard dummy text ever since the 1500s.
Lorem Ipsum is simply dummy text of the printing and typesetting industry. Lorem Ipsum has been the industry's standard dummy text ever since the 1500s.
%%CATEGORY_TOTAL_PERCENT%%
%%CATEGORY_TOTAL_NUMBER%%
[CATEGORY_TOTAL_PERCENT]
[CATEGORY_TOTAL_NUMBER]
This article offers some suggestions of poses you can use with Head to Knee Pose, so keep reading! Then if you need more inspiration, check out more seated yoga poses.
Lorem Ipsum is simply dummy text of the printing and typesetting industry. Lorem Ipsum has been the industry's standard dummy text ever since the 1500s.
%%CATEGORY_TOTAL_PERCENT%%
%%CATEGORY_TOTAL_NUMBER%%
[CATEGORY_TOTAL_PERCENT]
[CATEGORY_TOTAL_NUMBER]
Retake
YOUR TOTAL POINTS
0
Watch our recommended steps for entering, holding, and exiting the pose.
Sanskrit Origins and Philosophy of Head to Knee Pose
This asana is more than just a physical exercise; it links to yoga’s history and evolution. As a yoga teacher, I encourage my students to learn the Sanskrit names for postures to honor yoga’s tradition.
The Sanskrit name for this asana is straightforward as it describes the body’s position. Janu means “knee,” and sirsa translates to “head.”
Historical Roots
Head to Knee Pose, or Janu Sirsasana, holds a significant place in the library of yoga postures. The version we practice today is a more modern adaptation of a posture called maha mudra, described in the 15th-century text Hatha Yoga Pradipika.
The version we recognize and use today appeared in the early 20th century when renowned teacher T. Krishnamacharya described and demonstrated this asana in his text Yoga Makaranda (1934). Later, B.K.S. Iyengar also included this posture in Light On Yoga (1966), providing several photographs and detailed practice instructions for correct alignment.
Yogic Principles and Philosophy
Balance and introspection are vital yogic principles embodied by forward bends like Head to Knee Pose. They represent an inward journey toward self-discovery and humility. The action of bowing our heads shows respect for ourselves and our limitations. We acknowledge that there is always room for growth in our practice and personal life.
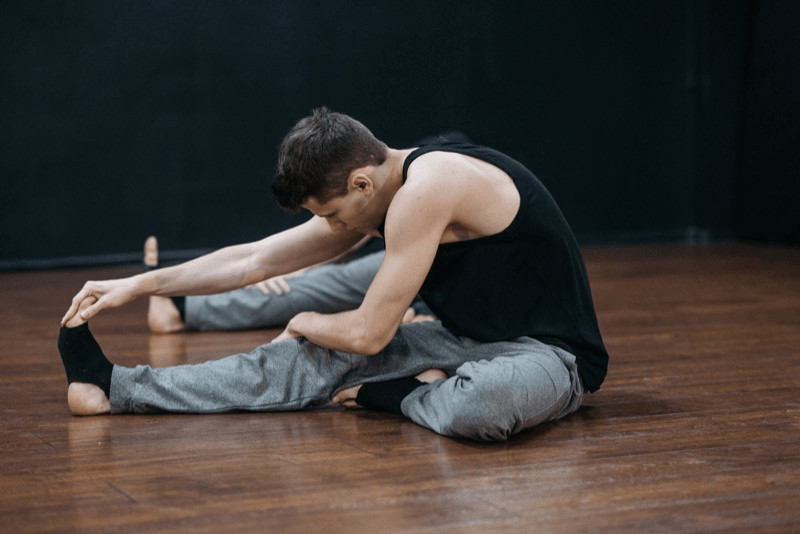
Step-by-Step Instructions for Janu Sirsasana
To ensure correct alignment, take your time entering Head to Knee Pose. Follow each step and pause to breathe through any tightness you experience without pushing. Remember, it’s not a race!
Starting Out
Begin on the floor in Staff Pose with your legs extended in front of you, separated at a hip-width distance. Flex your feet so your toes point toward the ceiling.
Place your arms at your sides with your hands or fingertips pressing into the ground beside your hips.
Tilt your pelvis forward slightly so you are sitting directly on top of your sit bones.
Sit tall with your back straight and take a few deep breaths to prepare.
Set-Up and Execution
Bend your right knee and place the sole of your right foot against your left inner thigh. Let your right knee fall gently toward the floor, opening your right hip.
Keep your left leg straight and your foot flexed.
With an inhale, lift your arms overhead. Press your navel in toward your spine to engage your abdominal muscles.
As you exhale, hinge from your hips, leading with your chest as you bend forward.
Reach your arms forward and lower them down. Place your hands on either side of your extended left leg.
Final Expression
Move into the final posture with one more intentional breath.
Create more length in your spine as you inhale.
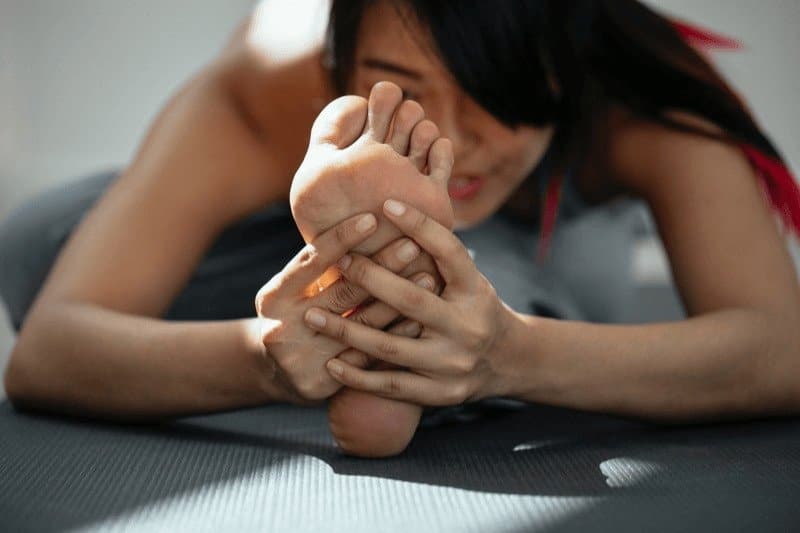
Exhale and bring your chest towards your thigh in a forward fold over the left leg. Bow your forehead toward your left knee.
Keep length in your neck by pressing your shoulders down away from your ears and spreading your shoulder blades wide across your back.
Depending on your comfort level, your hands may grasp your left foot, ankle, or shin.
Hold this stretch for 5 to 10 breaths, releasing tension with each exhale.
Mindful Release
When ready, engage your abdominal muscles to lift your torso and sit tall. Straighten your right leg, returning to Staff Pose.
Repeat this stretch on your other side; bend your left knee and place the sole of your foot against your right thigh. Follow the same preparatory and alignment directions as you fold forward over your right leg.
Expert Alignment Tips to Avoid Common Mistakes
As you refine your alignment, watch out for these common mistakes.
Rounding the lower back (lumbar spine): Although the name of the pose is “Head to Knee,” I prefer to say “belly to thigh” or “chest to leg,” as this cue helps you keep the spine long rather than rounding over.
Scrunching the shoulders: Any time the arms reach forward, the shoulders tend to creep up around the ears. Instead, widen your shoulder blades and keep the neck long.
Forcing the stretch: Don’t get thrown off by the name of the pose — if you’re unable to bring your forehead to your knee, don’t force it! Forward bends take time and patience. Breathe through tension without straining or pushing, and use a modification when necessary.
Breath Coordination
Yoga teachers often provide breathing cues for a good reason. Moving with your breath helps you slow down and enter the pose mindfully, minimizing the risk of injury. Using your breath intentionally in yoga poses like Janu Sirsasana also helps deepen the stretch.
Each time you inhale, find more length in your spine. As you exhale, release and surrender further into the forward fold. Patience is key!
Modifications and Contraindications for Head to Knee Pose
Tight hamstrings are a common challenge in this asana and can cause lower back pain when you fold forward. The simplest modification here is to keep the knee of your extended leg slightly bent. You’ll maintain the integrity of the pose without putting strain on your back.
Prop Support
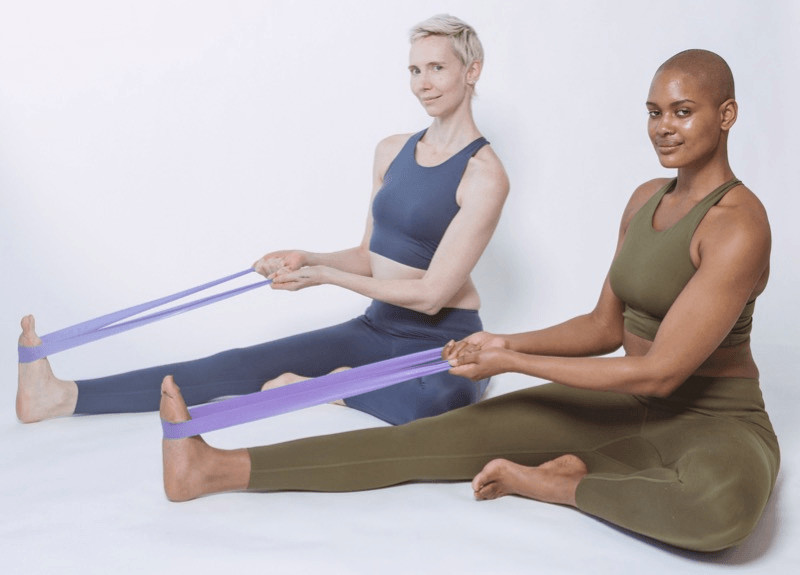
Using props can make this asana more accessible, especially for people with excessive tightness in their hips or hamstrings.
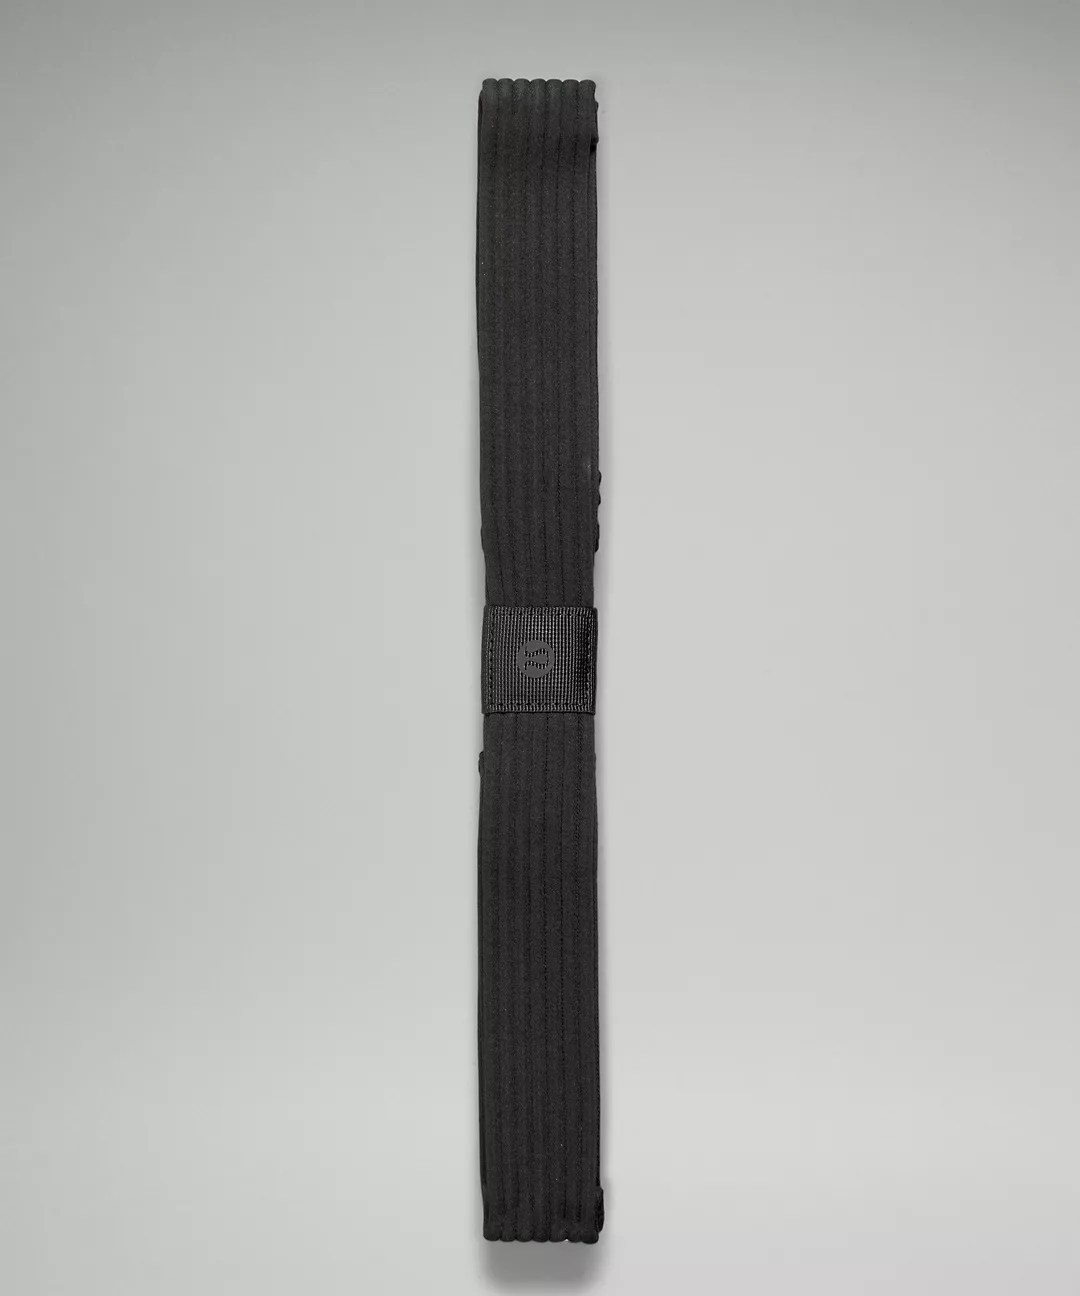
Strap: If the toes of your straight leg are too far out of reach, a strap can bridge the gap. Wrap it around the heel of your extended leg and hold the ends in your hands.
Towel or cushion: Place a rolled towel or cushion under the knee of your extended leg for a little extra support.
Blocks: Rather than using a strap, try placing yoga blocks under your hands. It brings the floor up to you, shortening the distance you have to reach.
Blanket: Sitting on a folded blanket elevates the hips slightly and helps with tightness.
Respecting your body’s limits is critical when practicing any yoga pose, including this one. Listen carefully to what your body tells you; if there’s pain, ease off immediately.
Not everyone will look the same in this pose due to different body structures and flexibility levels. Focus on the sensations you’re feeling rather than forcing your body into a position it isn’t ready for.
Contraindications
Although this asana is suitable for most people, there are a few cases where it’s best to skip this one.
Recent or chronic injury to the knees or hip joints.
Strained back muscles.
Spine issues, especially sciatica or herniated discs in the lumbar spine.
Pregnancy in the 2nd or 3rd trimester, as the forward bend puts too much pressure on the abdomen.
Janu Sirsasana Preparatory Poses
Before diving into Janu Sirasasana, it’s crucial to warm up. This helps prevent strain and enables you to achieve a deeper stretch.
Warm-Up Poses
Focus on a warm-up sequence that opens up your hamstrings and hips and releases tension in your lower and upper back. Here are my top recommendations:
Forward bends: I like to flow through a few Half Sun Salutations, using Uttanasana and Ardha Uttanasana to mobilize my spine and release tightness in my legs. If you’re already sitting on the floor, Seated Forward Bend works great, too.
Bound Angle: This seated stretch opens the hips and inner thigh muscles you’ll stretch on your bent leg in Head to Knee Pose.
Gentle twists: A gentle twist can release tension in your back. I prefer a simple seated twist or Thread the Needle in this case.
In my experience, spending several minutes on these warm-ups can make a significant difference. They help me feel more prepared for deeper stretches like Head to Knee Pose.
Challenging Variations
Adventurous yogis might want to try a variation of this asana, like the revolved or standing versions.
Revolved Head to Knee Pose
This version has a twisting element that targets the side muscles and spine.
From Staff Pose, open your left leg to the side as you bend your right leg in. Place your right foot close to your pubic bone.
Inhale and reach your arms up; then, as you exhale, twist your body to the right and side bend over your extended left leg.
Rest your left arm on top of your left leg as your right arm reaches up and over. Hold for a few breaths, then engage your abdominal muscles to rise up.
Return to Staff Pose and repeat Revolved Head to Knee on your other side.
Standing Head to Knee Pose
Want to stretch your hamstrings and work on balance at the same time? Try this standing variation.
Begin standing in Mountain Pose. Shift your weight slightly onto your left leg.
Bend your right leg, bringing your knee into your chest.
Grasp the sole of your right foot or wrap your hands around the shin.
Maintain your balance and slowly straighten your right leg. Flex your foot so your toes point up.
Inhale and lengthen your spine. As you exhale, fold forward over your right leg.
Hold for 3 breaths, then lift your torso. Release your right leg and lower it down.
Repeat on your other side, balancing on your right leg while lifting and extending your left leg.
Incorporating Head to Knee Pose into Your Practice
Flow Suggestions
In my classes, I typically use this asana towards the end of a sequence before transitioning onto my back. I find the forward fold element of this posture is the perfect way to wind down and turn my attention inward before the meditative time in Savasana.
By using it at the end of a sequence, you can also be sure your muscles are warm, giving you a more effective stretch.
After this forward bend, a counterpose like Bridge Pose also feels great. Roll down onto your back, bend your legs, and lift your pelvis to stretch the front of your hips and abdomen. Then, lower down and extend your legs into Savasana.
Benefits of Janu Sirsasana
Stretches key muscles: This deep stretch targets your hamstrings and back muscles while opening the hip and inner thigh of the bent leg. Releasing all that tightness after a long day of sitting at a desk brings significant relief.
Supports digestive health: The action of folding forward compresses the abdominal organs gently. When you release and rise, your abdomen receives freshly oxygenated blood, stimulating digestion.
Promotes stress relief: Forward bends have a calming effect on your nervous system by stimulating your vagus nerve and activating your “rest and digest” mode.
Enhances mindfulness: I love forward bends for their introspective quality. When I close my eyes and bow forward, it’s like hitting the pause button. I can concentrate on my breath and become attuned to my internal experience of the present moment.
Final Words of Encouragement
Becoming more flexible and managing stress are two of the most common goals I hear that inspire people to start practicing yoga. That’s why so many yoga teachers love including Head to Knee Pose in our yoga sequences. This pose nurtures both the body and mind.
As you incorporate Head to Knee Pose into your yoga library, practice regularly, but don’t push yourself too hard. Aim for gradual improvement instead of instant results. Remember that progress takes time and dedication, especially where tight hamstrings are concerned!
To me, the effort required in this posture is all about accepting the present moment. Release your expectations, breathe through tensions, and exhale into the surrender of Janu Sirsasana.


 17")


 21")
 22")

