Key Takeaway
Advanced seated yoga poses offer a comprehensive stretch for the entire body, challenging flexibility and strength even without standing, and can be integrated into different parts of a yoga practice for both warming up and cooling down.
Whether you want to slowly awaken your body in the morning or enjoy deep, juicy stretches after a strenuous workout, seated yoga poses are fantastic.
This yoga asana category involves forward folds, twists, hip openers, hamstring stretches, and more, giving you a full-body stretch-out without even standing up!
But while you may assume that most seated poses are easy, this is not the case at all. Sure, there are many beginner-friendly seated poses that gently stretch and loosen up the body, but there are also some highly challenging ones (hint: splits pose!)
Don’t believe me? Read on to discover a broad selection of seated yoga poses, ranging from beginner to advanced.
Contents
- 1 When Should You Practice Seated Yoga Postures?
- 2 Beginner Seated Yoga Poses
- 2.1 Easy Pose (Sukhasana)
- 2.2 Bound Angle Pose (Baddha Konasana)
- 2.3 Staff Pose (Dandasana)
- 2.4 Thunderbolt pose (Vajrasana)
- 2.5 Head-to-Knee Pose (Janu Sirsasana)
- 2.6 Seated Spinal Twist (Half Lord Of The Fishes Pose)
- 2.7 Seated Forward Bend (Paschimottanasana)
- 2.8 Seated Wide-Legged Straddle (Upavistha Konasana)
- 3 Intermediate Seated Yoga Poses
- 4 Advanced Seated Yoga Poses
- 5 Tips For Practicing Seated Poses
- 6 Final Thoughts On Seated Yoga Postures
When Should You Practice Seated Yoga Postures?
Depending on the specific posture, seated poses can be included in the warm-up section of your yoga practice or after the standing poses.
For example, gentle seated yoga poses like bound angle and hero pose can help to loosen up and open the body ahead of the standing yoga poses. Meanwhile, deep hip openers and forward folds can be lovely to cool down and stretch the muscles toward the end of the practice.
When choosing where to place seated poses in your sequence, consider the asana’s difficulty level. Intermediate and advanced seated postures should be practiced in the second half of the session when the body is already warm to avoid injury.
Beginner Seated Yoga Poses
New to yoga? No worries! Here are eight beginner-level seated poses that will gently stretch and open your body.
Easy Pose (Sukhasana)
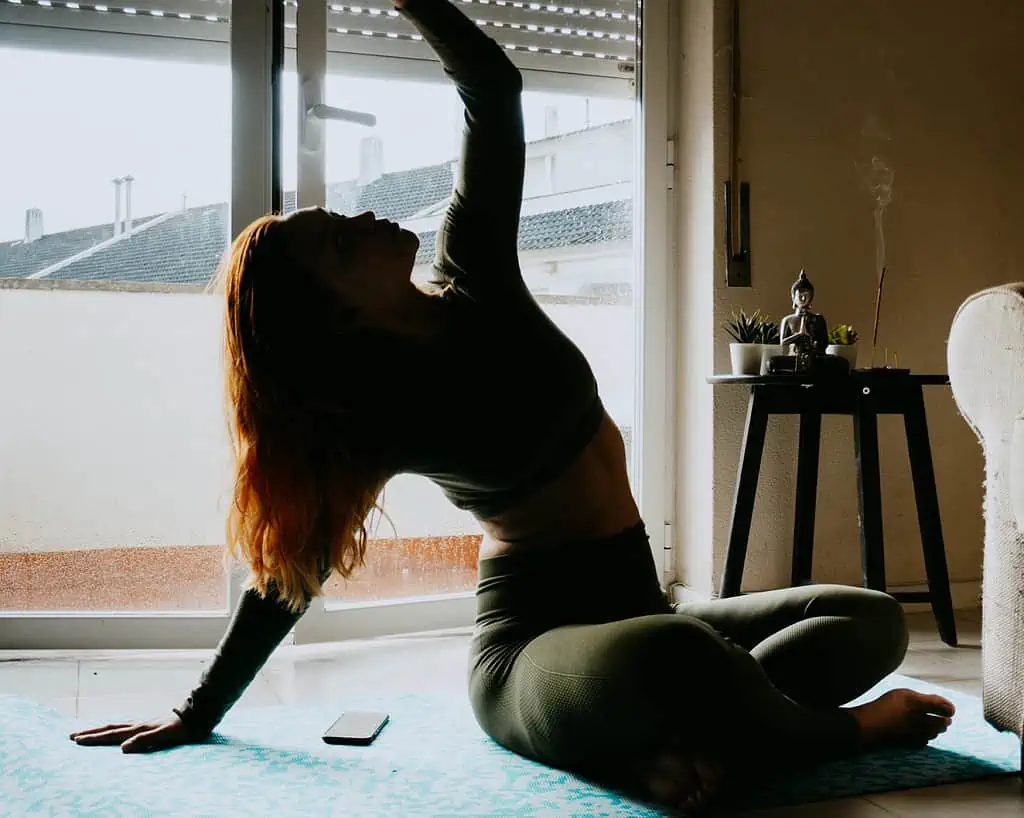
The easy pose is a standard cross-legged position that many yoga classes begin in. Unlike the lotus pose, the easy pose is accessible for most people as it involves simply crossing your shins and sitting with a straight spine.
While the leg position itself creates a gentle hip opening, there are many variations you can make that add additional benefits, such as:
- Gentle twist – Bring one hand behind you and the other hand to the opposite knee as you twist from the torso, maintaining a straight spine.
- Gentle forward fold – Keeping your sitting bones on the ground, walk your fingertips forward directly to lower your torso to your legs.
- Side bend – Place one hand on the floor and reach the opposite arm up and over to the side to stretch the side body.
- Reverse prayer – Bring both hands behind your back, bending the elbows and touching the palms.
- Chest opener – Clasp your hands behind you and extend your arms. Inhale to open the chest, then exhale to fold forward, bringing your clasped hands up and over.
Bound Angle Pose (Baddha Konasana)
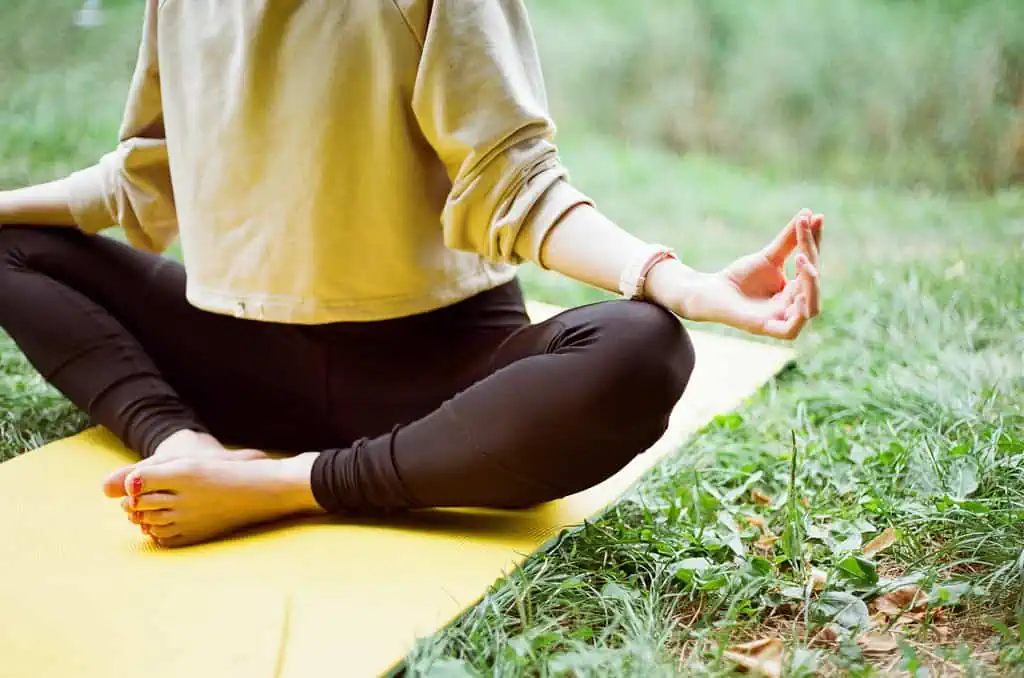
Bound angle, also known as butterfly or cobbler’s pose, stretches the inner hip flexors and groin while soothing tension in the lower back.
To do this position, bend both knees out to the side, bringing the soles of your feet together. You can do a few variations here, such as remaining upright, bouncing the knees up and down, or folding forward.
Moreover, the distance between your feet and your body will determine your sensation level. For example, you can bring the feet further away from you to create a diamond shape with your legs if you want a gentle stretch. Or you can pull the feet close to your groin for a deeper hip opening.
Staff Pose (Dandasana)
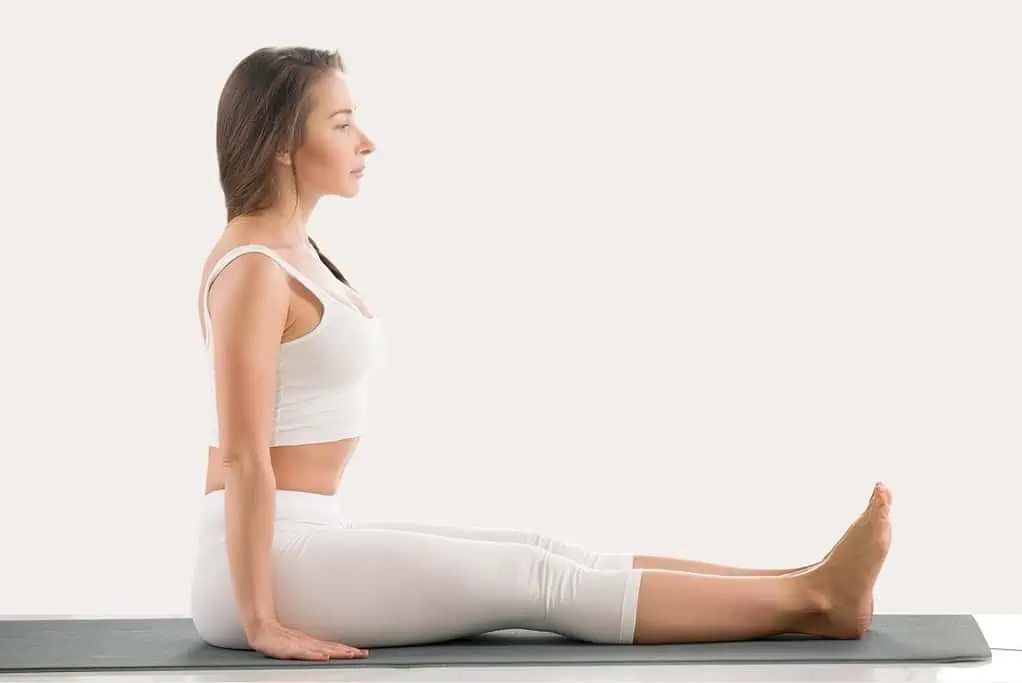
Staff pose is another beginner-seated position where both legs are straight and the feet are together with the toes pointing up. Dandasana improves your posture, lengthens the spine and hamstrings, and strengthens the back muscles.
While this posture may look simple, there is a lot of muscle engagement. To maintain the position, flex your feet and engage your thigh muscles, pressing them down to the mat. You should also engage your arms by keeping them straight and pressing the palms slightly into the floor while drawing the shoulders away from the ears.
Thunderbolt pose (Vajrasana)
The thunderbolt pose involves sitting on your heels with your knees in deep flexion. This posture stretches the quads while strengthening various body parts, including the ankles, knees, back, chest, and core.
Thunderbolt is also a popular position for seated meditation or performing breathing techniques. In addition, it has many therapeutic benefits, including aiding digestion, constipation, and hypertension.
Head-to-Knee Pose (Janu Sirsasana)
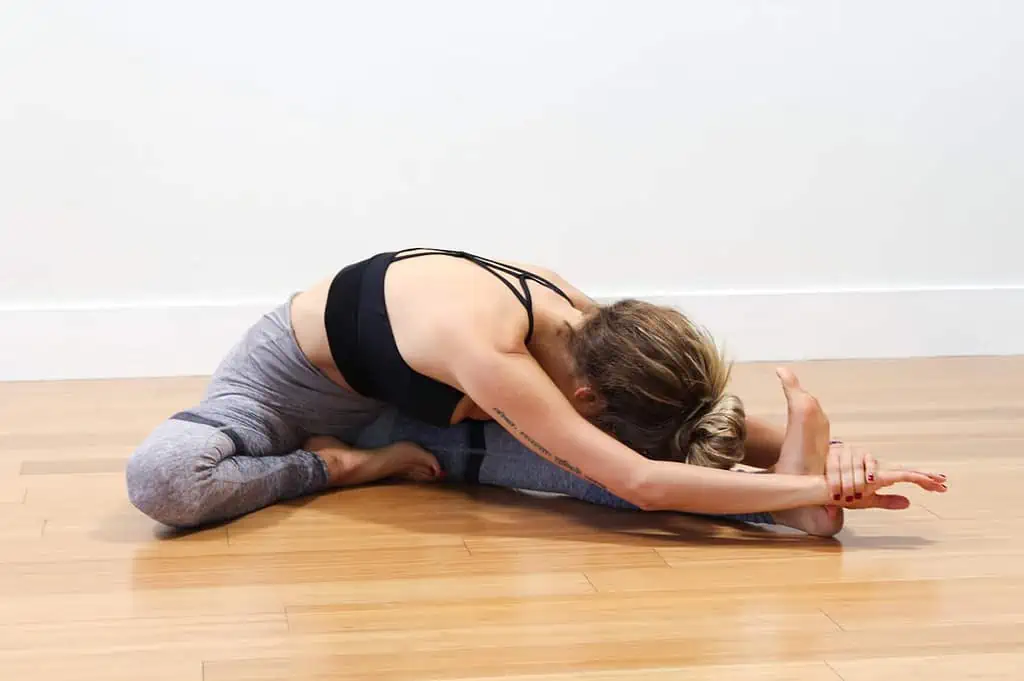
This seated yoga posture combines a forward bend and a hip opener. It stretches various body parts, including the spine, hamstrings, groins, and shoulders. It also stimulates specific organs such as the liver and spleen and has a calming sensation on the mind.
From a seated position with both legs extended straight, bend your right knee, turning the knee out to the side and placing the foot on the inner left thigh. Next, sit up straight, inhale, and fold forward over the extended leg.
As you hold this pose, focus on pulling your chest forward towards your foot. You can flex the left foot to keep the leg straight and deepen the hamstring stretch. If you can reach the foot with your fingers, you can also gently pull yourself further toward the left leg.
Seated Spinal Twist (Half Lord Of The Fishes Pose)
This seated spinal twist is very therapeutic for the digestive system. The tight twisting position “wrings” out the abdominal organs, helping to release toxins and stimulate digestion while toning the core. The spinal twist also improves spinal mobility and eases low back pain.
Start with both legs straight, then bend your left knee, placing the foot outside your right thigh. Next, bend your right knee, moving the foot towards your left hip (keeping the knee on the ground). If this position is not accessible or creates pain, keep the bottom leg straight.
Maintaining this leg position, bring your left hand behind you with the fingertips on the ground and the wrist supporting your lower back. Reach your right arm up as you inhale, then twist your spine to the left as you exhale. Next, bend the right elbow, hooking it to the outside of the left knee. Take 5 breaths here, going deeper into the twist with each exhale.
Seated Forward Bend (Paschimottanasana)
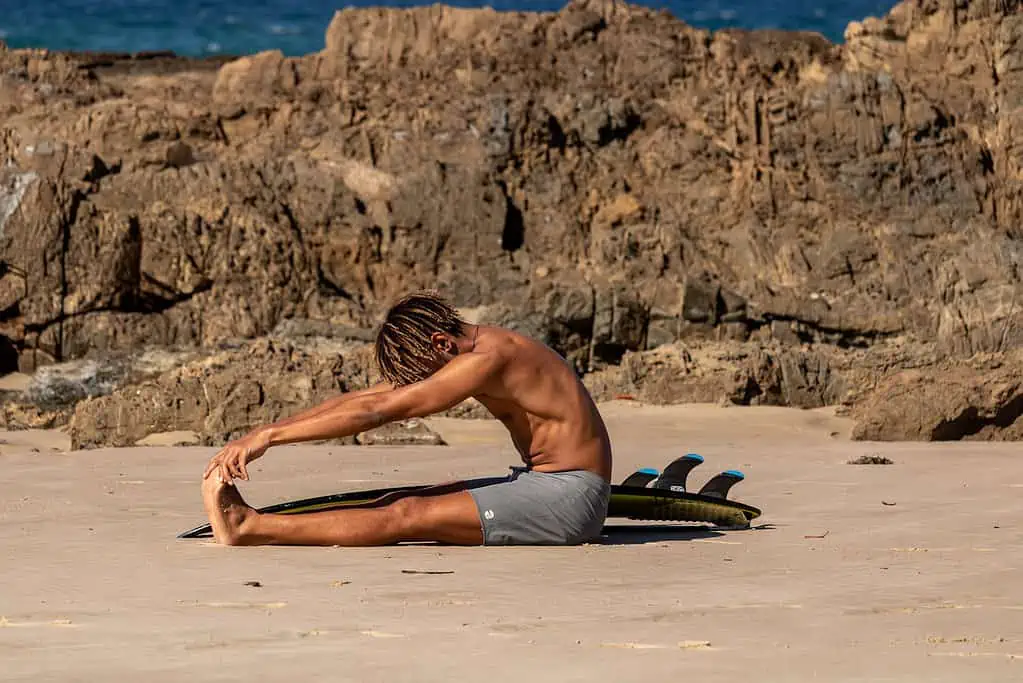
Paschimottanasana is a seated forward fold where the legs are together. This position gives a deep stretch to the entire back, improving spinal mobility and flexibility. It also stretches the hamstrings and calf muscles and calms the mind.
Start in Dandasana with your spine straight. On your inhale, reach both arms up, creating more length in the spine. As you exhale, maintain this length as you tilt from your hips and lower your torso to your thighs.
Keep your spine straight as you come down by keeping your arms alongside your ears. When you reach your maximum, release your hands to your calves, ankles, or feet, or hold onto a strap hooked around the soles of your feet.
Seated Wide-Legged Straddle (Upavistha Konasana)
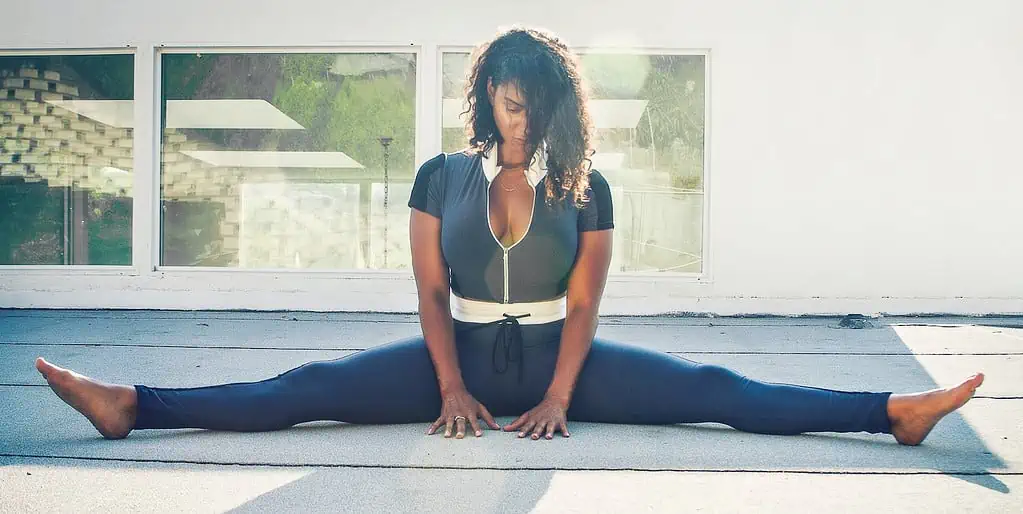
Seated wide-legged straddle is a wide-leg version of Paschimottanasana. It stretches the hamstrings, hip flexors, groin, and lower back while improving the external rotation of the hips. It also stimulates the abdominal organs and improves circulation in the pelvis.
From Dandasana, bring your legs as wide as feels comfortable. With a straight spine, inhale to reach your arms overhead, then exhale to fold forward. In the forward bend, you can rest your hands on the mat between your legs, grab the outsides of your feet, or hook your peace fingers around your big toes.
Intermediate Seated Yoga Poses
Once you feel comfortable with the beginner-seated poses, try these slightly trickier ones.
Cow Face Pose (Gomukhasana)
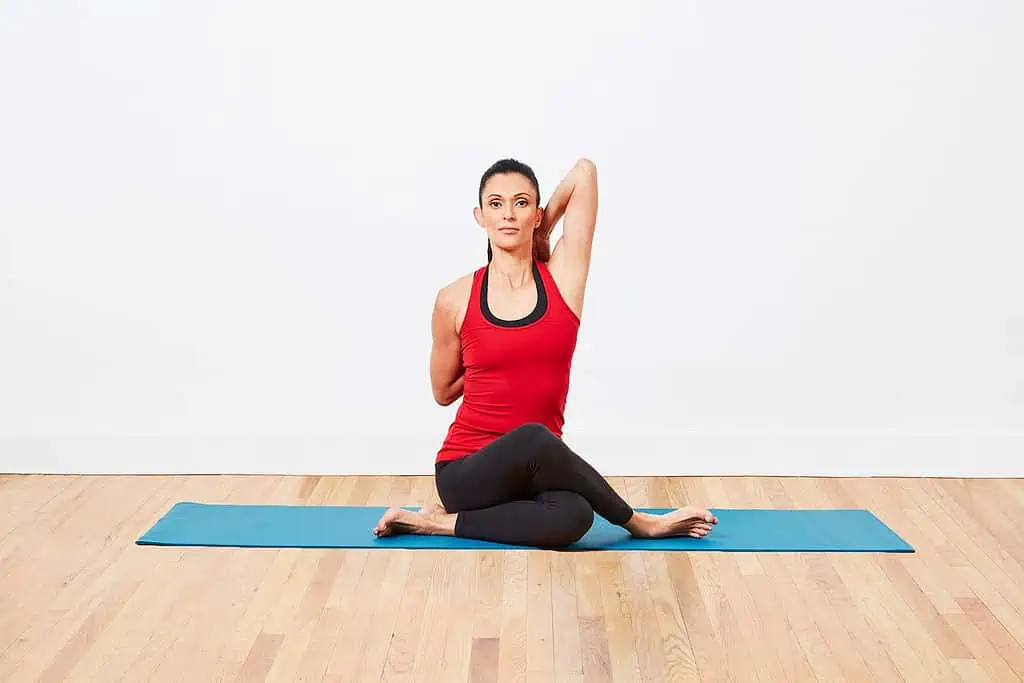
The cow face pose improves flexibility in the shoulders and hips by opening the chest and stretching the triceps, outer hip flexors, and glutes. It is also an excellent pose for counteracting the effects of long periods of sitting and improving posture.
Bend your left knee, stack it over the right knee, and bring the foot towards the right hip. Then bend the right knee underneath, bringing the foot towards the left hip. The knees should remain stacked,d though there may be a gap between them.
For the arm positioning, bring your left arm behind you, bend the elbow, and bring the fingertips towards the upper back. Then reach your right arm up to the sky, bend the elbow, and hook the fingers. Finally, point the top elbow upwards and open the chest as you breathe deeply into any tension.
Hero Pose (Virasana)
Hero pose is a deeper and, thus, more challenging version of the thunderbolt pose. Instead of sitting on your heels, you move your feet to the outside of your hips and place your sitting bones directly on the ground. This results in deeper knee flexion, and thus, it is incredibly strengthening for these joints and the thighs, ankles, and arches of the feet.
Start in thunderbolt pose with the knees bent, then slide your feet out to the side of your hips. If you have tightness in the thighs or knees that prevents you from connecting your sit bones to the ground, sit on a folded blanket.
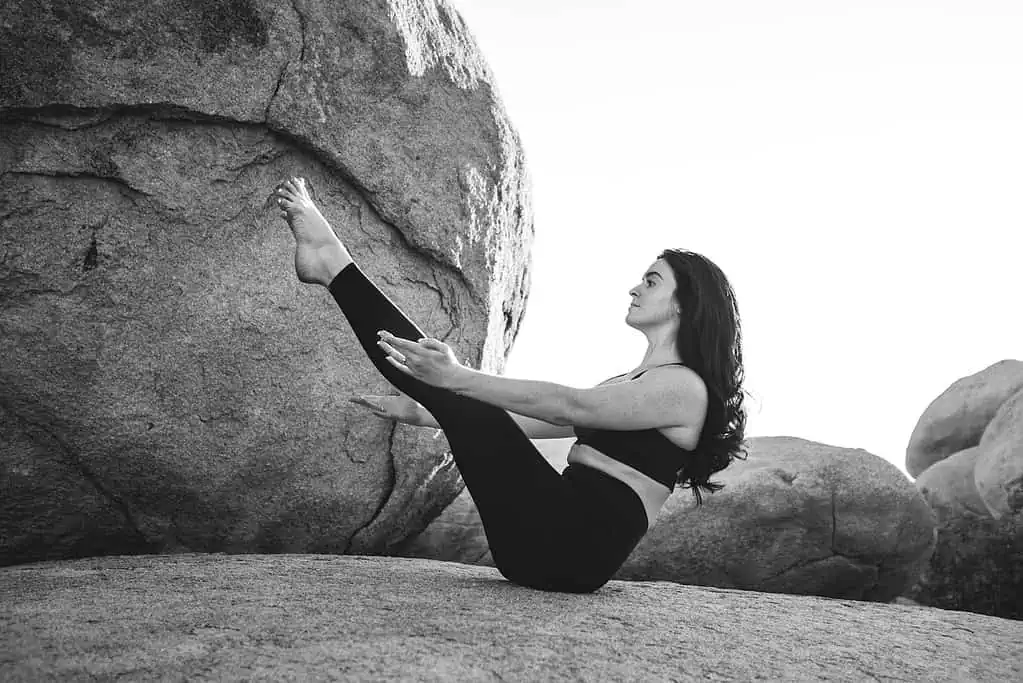
Navasana strengthens the thighs, back, and core muscles while improving balance, stability, and digestion. The final position involves the legs extended straight and the arms floating alongside the thighs, engaged. A more beginner-friendly variation is to keep the knees bent with the shins parallel to the ground.
Fire Log Pose (Agnistambhasana)
The fire log is a seated pose where the shins are stacked, creating the appearance of fire logs. This asana gives a deep stretch to the glutes and outer hips. It improves flexibility in the lower body and strengthens the legs and knees.
Starting from the easy pose, bring your right shin slightly forward until it is parallel to the top of the mat. Next, stack your left shin on top, placing the heel over the right knee and the knee over the right foot. If there is a large gap between the top knee and bottom foot, put a pillow or block in between for support.
Pigeon Pose (Eka Pada Rajakapotasana)
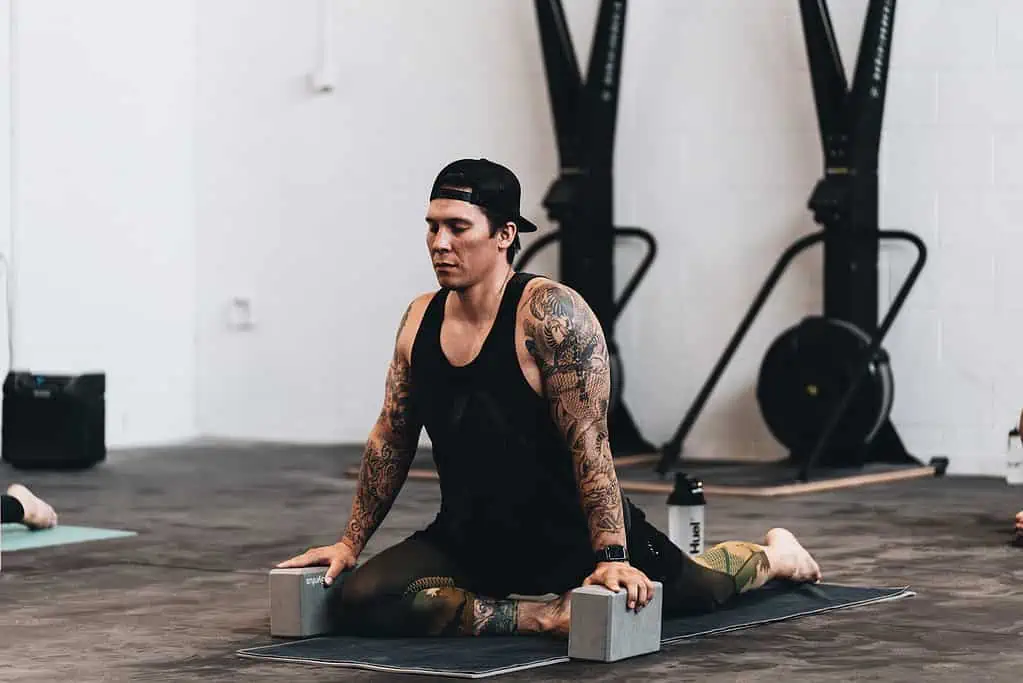
The pigeon pose is another seated asana for the outer hips and glutes. It is particularly beneficial for anyone with tight hips or lower back pain, as it helps to loosen up the muscles in these areas and release stagnating energy.
Bring your left knee forward from a tabletop position, placing it behind the left wrist. Shift the left foot towards the right side as you sink your hips. Walk your hands close to your body, straighten your spine, and breathe deeply.
If you want to take this position further, there are a few variations you can try:
- Sleeping Pigeon – Walk your hands forward and release your upper body down, resting your forehead on the ground or a prop.
- Mermaid – Staying upright, bend your right knee and reach behind with your right arm to grab the foot. Slide the foot to your elbow, then bring your left arm up, turning the elbow and clasping your right fingers. Press the chest forward for a deep upper body opening.
- King Pigeon – Bend the back knee like you are coming into Mermaid, then hook a yoga strap over the top of the foot. Reach both arms up, bending the elbows and grabbing the belt. Arch the spine and press the chest forward.
Heron Pose (Krounchasana)
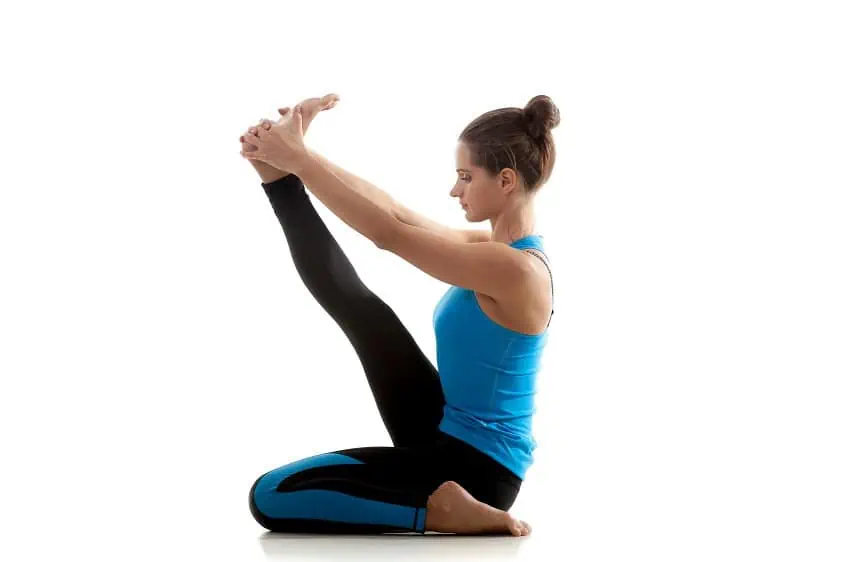
This intermediate yoga pose gives an intense hamstring stretch, opens the hips, and improves spinal flexibility. It also stimulates the heart and abdominal organs and strengthens the feet, knees, and ankles.
From Dandasana, bend your left knee, bringing the foot next to your left sitting bone (like in a half-hero pose). Then bend your right knee, bringing the sole on the floor in front of you.
Grab your right foot with both hands and slowly extend and lift the leg, bringing the foot higher than the head. You might have to lean back slightly as you do this, but keep your spine straight and your chest lifted.
Advanced Seated Yoga Poses
Mastered all of the above? Then give these challenging, advanced-level seated yoga poses a go if you feel brave enough. Just be sure to fully warm up the body before attempting them.
Lotus Pose (Padmasana)
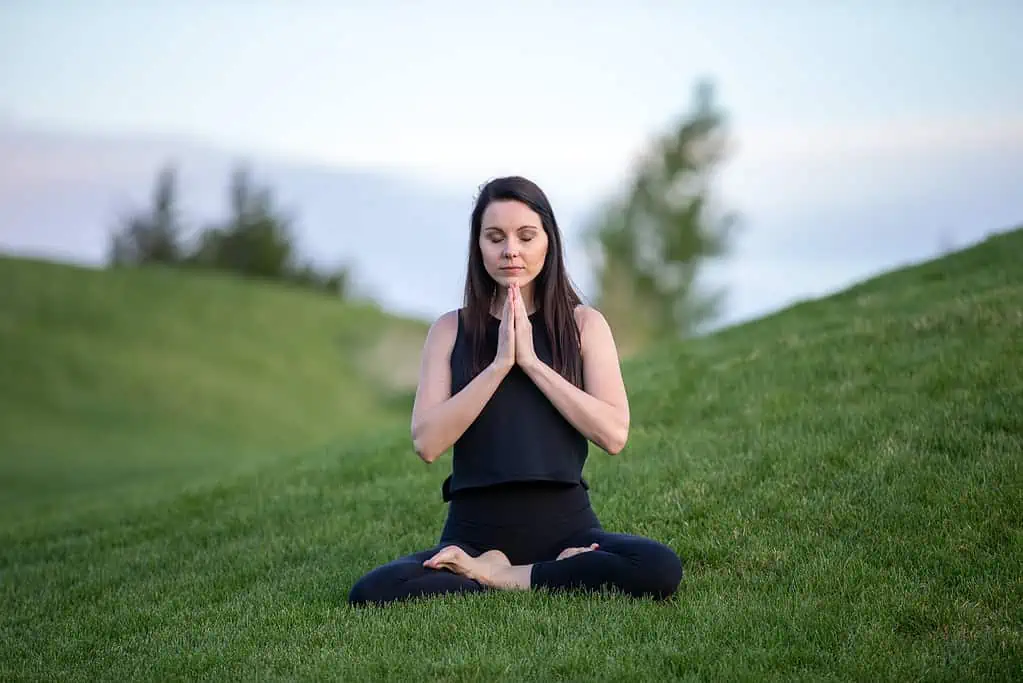
Lotus pose may be depicted as the standard meditation posture, but it is very challenging for many people as it requires high hip flexibility. Practicing this posture further improves flexibility, promotes good posture, calms the mind, and stretches the ankles and knees.
From an easy pose, lift the left foot and slowly move it towards the right thigh, placing it close to the groin with the sole facing up. This is known as the half-lotus pose.
To do the final version, release the right leg, grab the foot, and cross the shins to place the right foot on the left thigh. In the final position, both soles should face upwards, and the heels should be close to each other. If it is too painful, release the right leg and place it back under the left in a half lotus.
Tortoise Pose (Kurmasana)
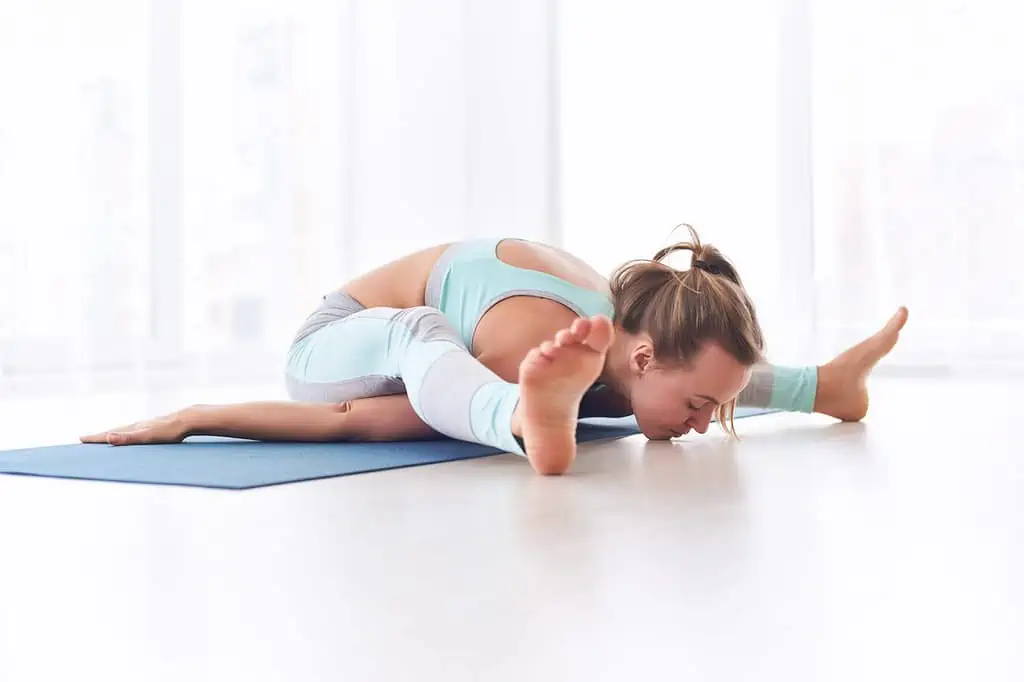
Tortoise Pose requires open hips and calls for flexibility in the spine and shoulders, making it one of the most challenging seated yoga poses. However, it has many benefits, including toning the abdominal organs, reducing low back tension and sciatica pain, and improving blood circulation.
From a straddle position with the legs wide and the spine straight, bend your knees slightly as you walk your hands forward between the legs. As you lower your upper body between your legs, slide your arms under the knees with the palms facing down. The full expression is to flatten the arms and torso to the ground with the legs extended.
Full Splits (Hanumanasana)
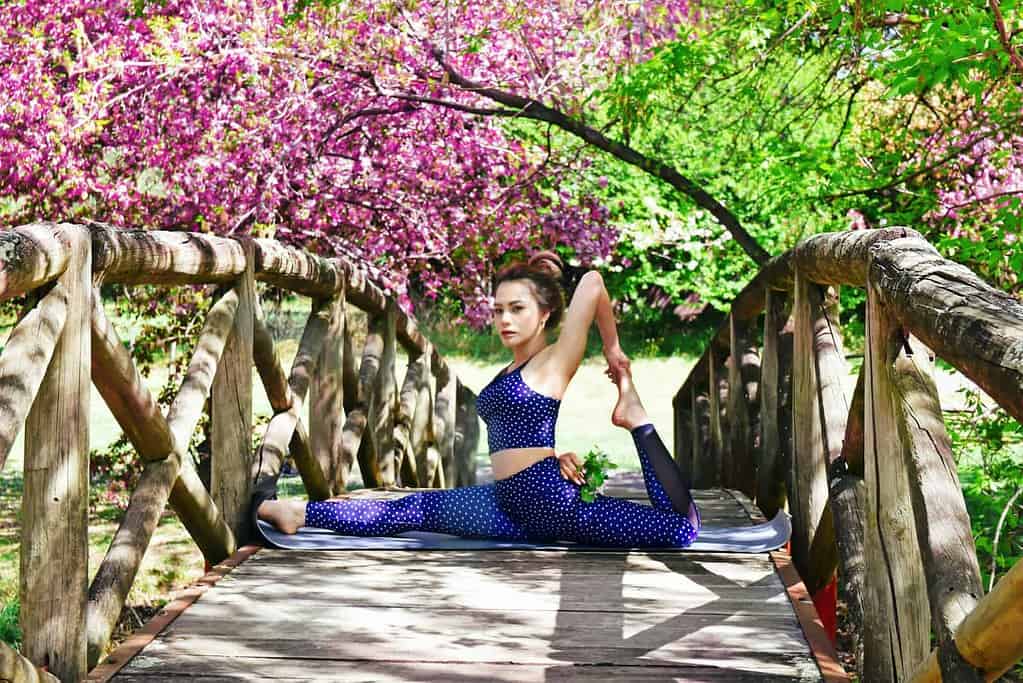
Hanumanasana, commonly known as full splits, is another challenging seated pose for many, as it requires significantly open hips and thighs. However, it has many benefits, including toning the legs, soothing menstrual cramps, and balancing the nervous system.
From a tabletop position, step the left foot between your hands. Next, walk the foot forward as you sink your hips and slide your right leg back, bringing the feet further away from each other. You can then flex the left foot to slide the heel along the floor, bringing the hips as close to the ground as possible.
If the sitting bones remain hovering above the floor, support yourself by placing a block under them.
Compass Pose (Parivrtta Surya Yantrasana)
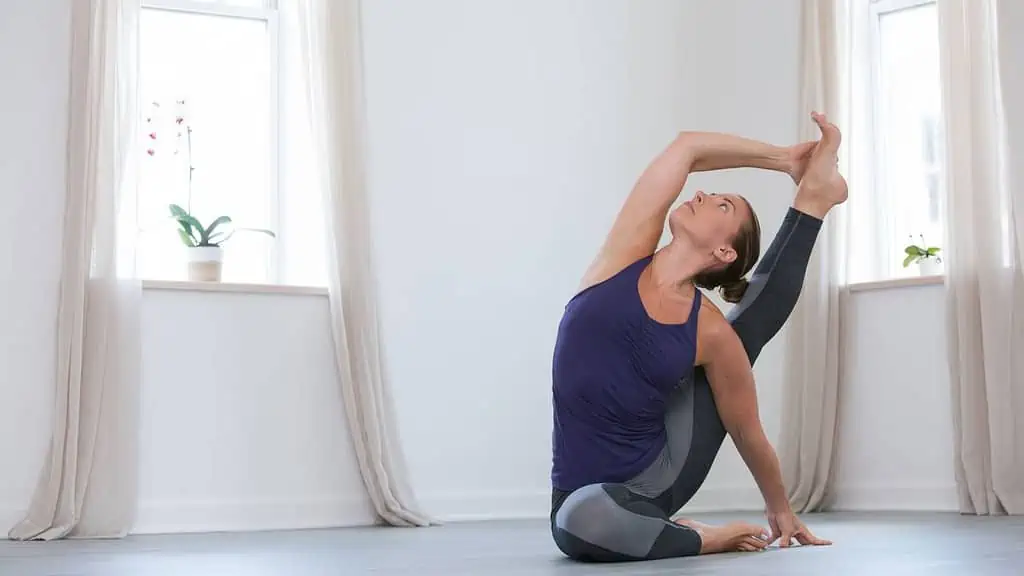
The compass pose is a more advanced version of the heron pose, giving an equally intense stretch to the hamstring as the splits pose. In addition, it stretches the shoulders, chest, and hips, strengthens the core, improves balance, and increases spinal flexibility.
From an easy pose, bend your left knee, hugging it to the chest. You can keep the right leg bent or extend it. Thread your left arm under your left leg, bringing your fingertips to the floor outside your left hip.
Lengthen your spine, then use your right hand to slide the inner left knee up your left arm. Then, holding the outside of the foot, slowly extend the left leg as you pull your right shoulder back to open the chest.
Tips For Practicing Seated Poses
As you can see, not all seated poses are a walk in the park. But a couple of things will significantly help you find the correct alignment and full expression of each one.
Sit On A Block
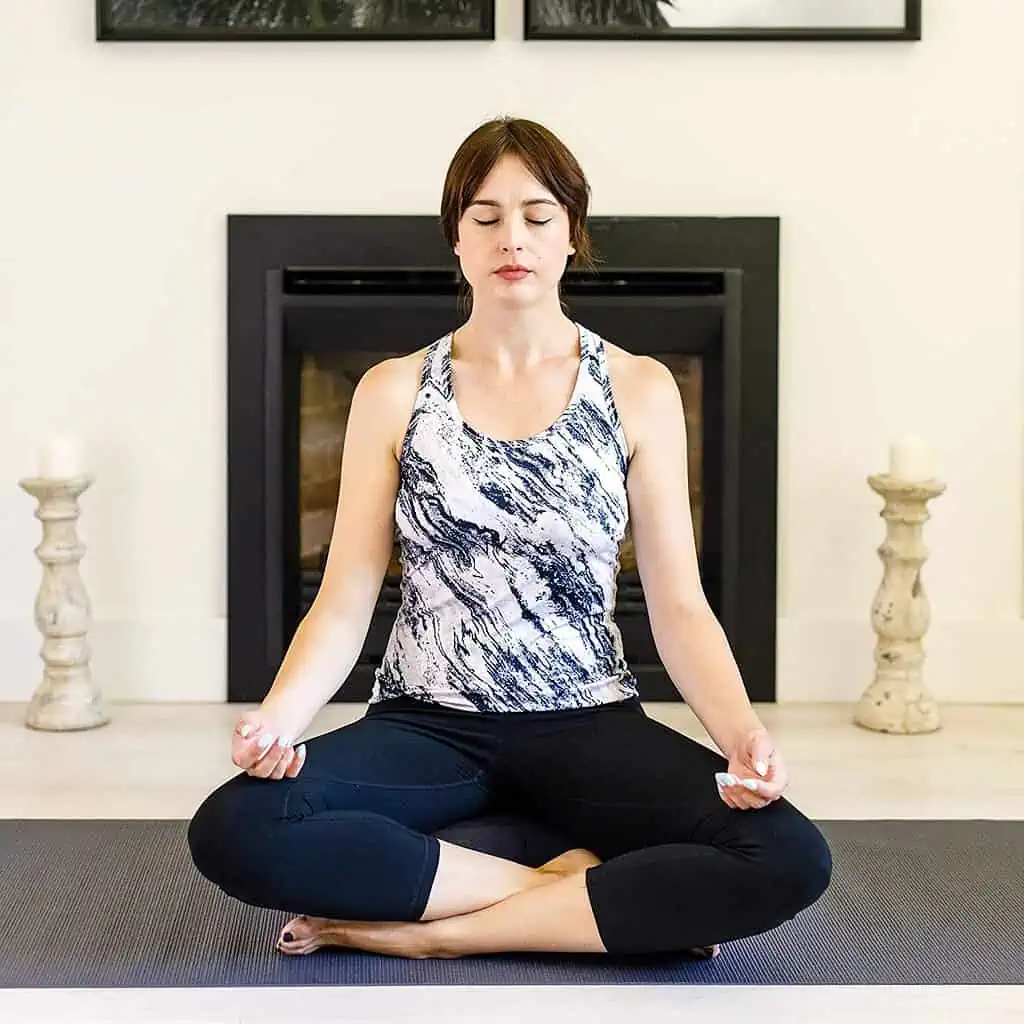
Many people with tight hips struggle to sit up straight due to tension in the lumbar spine. This leads to leaning back or hunching forward, which are incorrect postures.
The simplest yet most effective adjustment you can make if struggling with seated asanas is to place a yoga block under your sitting bones. Elevating your hips will ease the tension in your lower back, allowing you to find and maintain a straighter spine.
Sitting on a block will also help in any cross-legged position if you have sensitive knees or lack mobility in this joint. Moving your hips higher will bring your knees closer to the ground without the risk of injury.
Even if you don’t have tight hips or knee issues, you may still find it beneficial to sit on a small meditation cushion or folded blanket during seated asanas, especially if you hold them for a long time.
Move With Your Breath
The second key to mastering seated postures is to move with your breath. For example, use your inhale to find length in your spine, then move on to the exhale, whether it is folding forward or twisting.
In addition, your breath will help you move through tension when holding advanced poses like the splits or compass pose. Breathe slowly and deeply through the nose, directing the prana to where you feel the most tension. By focusing on this area for a few breaths, you might feel the muscles relax and open up more, allowing you to go deeper.
Final Thoughts On Seated Yoga Postures
Try some of these seated yoga poses if you want to work on your flexibility, improve your posture, or unwind after a stressful day. You can add them to your usual yoga practice or create an entire seated sequence for those days you can’t face another sun salutation or Warrior 2!


