Joanne Highland is a 500-hour certified yoga and barre fitness teacher. Originally from the central coast of California, she attended the University of Southern California, graduating in 2007 with a degree in music and a minor in health promotion.
Follow me:Instagram | LinkedIn | Personal Website
Jagpreet Kaur is a certified yoga instructor/therapist (Ministry of AYUSH, YCB, Govt. of India), nutritionist (from INFS), skilled marketing copywriter, and content writer. She is also an expert in pre-and postnatal care. Jagpreet seamlessly blends her knowledge of nutrition, yoga, and writing with a passion for spirituality that fuels her commitment to wellness, evident in her holistic approach and dedication to meditation.
Follow me:Instagram | LinkedIn
Published Date:
Estimated reading time:
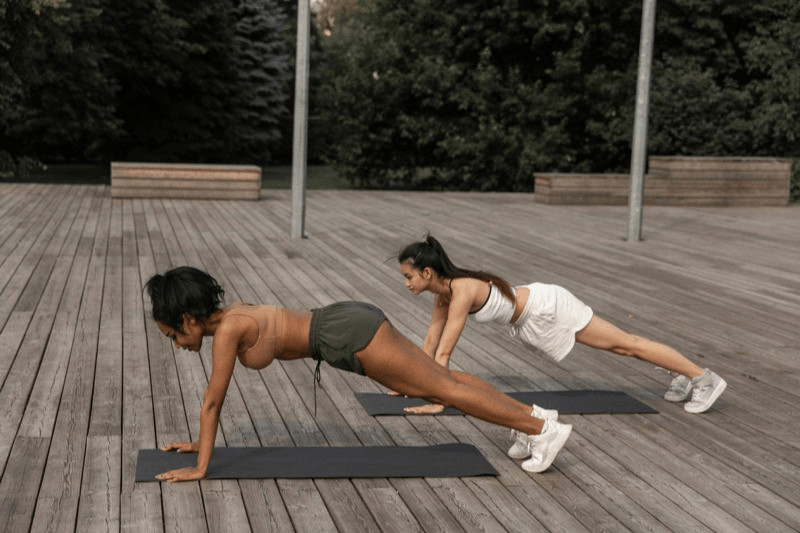
Plank Pose
Listen to this article:
Key Takeaway
Plank pose is a foundational pose that elevates your practice physically and mentally. To achieve the perfect plank, focus on proper alignment by ensuring your shoulders, hips, and heels are in a straight line, as detailed in this guide. Regular practice can significantly enhance core strength, stability, and overall fitness when integrated into your routine consistently.
Incorporate planks gradually; start with shorter durations and increase as you become stronger. Use them as transitions between poses or as part of a warm-up and strengthening sequences.
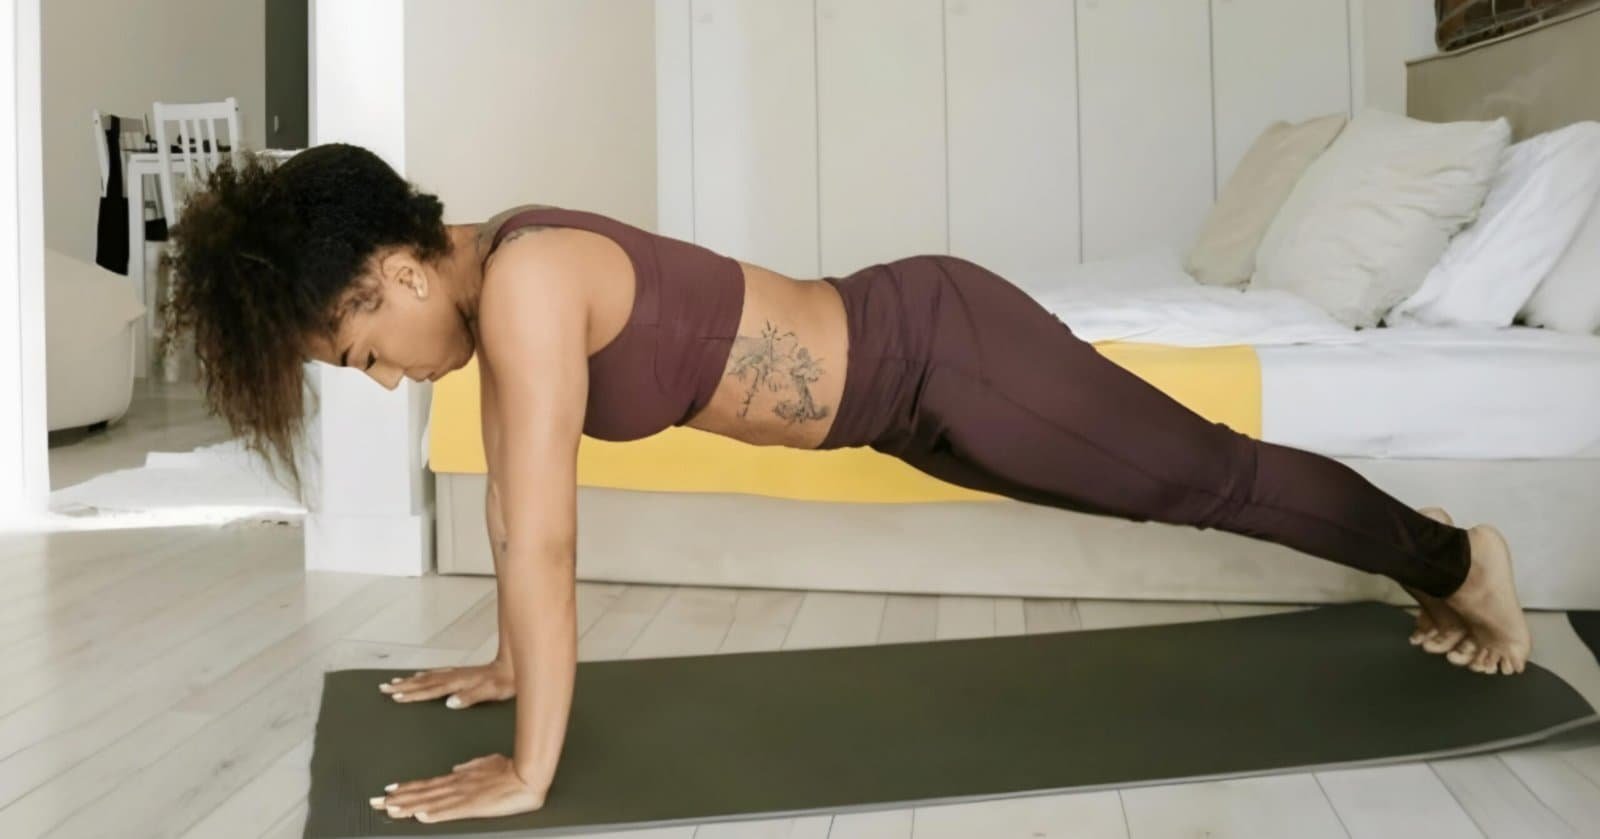
In modern yoga, there is no better representation of strength and stability than the all-powerful Plank Pose. It’s an iconic pose that even beginners may find familiar on the surface as it resembles a “push-up” position.
In yoga, however, we don’t just bring our bodies into the poses; we use the poses to bring awareness to the subtleties of alignment within our bodies. You might be familiar with the shape of Phalakasana, bringing your body into a straight line while pushing the floor away. But are you attuned to the nuances of proper alignment?
With this detailed exploration, beginners and experienced yogis alike will gain a new appreciation for this fundamental yoga pose. You’ll discover that it’s a workout for the body and a tool for building mental resilience.
Time Left:
00
:
00
:
00
HRS
MIN
SEC
Time Spent: %%TIMESPENT%%
Time expired. Sorry, you will not be able to continue with this quiz. Please opt-in to see the result.
SEC
HRS
MIN
SEC
SEC
Total Time
[SQBTimeSpent]
0
HRS
0
MIN
0
SEC
What are you most interested in learning about Plank Pose?
Where can we email you the results? Please enter details below.
This comprehensive guide covers all of the essentials about Plank Pose, including alignment, tips for getting the most out of your practice, and all the benefits that come with it. Keep reading!
Lorem Ipsum is simply dummy text of the printing and typesetting industry. Lorem Ipsum has been the industry's standard dummy text ever since the 1500s.
Continue
%%CATEGORY_TOTAL_PERCENT%%
%%CATEGORY_TOTAL_NUMBER%%
[CATEGORY_TOTAL_PERCENT]
[CATEGORY_TOTAL_NUMBER]
This is a common issue, so you're not alone! Keep reading to learn the ways you can modify the pose to take care of your wrists.
Lorem Ipsum is simply dummy text of the printing and typesetting industry. Lorem Ipsum has been the industry's standard dummy text ever since the 1500s.
It's possible this article will answer your questions, so keep reading! Then, feel free to leave us a comment if you still have questions about this pose. We're here to help!
Lorem Ipsum is simply dummy text of the printing and typesetting industry. Lorem Ipsum has been the industry's standard dummy text ever since the 1500s.
%%CATEGORY_TOTAL_PERCENT%%
%%CATEGORY_TOTAL_NUMBER%%
[CATEGORY_TOTAL_PERCENT]
[CATEGORY_TOTAL_NUMBER]
First, read this article in its entirety to brush up on your Plank alignment and knowledge. Then, you'll be ready for Sun Salutations!
Lorem Ipsum is simply dummy text of the printing and typesetting industry. Lorem Ipsum has been the industry's standard dummy text ever since the 1500s.
%%CATEGORY_TOTAL_PERCENT%%
%%CATEGORY_TOTAL_NUMBER%%
[CATEGORY_TOTAL_PERCENT]
[CATEGORY_TOTAL_NUMBER]
Retake
YOUR TOTAL POINTS
0
Watch our recommended steps for entering, holding, and exiting the pose.
Origins and Meaning of Plank Pose
Modern Roots
Given its popularity and importance in modern asana practice, you might think that Plank Pose originates in ancient yogic texts. However, this is a modern pose dating back to the 20th century with the rise of Hatha and Vinyasa yoga.
With the popularization of Vinyasa flow and Sun Salutations, Plank Pose has become one of the most recognizable yoga postures today.
Sanskrit Name and Symbolism
The Sanskrit name for Plank Pose is Phalakasana, stemming from the word phalaka, meaning “plank” or “board.”
The name reflects the appearance of the body’s position being akin to a sturdy wooden plank, in addition to the strength and solidity one aims to achieve while holding the pose.
Phalakasana is more than a physical exercise — it’s a foundation for building inner resilience and endurance. Just like how wooden planks are essential in forming the base of a house, Plank Pose lays down the groundwork for advancing in your asana practice.
Step-by-Step Guide to the Perfect Plank
You’ll encounter Plank Pose in many types of sequences and flow, and there are numerous ways to enter the pose. For simplicity’s sake, we will stick with the basics here, approaching Plank as a static pose as we break down its alignment details.
Begin in Table Top
Begin on your mat on your hands and knees in Table Top Pose. Align your knees directly underneath your hips, and place your hands under your shoulders.
Spread your fingers wide to create stability and evenly distribute your weight. Gaze down toward your mat, between your hands to keep your neck long.
Press the floor away with your palms and spread your shoulder blades wide across your upper back to properly engage the shoulder girdle.
Engage your abs by pressing your navel in toward your spine.
Move into Position
Keeping your upper body aligned and your abs engaged, step your right foot back. Extend your right leg behind you with your toes tucked.
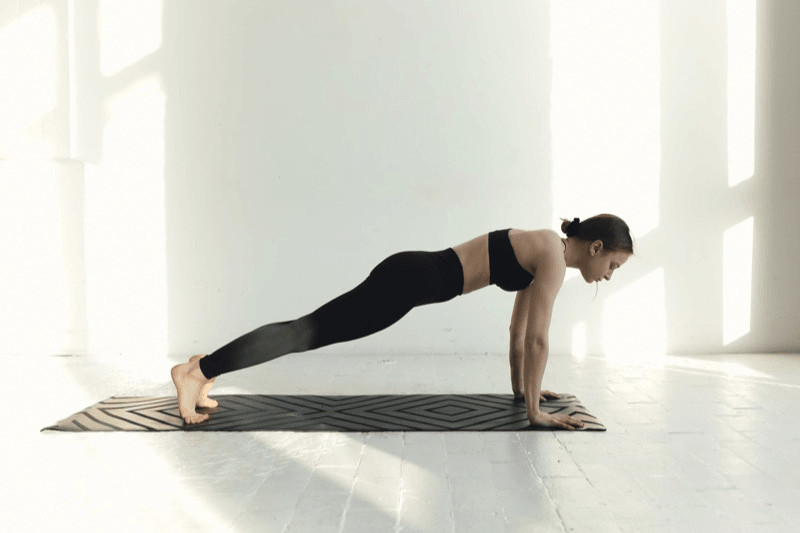
Step your left foot back, toes tucked. Your body should be in one long line from your head to your heels.
Your feet should be separated at a hip-width distance. Keep both knees straight and engage your thigh muscles as you reach your heels back.
Maintain a neutral position in your pelvis: your tailbone should be neither tucked under nor tilted up toward the ceiling.
Hold your Plank for 20-30 seconds up to a minute while maintaining natural breath flow.
Release and Rest
When you’re ready for a break, return to Table Top by lowering one knee at a time. Sit your hips back onto your heels in Thunderbolt Pose as you stretch your wrists, or bring your forehead to the floor in Child’s Pose.
If building strength and endurance is your goal, repeat 2 more rounds of static Plank holds, staying in the pose a few seconds longer each time.
Expert Alignment Tips
When done correctly, Plank is a workout for your whole body! However, correct alignment is nuanced and requires high body awareness and attention to detail.
Common Alignment Mistakes
Watch out for these common misalignments to get the most out of your Plank practice.
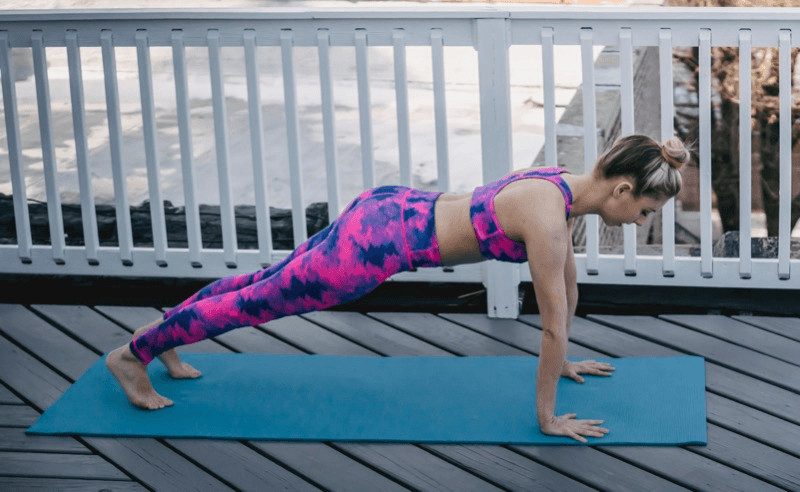
Sinking chest: Keep pressing the floor away while lifting up and out of your shoulder joints to keep your chest from sinking below your shoulders. Engage your upper back by widening your shoulder blades.
Locked elbows: Hyperextending your arms may cause joint pain. Try keeping a micro-bend in your elbows to ensure your muscles are engaged to support the joint.
Sagging or raised hips: This issue stems from a lack of core engagement and can strain your back. Engage your core muscles to keep your body in one straight line from head to heels.
Tilted tailbone: Sometimes, when trying to correct sagging hips, students tilt the tailbone up toward the ceiling, creating a curve in the lumbar spine. Instead, keep your pelvis in a neutral position.
Strained neck: If practicing in front of a mirror, you might be tempted to turn your head or look forward to check your alignment. However, keeping your head aligned with your spine is essential to maintain the length of your neck. To do this, fix your gaze straight down between your hands.
Plank Pose builds stability for virtually all other yoga postures, so attention to detail is crucial here!
Importance of Core Engagement
Properly engaging your core muscles is crucial in achieving a strong Plank Pose. Tighten your abdominals as if bracing for impact; press your belly button toward your spine while keeping your breath flowing.
Following these steps and incorporating proper alignment and muscle engagement will help you build endurance over time with practice. Even holding Plank for 30 seconds can have significant benefits — you’ll feel it throughout your entire body!
Plank Pose Contraindications
Plank Pose is a powerful exercise that strengthens many muscles. However, not everyone should do it. People with certain health conditions need to be careful. Individuals experiencing the following issues may be able to practice Plank with modifications only after consulting with their doctor.
Injury or recent surgery in the wrist, elbow, or shoulder joints: Avoid any weight-bearing postures that affect these joints until a medical professional clears you.
Recent abdominal surgery or hernia: Plank pose requires your abdominal muscles to be in top shape, so take your time to fully recover before trying this exercise.
Lower back issues: For people with chronic lower back pain or herniated discs, this pose may worsen your symptoms.
Osteoporosis: If you’re concerned about your bone health, planks might not be for you as they are a strong, weight-bearing pose.
High blood pressure: Holding this pose for longer durations may raise blood pressure temporarily.
Pregnancy and postpartum: The size of a late-term pregnancy belly may put too much strain on the lower back. After giving birth, new mothers may experience diastasis recti, a separation of the right and left abdominal muscles, and should start with a gentler core-strengthening exercise.
Modifications for Plank Pose
To accommodate different skill levels and physical conditions, here are several effective modifications for Plank Pose that can help you maintain alignment as your body strengthens.
Knees-Down Variation
If full Plank is too intense, start with your knees on the ground. This way, you can practice properly engaging your abdominals without putting unnecessary strain on your back muscles. In this variation, your body should be in a straight line from the top of your head to your knees.
You may also place a folded blanket under your knees for added comfort in this position.
Support with Props
Blocks: Placing blocks underneath the hands is a helpful accommodation for diverse body types, specifically for those with larger midsections.
Wall Support: To create more stability, set up your Plank Pose with your feet against a wall. Press your heels back into the wall to fire up your leg muscles.
Many people feel wrist strain during planks because there is considerable weight on their hands while the wrists are flexed. If this affects you, try these tips:
Spread your fingers wide on the mat and push down through your knuckles. This action helps distribute weight more evenly across your hands, which reduces wrist pressure.
Place your hands slightly in front of your shoulders to reduce the angle of flexion in the wrists.
Keep a micro-bend in your elbows to ensure all the muscles in your arms are engaged, which will lessen the strain on your joints.
Make fists with your hands and place your knuckles on the mat with the insides of your wrists facing each other. This eliminates any wrist flexion, keeping the joint straight.
If wrists still bother you after trying these tips, consider using Forearm Plank instead, where your forearms rest on the mat instead of your palms. As someone with sensitive wrists, I find this modification allows me to enjoy all the benefits of the pose without discomfort.
Variations to Level-Up Your Plank Pose
Ready for a challenge? The following advanced variations of the Plank Pose are designed to push your limits and enhance your balance and stability.
Single Leg Plank: When you feel solid and stable in your Plank Pose, try balancing on one leg at a time. Extend your right leg back, pointing your toes, and hold for several breaths. Lower your right leg down and switch, hovering your left leg for a few more breaths.
Elevated Legs: For a more intense upper body workout, place your feet on an elevated surface like the seat of a chair. This places more load on your arms and shoulders.
Using Plank in Your Asana Practice
Preparatory Yoga Poses
Before diving into Plank Pose, it’s vital to warm up. Focus on connecting to the core muscles, lightly engaging the arms, and mobilizing the wrists.
I always start with Table Pose to properly align my upper back and shoulders. Next, I transition into Cat and Cow stretches to connect with my core.
Then, I spend a few breaths in Downward-Facing Dog. This is a great way to prepare for Plank. Your hands are on the floor with the wrists in less severe flexion, allowing you time to prepare the wrist joint for bearing more weight in Plank.
Sequence Integration
Many people learn to flow through their planks as part of the Sun Salutation sequence. However, they are also effective as a static pose, held for several breaths to warm, tone, and strengthen various muscle groups.
Yogis who love handstands and other inversions often start with a few Planks to activate the core and arms before going upside-down.
Any way you can incorporate Phalakasana into your asana practice will enhance physical strength and stability.
Increase Time Gradually
If you’re just starting your planking journey, I recommend initially starting with 20-30 seconds. Then, gradually increase as your endurance improves, working up to a minute or more.
Consistency is vital; practice planking several times per week to see improvements.
Breath Connection
Breath can be an excellent tool for helping you build endurance in this pose. While holding a Plank, I prefer to focus on counting several breaths rather than watching the seconds ticking by.
When I focus on breathing deeply in this pose, I feel more connected to my entire body’s effort – it becomes more than just an exercise; it turns into meditative work.
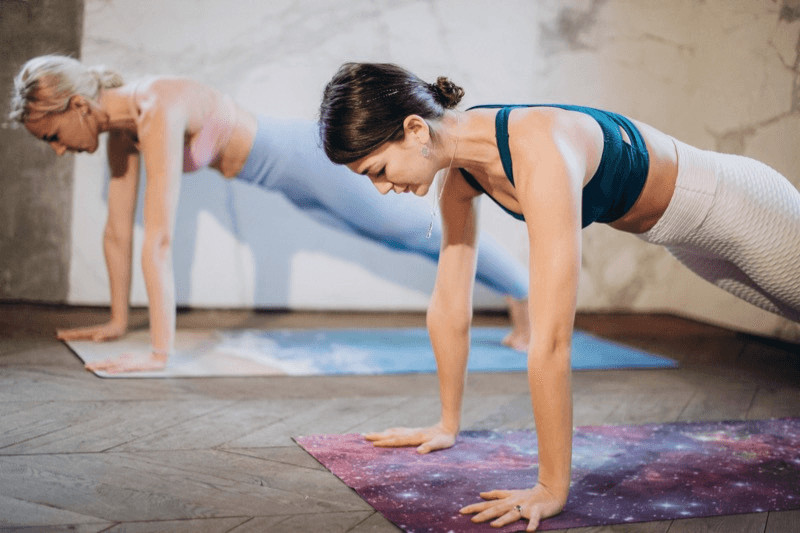
Plank Pose is a cornerstone of strength training that supports overall health. Its many benefits extend beyond simply building muscle tone. Here are notable changes you can experience when you add some planks into your regular asana practice.
Core strength: Planks are a great way to build core strength. This exercise targets the abdominal muscles and the back and hips. Strong core muscles are essential for all types of movement as they support your spine and contribute to back health.
Arm and shoulder strength: Your abdominals aren’t the only muscles getting a workout in Plank. Your upper back, shoulders, and arms also engage to support your
Improved posture: Planks help your posture by strengthening your abdominals and back muscles and training your body to maintain proper alignment in all activities.
Metabolic boost: Planks work the entire body, engaging multiple muscle groups simultaneously with isometric contractions. This means a higher calorie burn and increased metabolic rate.
Mental fortitude: Plank Pose can be as much a workout for your mind as for your body. When you think you’ve reached your limit, stay for just one more breath — you might surprise yourself with your capabilities! Consistency and discipline build confidence along with physical endurance.
Closing Thoughts
To me, Plank Pose is the epitome of strength and stability — literally and figuratively. This pose builds strong muscles while encouraging you to tap into your inner strength and resilience.
The next time you roll out your mat, approach Plank Pose with curiosity and mindfulness, exploring different variations and modifications to fit your body. Embrace Phalakasana as an opportunity for growth, not just in your yoga practice but as you persevere through life’s challenges.
Plank Pose can help improve posture and core strength.
Beginners can modify Plank Pose by lowering down to their knees.
You should arch your back in Plank Pose.
Frequently Asked Questions
What is Plank Pose in yoga?
Plank Pose, or Phalakasana, is a core-strengthening yoga pose that involves holding the body in a straight line parallel to the ground, supported by the arms and toes.
How can I modify this pose?
You can modify this pose by lowering your knees to the floor or practicing the pose on your forearms. This accommodates different fitness levels and physical limitations.
Who should avoid Plank Pose?
Individuals with shoulder, wrist, or elbow joint issues should skip this pose. People with poor bone health, high blood pressure, or those who are pregnant and postpartum should consult with a doctor before adding this exercise to their routine.
What are the benefits of practicing Plank regularly?
Regular practice strengthens core muscles, improves posture, enhances balance and stability, and can increase overall body strength.
How can I incorporate Planks into my yoga routine effectively?
Incorporate planks gradually; start with shorter durations and increase as you become stronger. Use them as transitions between poses or as part of a warm-up and strengthening sequences.


 2")
 3")
 4")


 7")


