
Sometimes having your world “turned upside down” can be a good thing. This is definitely the case with yoga inversions. If you’re looking for more energy or a midday pick-me-up, a yoga headstand is far better than an afternoon coffee. Here is a step-by-step guide to learning and teaching Sirsasana.
Contents
What are the benefits of adding a headstand to your yoga practice?
Inverted (upside down) poses improve circulation and boost the immune system by increasing the flow of white blood cells and lymph throughout the body. Not to mention, being upside down brings freshly oxygenated blood straight to the heart, leaving you feeling more energetic and focused.
On an energetic level, headstand positions help open the third eye chakra and bring more clarity to the mind. By resting all of your weight on your crown chakra, you are also increasing the life force energy that flows through the crown of your head. With increased energy, also comes increased body awareness and that’s where all of the benefits begin to show.
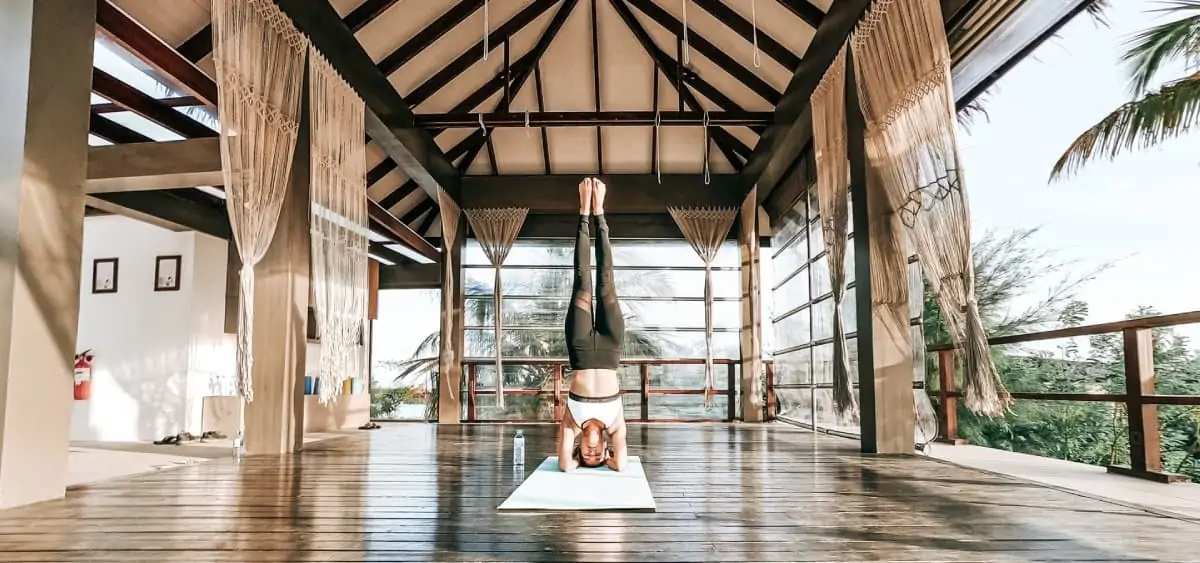
Sirsasana (headstand) is sometimes called the “King of Yoga Postures”. It’s a challenging and rewarding asana with many physical and spiritual benefits. Headstand builds core strength, improves balance, and increases upper body strength, but it can also be potentially dangerous if the pose is entered improperly.
Are Yoga Headstands Bad for Your Neck?
In recent years, many yoga communities have voiced concerns about the safety of Sirsasana. Some studios have abandoned the pose altogether.
The reality is, any asana can be unsafe if students are not properly guided by their yoga teacher. Yoga asanas have been around for thousands of years. Even elderly practitioners like BKS Iyengar (in his 90s) reportedly begin many morning yoga practices with a 30-minute Sirsasana pose.
While it takes many years to master an inverted pose like headstand, balancing and strength-building are worthwhile endeavors at any age or skill level. Yoga teachers have the unique opportunity to coach, assist, and motivate their students to safely explore this rewarding asana.
How to Get into Headstand

Traditionally, there are three different forms of the Headstand posture.
These forms include:
Tripod Headstand – where you have three points of contact with the mat. Your two hands, and the crown of your head.

Supported Headstand – where your forearms are also connected to the mat. This takes some pressure of the neck and spine when your body is upside down.

Full Headstand – this one is for experienced yogis, where only the crown of the head is connected to the floor. This pose is only to be done after you have mastered both the tripod headstand and supported headstand.

The standard modern cues for teaching supported Sirsasana are usually along these lines:
- Start on your yoga mat in child’s pose with bent knees and take a few deep breaths.
- Rise your body up and place your forearms on the floor. Your elbows should be shoulder width apart and your hands interlaced with one another, forming a triangle shape and creating a stable base.
- Begin to straighten your legs and make your way up into dolphin pose.
- Place the crown of your head between your arms and slowly shift more weight into the head and neck.
- Cradle the back of your neck with your clasped hands.
- Activate your core muscles and keep your core engaged by drawing your belly button in toward your spine.
- Walk your feet in as close as you can to your elbows.
- Slowly lift one foot up toward the sky. When you feel your weight move forward into your head, activate your abdominal strength to lift your other leg off the floor too.
- You can either slowly bend your knees and come into a tuck variation of a headstand, or with straight legs, float your feet up to the sky.
- Stack the knees, hips, and shoulders above one another in a straight line.
- Hold here and breathe.
- If you are ready to release, bring your legs back to the floor with control. Return to your childs pose, extend your arms straight out in front of you and let the spine decompress.
Seems easy enough. But then, the nuances come in. How much weight should be on the head? How much weight should be on the forearms? How do you protect your neck and prevent injuries?
Some yogis insist on the Pareto principle: 80% of the weight on the forearms and 20% on the head. Others say that there is no precisely “correct” way of distributing your weight in Sirsasana because everyone’s bodily proportions and ergonomics are different. There are also many different ways to enter and exit the pose. While we cannot control anyone’s body proportions, yoga teachers can clearly control how to cue a pose.
How to Keep your Students Safe

As a yoga teacher, it is your job to teach a diverse range of students how to approach asanas in the safest and most advantageous way for their practice. Perhaps it should go without saying that certain students- particularly those with disc generation, osteoporosis, or other spinal issues- should avoid Srirasana.
To avoid injury in your yoga classes, ask students about their current state of health, and past injuries before you start to cue headstand position for everyone.
For yogis with solid spines, strong cores, and an eagerness to learn, achieving a headstand could be that “breakthrough” moment for their yoga practice. Thankfully, there is some useful science on headstand safety that will help yoga teachers and students alike.
The Science of Headstand Safety
In 2014, researchers at the University of Texas Austin decided to investigate the weight loading and force on the head in 3 different types of yoga headstands. In the study, 45 yogis who were experienced with headstands were asked to perform 3 different entry/exit strategies. Researchers measured the peak force on the heads, loading rate, center of pressure, and cervical alignment of each yogi in each type of headstand.

3 ways to get into a Yoga Headstand
- Pike-up and pike-down (both legs straight at the same time)
- Curl-up and curl-down entry and exit (both legs bent at the same time)
- Split-leg entry and exit (legs bent one at a time)
How to Achieve a Slower Entry and More Neutral Spine
The study found that the “symmetrical extended leg position” (pike-up and pike-down) method caused the lowest load rate on the head and neck. However, these yogis were intermediate to advanced in their headstand practice. This pike method of entry is usually the most challenging for beginners.
Their data also showed that this straight-legged (pike-style) headstand created slower entry and exit rates into and out of the pose. The cervical spine also remained more neutral when the legs came up straight together, rather than curling or scissoring them upward.
Clearly, we can teach headstand entries in many different ways, but it appears that keeping the legs straight and together is the safest method, leading to only 40-50% of the body weight in the head and neck, rather than 80% in the other headstand types.

Keep Legs Straight and Lift Them Together
Moral of the story? The head and neck stay safer when the core is strong enough to lift the legs straight up together. With this method, about 45% of the body weight is distributed through the head and neck, and this should not cause a problem for healthy people. We shouldn’t instill fear about practicing yoga headstand, but we should definitely approach it safely.
Always end in a child’s pose
If you want to avoid injury (particularly to the back of your head, your spine and your neck), you always want child’s pose to follow your headstand pose. This is because ‘counter-yoga-poses’ create the opposite movement to the deep pose you just did.
A yoga class is usually full of other poses that counteract each other. For example forward and backward bends, and resting poses after inversion poses. A good yoga instructor will cue these poses together in a yoga practice because it creates whole-body balance and safety.
How to Teach Headstand Safely in Yoga Classes
Some yoga teachers will say it isn’t safe to teach headstands to beginner or elderly students. Ultimately, it is up to you to decide what you feel comfortable with in your classes.
The force of pressure on the head and neck is significant, but it is not going to fracture or injure the neck on its own. This pressure is distributed throughout the bones, muscles, and soft tissues in the head and neck.
But it is important to be sure that students understand the risks and benefits of Sirsasana before they attempt it. For students who don’t want to attempt it, always offer an alternative such as holding a dolphin pose.
Who Should Not Do Headstand?
Headstands are complex and not for everyone. Anyone with these issues should avoid inversions:
- People with neck injuries of any kind
- People with osteoporosis
- People with glaucoma, as inversions increase the blood pressure in eyes
- Pregnant women, due to the risk of falling
- Children under 7, as their skulls are still soft
- People with heart problems
- People with regular migraines
- People who lack upper body and core strength (as these are essential muscle groups needed for headstand pose)
Use a Thick Blanket or Pad
If you are practicing on a wooden or hard floor, it is vital to use a thick folded blanket or pad to protect the head during Sirsasana. Place the blanket directly under the top of your head. Be sure that the blanket will not shift during the inversion nor intrude on proper arm placement.
Start with Dolphin Pose to warm-up your upper body
Dolphin pose is the best way to prepare for inversions by strengthening the shoulders, stretching the upper back, and activating the core.
- Start on your knees with knees hip-width apart
- Place clasped hands on the floor, creating a “V” with the forearms
- Check that elbows are shoulder-length apart and a couple of inches in front of the shoulders
- Stack your wrist bones and firmly press elbows and forearms into the floor
- Lift your pelvis and press your heels toward the floor as if in a Downward Dog
- Make sure your shoulders are not compressing toward your ears
- Gaze at your feet and lift your hips to the sky
- Allow your head and neck to hang freely between your shoulders
You can try a few variations in this pose to help you build strength and stamina in the shoulder girdle and abdominal muscles. Here are some ideas:
- Slowly straighten one leg up toward the sky and practice coming to the tippy toes of the grounded foot. For example, the right leg extends tall, trying to straighten the right knee, as you keep your left foot down on the ground. Take five breaths here and then swap sides. This helps to open up the hips.
- Try to walk your feet in as close as possible to the elbows, as this shifts your body weight forward into your head and shoulders. From here, practice bending the right knee, then the left knee to slowly get your knees tucked up into a floating position, feet floating off the floor.
- To build strength in the upper arms. Practice going from dolphin to downward dog and back. As you bend and straighten your upper arms, you will feel your arms getting stronger.
- Just hang out here! Add a dolphin pose to the end of each yoga practice and you’ll be floating up to headstand in no time.
Use the Wall
Some yogis insist that practicing a headstand against the wall is a distraction, however, others have found a wall super helpful when trying to overcome the mental hurdles of this inversion. Practicing against a wall will help you find your balance and courage to progress in the posture.
- It’s very important that you don’t lean against the wall- simply use it as a safety net in case you start to fall
- Start with the clenched hands 3-6 inches from the wall
- Place the head and follow headstand entry cues as usual
- Only use the wall as a guide to catch you
- Avoid arching the back or coming out of alignment trying to touch the wall with your feet
*You can also use the wall to practice a right angle “L” headstand as pictured below

Emphasize Core Exercises
Core strength is the root of all inversions (and all stability in general). A strong core will prevent injuries and make entries/exits that much easier. Prepare students with a variety of core exercises for the upper and lower body such as:
- Plank
- Side Plank
- Shifting Dolphin Plank (pull forward)
- Boat Pose
- Twisted Chair Pose
- Revolving Side Angle
Tips for Teaching Headstand Pose
At the end of the day, teaching Sirisasna is all about emphasizing strength, activation, and courage. Make it fun for your students and don’t be afraid to demonstrate your own failures, catch their legs when they fall, and use humor to lighten the mood. You can also offer a few bonus tips to make students feel supported and prepared:
- Avoid eating for 2-3 hours before practicing Sirsasana (or any inversions)
- Thoroughly warm up the body before attempting headstand, especially the arms, and core
- Actively push shoulders away from the ears to prevent excess pressure on the neck
- Keep hips aligned with shoulders and do not arch the lower back
- Squeeze the abs and glutes continuously
- Ensure that the very crown of the head is touching the ground (not the forehead or base of the head)
- Flex and engage the legs as you lift, keeping them as straight as possible and shifting weight into the forearms
Yoga Headstand FAQ
What is a Yoga Headstand good for?
Spending time with your body upside down has all the benefits of building strength, draining the lymphatic system, and feeling great for your brain! Plus, it builds physical strength and stamina in your muscles.
How long does it take to do a headstand in yoga?
Practice and patience are going to be your friend when you want to get into Headstand. If you chat to a lead teacher, they may be able give you some tips to build your strength for headstand. You can also support yourself with yoga props such as blankets, bolsters and yoga blocks for the shoulders to help you build confidence.
Over time and with consistent commitment, you’ll be able to go from just floating one knee off the floor, to dancing with your feet in the sky in headstand pose.
Have you successfully taught headstands to a beginner? What was the most useful cue for them? We’d love to know in the comments below.
Happy headstanding! Namaste.