
Listen to this article:
Key Takeaway
Regular yoga practice, focusing on hip and hamstring flexibility, can lead to mastering the splits, with benefits including improved mobility, stress relief, and alleviation of back pain.
If you’ve always dreamed of doing the splits, regularly practicing certain yoga poses could be your secret to up-leveling your flexibility.
Here is everything you need to know about working toward a full split pose, including the best poses, flexibility tips, and a 30-day challenge.
Contents
- 1 What is Hanumanasana?
- 2 Benefits of the Splits
- 3 Can everyone do a split?
- 4 Different Types of Splits
- 5 10 Best Yoga Poses to Prepare for Splits
- 5.1 Standing Forward Fold (Uttanasana)
- 5.2 Standing Wide-Legged Forward Fold Pose (Prasarita Padottanasana)
- 5.3 Downward-Facing Dog (Adho Mukha Svanasana)
- 5.4 Low Lunge (Anjaneyasana)
- 5.5 Lizard Lunge (Utthan Pristhasana)
- 5.6 Pyramid Pose (Parvsottanasana)
- 5.7 Pigeon Pose (Eka Pada Rajakoapotasana)
- 5.8 Happy Baby (Ananda Balasana)
- 5.9 Seated Wide-Legged Forward Fold (Upavistha Konasana)
- 5.10 Half Split (Ardha Hanumasana)
- 6 Try a 30-Day Splits Challenge
- 7 Split Safety + Most Common Flexibility Mistakes
- 8 How to Do Full Splits (Hanumanasana)
- 9 Yoga Split FAQs
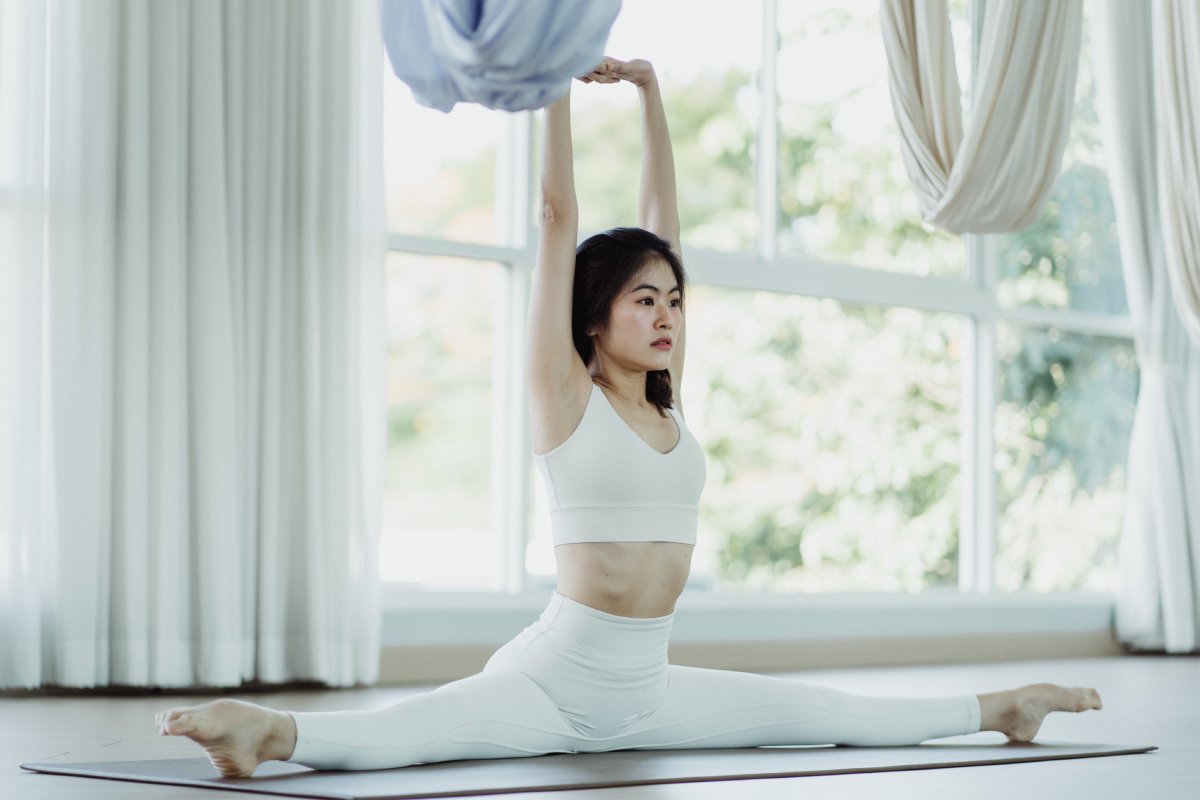
What is Hanumanasana?
Even for the most experienced yogis, mastering the full splits (Hanumanasana, or monkey pose) is undoubtedly challenging. It requires some major hip opening and hamstring lengthening.
Although this pose may seem out of reach for many, it’s not impossible. We even have a trick to figure out if your body can handle a full split or not.
Training for the splits is incredibly beneficial for hip mobility, hamstring flexibility, helping with back pain, and even reducing stress.
However, this practice is not for the impatient or faint of heart. You have to be consistent and gentle with yourself to avoid injury and maximize the benefits of the splits.
 + Top 10 Yoga Poses yoga splits 1")
Benefits of the Splits
The full splits are more than just a fun cheerleading move or a way to show off in the studio. Like all yoga poses, ancient yogis practiced Hanumanasana (Monkey Pose) for its abundance of benefits.
Improves Mobility in Hip Flexors
The most obvious benefit of Hanumanasana is opening up the hip flexors. This small group of muscles near the front of your hips affects the movement of your knee, upper legs, and pelvic area.
Your hips are at the base of your spine, and therefore their flexibility affects your entire body. Tight hip flexors can lead to low back pain, poor posture, glute pain, and even neck tightness.
Practicing the splits can drastically improve your hip mobility, resulting in more fluidity and less pain in your daily movement.
Stretch Hamstrings
Tight hamstrings are another very common complaint amongst yogis, athletes, or people who spend a lot of time sitting. These long muscles run along the back of your legs, from the upper thigh down to the calf.
Like your hip flexors, inflexible hamstrings can have negative impacts that radiate both upward and downward. Regularly stretching out your hamstrings and working toward the splits could help relieve knee pain, back pain, foot pain, and/or issues with your posture.
Relieve Lower Back Pain
The lower body bears the weight of so much stress (both physically and mentally). Low back pain, in particular, affects over 570 billion people globally.
Could practicing the splits be one of the secrets to alleviating the burden of low back pain? Absolutely! When practiced properly (without force or improper spinal alignment), the splits help open up your tailbone, hip flexors, and lower spinal column to relieve tightness in your back.
Counteract Sedentary Lifestyle
Stiff hips are a very common problem for anyone living a sedentary lifestyle. If you sit at a desk all day, the benefits of the splits are compounded in your favor: you can relieve tension in your hips, release back strain (including sciatica pain!), improve joint mobility, and stretch out the hamstrings.
Reduce Stress
Yoga philosophy has even hypothesized that we carry a lot of our daily stress and emotions in the hip region. Perhaps this is why you feel such relaxation and release when you deeply stretch and open your hips.
Hanumanasana helps relieve stress and calm your mind.
Can everyone do a split?
Technically, most yoga poses are achievable for the majority of the population; however, some people simply are not built to do the full splits.
While tight hamstrings and inflexible hips can be the major reasons why someone can’t get into the splits, these challenges can be overcome with consistent, intentional stretching. On the other hand, you cannot change your bone structure.
Try this simple exercise to see if your body is built for the splits:
- Find a wall, fence, or tabletop about the same height as your hips
- Stand adjacent to the table or fence with your feet facing forward (parallel to the structure)
- Lift one leg with the knee straight and place your foot on top of the structure
- Point the toe up
- See if your legs create a 90-degree angle; if so, you should be able to do a split after enough flexibility training
- If your legs cannot make a 90-degree angle, your hip bones may be placed at a different angle that won’t allow your body to do the splits
The splits are an intense pose for the hips, legs, groin, and back. Flexibility is a big part of the equation, but there are many other factors at play. Regardless of your bone structure or flexibility level, stretching for the splits could be beneficial for everybody.
Avoid trying the splits if you have:
- a hip injury or hip replacement
- arthritis or other joint problems
- muscle tears (especially in the groin or hamstring)
- a back injury of any kind
- problems with your hamstrings
- pelvic dislocation
- herniated or slipped discs
The moral of the story? Most people can do the splits, but not everyone! Injuries or your intrinsic anatomy are more likely to stop you than a lack of flexibility. Either way, hip-opening yoga poses can help you enjoy the benefits of greater hip flexibility.
Different Types of Splits
There are technically three main types of splits: right splits, “straddle” or middle splits, and left splits.
The right split and left split are simply opposite variations of the Hanumanasana pose. Both involve one leg straightened forward and one behind so that the body is oriented completely to the side.
Although one side of your body is probably more flexible than the other, you should always hold each side for an equal amount of time to ensure proper balance. Practicing only one side could result in uneven flexibility and problems with spinal equilibrium.
Middle or “straddle” splits (Upavistha Konasana) are seated poses that bring the legs out to each side with the body and pelvis oriented straight ahead. A middle split pose will access different areas of the hip flexors and the adductor muscles in the inner thighs.
Straddle splits are typically the most challenging and often require mastering standard (right and left) splits first.
You can use similar poses to prepare for all types of splits; just remember to work toward a balance of flexibility on all sides of the body.
10 Best Yoga Poses to Prepare for Splits
Preparing for the splits is a gradual process that requires patience and consistency.
Research shows that stretching for 10-15 minutes per day (ideally holding each stretch for 10–30 seconds, then relaxing, then going a little deeper) is more beneficial than an hour-long session once per week or holding a stretch for a long period.
Studies have also found that “bouncing” is not beneficial for improving deep flexibility.
Thankfully, this makes preparing for the splits fairly simple for busy people.
Quickly add these poses to the end of your workout, run, or yoga session to prepare your body for the splits!
Standing Forward Fold (Uttanasana)
 + Top 10 Yoga Poses yoga splits 2")
This classic calf stretch is the perfect way to open up your hamstrings and release tension in the lower back. Don’t worry if you can’t touch your toes- a yoga strap or yoga block can help bridge the gap between the floor and your hands.
- Begin in Mountain Pose (Tadasana) with feet hip-width apart
- Inhale your hands up
- Exhale and swan dive downward, hinging at the hips
- Keep the abs and quads engaged as you fold forward over your legs
- Let your head hang down with the neck loose
- Reach your hands to the floor, or grip behind your calves or ankles
- Inhale upwards to create a flat back
- Then exhale back down, trying to push your glutes toward the ceiling and pull your chest closer to your thighs
Optionally, you can place blocks underneath your toes to create a deeper stretch in the back of the legs.
Standing Wide-Legged Forward Fold Pose (Prasarita Padottanasana)
 + Top 10 Yoga Poses yoga splits 3")
Folding forward with your legs extended wide is especially important for preparing for middle splits, but it also opens your hamstrings and hip flexors for the standard splits as well. This pose has the added benefit of opening up your inner thighs, releasing the lower back, and calming your mind.
- From Mountain Pose, step your feet out toward the sides of the mat, about 3 or feet apart
- Inhale and lift through your torso
- Place your hands on the hips as you engage your core, exhale, and hinge forward (*do not allow your back to curve or round)
- Place your hands flat on the floor, or top of yoga blocks for added length
- Fold your torso down between your legs and release your neck downward
- Adjust your stance wider or closer as needed, using the outsides of your feet to anchor to the ground
- Activate your inner thigh muscles and lengthen your spine with your glutes reaching up toward the sky as you sink deeper
- After 30-60 seconds, bring your hands back to your hips, micro bend your knees, and inhale to lift back to standing with your core engaged
Downward-Facing Dog (Adho Mukha Svanasana)
 + Top 10 Yoga Poses yoga splits 4")
One of yoga’s most infamous poses, Downward Dog is the best way to lengthen your hamstrings and warm up your pelvis in preparation for the splits. The light inversion improves blood flow and helps you feel more clear. Add a little bit of motion to this pose by “walking the dog” as you alternate lifting the heels of each foot.
- From a Forward Fold, step your feet back one at a time to bring your body in an upside-down ‘V’ shape
- Press your heels toward the floor as you lengthen your sit bones toward the sky
- Press your index fingers into the floor as you roll your shoulder blades down toward the center of your back
- Allow your neck to relax between your shoulders
- On each inhale, relax a bit, and on the exhale, press back to deepen the pose
Low Lunge (Anjaneyasana)
 + Top 10 Yoga Poses yoga splits 5")
This basic pose stretches your groin, quads, and hips to prepare them for deeper hip-opener poses.
- From Downward Facing Dog, step your left foot between your hands
- Keep your right foot elevated on the ball of your big toe, heel up and pressing toward the back wall
- Feel your front quad and hip flexor opening as your left leg bends into a 90° angle between your hands
- Optionally, drop your back knee
- On an inhale, rise with your hands overhead and look up, lunging deeper into the left hip
- Repeat on the right side
Lizard Lunge (Utthan Pristhasana)
 + Top 10 Yoga Poses yoga splits 6")
Similar to a Low Lunge, this deeper hip opener brings your body even closer to the floor to deeply stretch tight hips and work toward the full range of hip motion.
- From Low Lunge, shift your front foot to the outside of your shoulders so both of your hands are on the same side of your leg
- Optionally lower your back knee to the floor and rest the top of your foot on the mat
- On an inhale, lengthen your spine
- On an exhale, drop down to one elbow and then the other, keeping your hands flat on the floor and shoulders aligned with the forearms
- Feel your hips sinking toward the ground as your inner thigh opens and your knee moves slightly outward
- Inhale to ease out of the pose and then exhale to go a little bit deeper
- Hold for 30-40 seconds
- To release, move back into Low Lunge and repeat on the other side
Pyramid Pose (Parvsottanasana)
 + Top 10 Yoga Poses yoga splits 7")
To continue lengthening the hamstrings in preparation for the splits, this balance-challenging pose involves folding over the front leg as you stretch the hips.
- From Low Lunge, straighten the front leg with the toes facing forward
- On an inhale, your core to stand up straight with your arms overhead, palms inward
- Drop the heel and adjust the back foot to face forward at 45° angle as if in a Warrior Pose
- On an inhale, square the hips forward and lengthen your spine
- On an exhale, hinge over the front leg, bringing your nose toward your knee
- Release your forehead toward your shin and feel your navel engage back toward your spine
- Allow the front hamstring to stretch as the knee pushes backward (but avoid locking out the knee)
- Optionally, you can place blocks underneath your hands to lighten the stretch and prevent too much rounding in your back
- To exit, inhale and engage your core, then use your leg strength to come up
- Repeat on the other side
Pigeon Pose (Eka Pada Rajakoapotasana)
 + Top 10 Yoga Poses yoga splits 8")
Practicing external hip rotation is crucial for making progress toward the front splits. Pigeon pose is a great follow-up to Low Lunge and Lizard Lunge because it also stretches out the glute while activating the hip flexors.
- From the Table Top position (all fours), bring your right knee toward your right wrist
- Slowly let your knee fall outward toward the ground as the bottom of your right foot opens to the ceiling near your left hip
- Slide your left leg back and allow the top of the foot to rest on the mat
- Work to square your hips, bringing your left hip forward and right hip back
- Feel the right hip externally rotate and open as you breathe for 15-30 seconds
- On an inhale, lengthen the spine, and then exhale to walk the hands forward and fold over the externally rotated hip for 15-30 seconds
- Engage the core and push on your hands to sit back up and lift your hips back to Table Top
- Repeat on the other side
Happy Baby (Ananda Balasana)
 + Top 10 Yoga Poses yoga splits 9")
This yoga pose brings even deeper attention directly to the hip joints as you use your hands to pull your feet and knees outward and down. This is a deep groin-opening pose in a lying down position, so be sure you have squat-proof leggings for this one!
- Start laying flat on your back on the mat
- Inhale and bring your legs into your stomach
- Grab the outsides of your feet with your hands or use a strap to loop around each foot
- Slowly open your knees wide and begin lightly pulling them toward your armpits
- Feel your inner thighs open as you work your shins perpendicular to the floor
- Create resistance between your feet and your hands as you pull your knees outward and down toward your shoulders
- Exhale the tailbone to the floor and lightly rock back and forth to massage the lower back
Seated Wide-Legged Forward Fold (Upavistha Konasana)
 + Top 10 Yoga Poses yoga splits 10")
A wide-legged forward fold has all the benefits of the standard forward fold while simultaneously targeting the inner thighs. You can move your torso over one leg, to the middle, and over to the side to prepare for both middle splits as well as front splits. If you are tight in the inner thighs, use a bolster or yoga block.
- From a seated position, spread your legs out wide in a ‘V’ shape
- Keep your feet flexed as you lean forward onto your elbows, feeling the inner thighs begin to open
- Keep your sit bones anchored on the ground as you hinge your upper body toward the ground
- Hold and breathe for 15-20 seconds, then optionally move down onto your forearms or bring your torso toward the floor
- If you have flexible hamstrings, you may be able to fold directly over each leg or down the middle. If you have less mobility, a yoga strap could tremendously help improve your progress while maintaining alignment
- Try to keep the back as straight as possible and avoid rounding by engaging the core and keeping a micro bend in the knees
Half Split (Ardha Hanumasana)
Once you have gone through these poses, your hips and hamstrings should be thoroughly stretched. Half split is the final step toward really lengthening your front leg’s hamstrings while resting the back leg.
Practicing evenly on both sides will come in handy as you delve into the full expression of Hanumanasana.
- From Downward Dog, inhale and bring your right foot forward between the hands, bending the right leg into a 90°angle
- Exhale and let the left knee rest on the floor with the top of the foot relaxed on the mat like you are in a Low Lunge
- Press both your hands into the floor as you slowly straighten the right leg and bend forward over the knee as your hips move toward the back of the room
- Exhale and let your head rest on your knee, holding for 4-6 breaths and working to straighten the front knee
- Repeat on the other side
Try a 30-Day Splits Challenge
Practice these 10 poses every day for 30 days to see if you can reach full splits in a month! If you dedicate yourself to just 10-15 minutes of stretching each day, you can experience profound improvements in flexibility in this time frame. Better yet, challenge yourself alongside a yogi friend to hold each other accountable.
Split Safety + Most Common Flexibility Mistakes
Needless to say, attempting the splits without fully preparing your body could be pretty dangerous. No yoga pose is worth tearing a muscle or overextending your tendons.
The most common flexibility mistakes include:
- Forgetting to warm up: Stretching cold muscles is never a good idea. Practice your splits after a yoga class or workout to ensure that your ligaments and muscles are fully warmed up.
- Forcing a stretch: Stretching can be slightly uncomfortable, but it should never be painful. Avoid forcing your body to stretch too far, too fast. Pushing yourself into the splits before you are ready could do a lot more harm than good. Achieving the full splits is a process that requires patience and intention. Don’t force it. Instead, opt for gradual improvements each week.
- Forgetting to breathe: All of yoga goes back to syncing the breath (pranayama) with movement. Achieving the splits requires special attention to your breath, especially during deep stretches. Inhaling and exhaling help maintain your focus while oxygenating your blood. Use inhales to lengthen and exhales to deepen each stretch.
- Stretching 1 hour per week: When working toward the splits, consistency is more important than the length of time you spend stretching. Static stretching (holding stretches for prolonged periods) for an hour each week is unlikely to get you toward your goal. Instead, try to do 10-15 minutes of split preparation per day to see the most improvements.
- Ignoring pain: It should go without saying that yoga or stretching should never be outright painful. If you experience a sharp pain while preparing for the splits, STOP immediately. The discomfort of stretching should be mildly uncomfortable but never cause shooting or ripping pains. Don’t push yourself too fast too far or you might end up with an injury.
How to Do Full Splits (Hanumanasana)
Preparing your body for the splits with other yoga poses is the quickest way to open your hips and hamstrings. Next, you can begin sliding into the pose to get a feel for where you need to focus on stretching more. Before you reach the full splits, you may have to hover above the ground for a little while.
- Start in Downward Facing Dog with your pelvis squared forward
- Inhale and step your right foot forward between your hands
- Drop your left knee to the mat and roll the left hip slightly forward and out to externally rotate
- Bring your fingertips to each side of the front knee and slowly begin sliding the front foot forward
- Allow your pelvis to drop downward and engage the core to lift your pelvis
- Maintain a neutral spine as much as possible (avoid arching back)
- Imagine pulling your left hip forward and right hip back to keep the hips squared
- Hold for 10-12 breaths and release by rolling to the side or re-bending the knee and moving back into Downward Dog
Yoga Split FAQs
How long does it take to do the splits?
Depending on your flexible routine and dedication to the challenge, you may be able to enjoy a full Hanumanasana in just 30 days. The secret to mastering the splits is 10-15 minutes of daily practice using yoga poses that prepare for the splits. Your tendons need time to adjust to new lengthening and positions, so this process cannot be rushed.
Is it healthy to do the splits?
Practicing the splits is great for flexibility, hip mobility, joint health, reducing stress, alleviating back pain, and cultivating balance. Maintaining range of motion is especially important as you age. However, it is very important to properly prepare your body before attempting the splits. Forcing yourself into a split position could result in severe injury.