
Key Takeaway
Dolphin Pose (Ardha Pincha Mayurasana) is a comprehensive asana that strengthens the entire body, particularly the shoulders, while improving flexibility and preparing for advanced inversions.
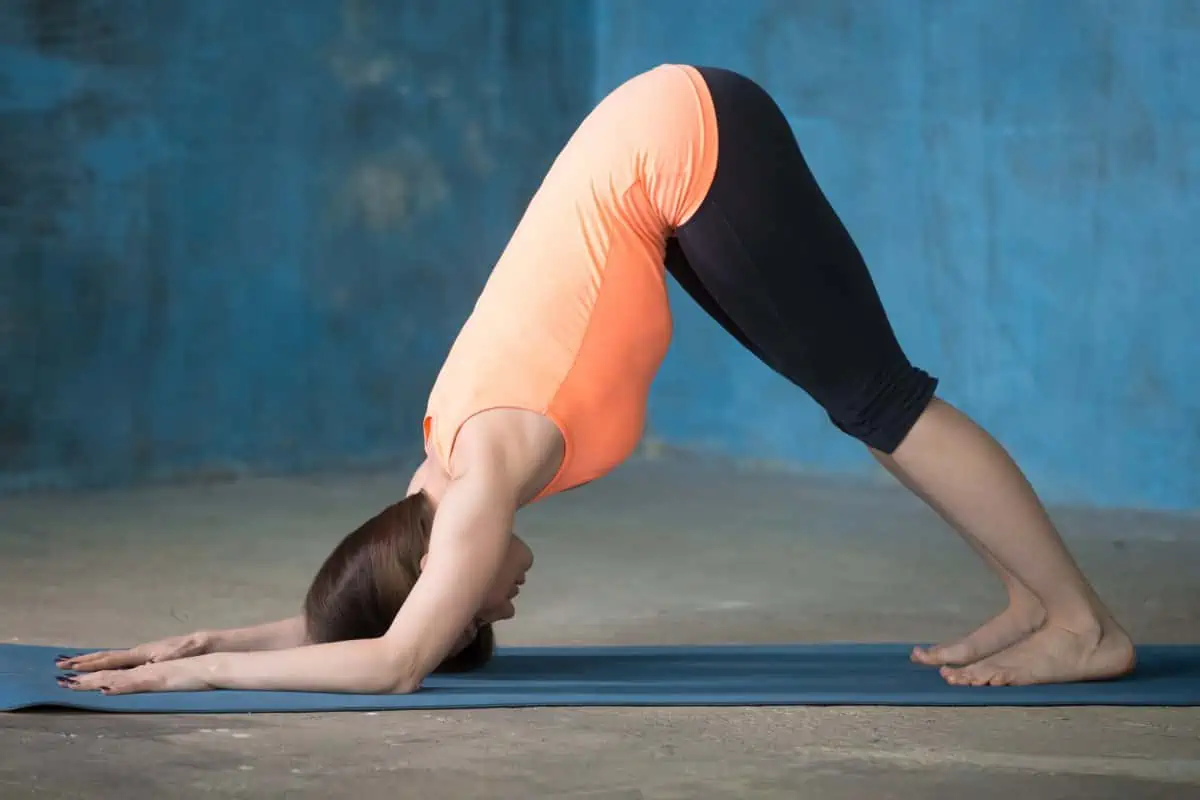
Gaining strength and flexibility are often cited as popular reasons for beginning a yoga practice. If there’s one well-rounded pose that checks both of these boxes (and more!), it’s Dolphin Pose!
Technically categorized as an inversion (any pose with the head upside down, below the heart) this asana will get your whole body working and energized. You might hear this pose called by its traditional Sanskrit name, Ardha Pincha Mayurasana (meaning half feathered peacock pose) or, less commonly, Catur Svanasana (quarter dog pose).
Dolphin is a versatile asana that enhances your yoga practice in various ways. In many different styles of yoga, Dolphin Pose might be included in a flow, or held for several breaths in order to build strength and endurance. It is also commonly used as a warm-up or to build strength in preparation for Forearm Stand and other advanced forearm balancing poses. For yogis with sensitive wrists or carpal tunnel syndrome, Dolphin is a wonderful alternative for Downward Facing Dog Pose.
Keep reading as we break down all the benefits and ways to practice this all-around awesome yoga pose!
Contents
Dolphin Pose Benefits
Physically speaking, Dolphin Pose is remarkably comprehensive: you’ll strengthen and lengthen your whole body, from your heels to your head. However, the real star of the show in Dolphin Pose is the shoulder girdle: the collar bones, shoulder blades, and surrounding muscles.

Improved Upper Body Strength
The main target of Dolphin Pose is to strengthen and stabilize the shoulders. As the most mobile and least stable joint in the body, shoulder strength is important in order to prevent injury, especially as you age. Luckily, practicing yoga poses like Dolphin will increase strength and stability in your shoulder girdle, which support good posture and helps maintain optimum range of motion.

Working the muscles of the shoulder girdle will also open the shoulders and upper back, to help reverse the adverse postural effects (rounded shoulders and back, “text neck“) many people experience while seated in front of a computer for many hours each day. Dolphin pose lengthens the spine and allows the neck to relax, helping you release tension built up throughout a sedentary day.
Building strength in the upper body is essential for mothers-to-be. New mothers commonly experience neck and shoulder pain related to the physical work required of caring for an infant: think of the frequent feedings, or transferring the baby into and out of a crib or car seat. Practicing prenatal Dolphin Pose will help build physical strength in the upper arms and back to support new mothers in their “fourth trimester.”
Additional Benefits of Dolphin Pose
Besides building upper body strength, here are some other positive effects of Dolphin Pose, making this a wonderfully well-rounded asana:
- lengthens the leg muscles, especially the hamstrings and calves
- strengthens the core
- promotes easier breathing by opening the chest
- stimulates vital body organs in the abdomen to aid digestion
- brings increased blood flow to the brain which helps relieve stress, reduces fatigue, boosts mental clarity, and can improve symptoms of mild depression and insomnia
- increases endurance and strength in the whole body
- builds confidence to work up to more advanced inversions
How to Practice Dolphin Pose

Dolphin Pose is a multi-functional asana: you can use it to build strength and endurance when held statically, or as part of a yoga flow. One reason why Dolphin Pose works so nicely in a yoga sequence is the variety of ways from which you can enter and exit the pose. Below, we’ve detailed a few different ways you can get into Dolphin Pose (however, if this is a new asana for you, we recommend starting with the first option, beginning in Table Top).
From Table Top (All Fours)
Getting into Dolphin Pose from Table Top is a good strategy for setting up correct alignment, which is especially helpful if you are just learning this pose.
- Begin in a Table Top position, on all fours. Align your knees directly under your hips.
- Lower yourself down, placing your forearms on the floor, a shoulder width apart. Your elbows should be aligned directly underneath your shoulders. Keep your forearms parallel to one another; your middle fingers should point directly forward.
- Tuck your toes. Pull your lower belly in and up to engage your abdominal muscles.
- Ground your inner wrists firmly to your mat as you press the forearms into the floor.
- With your toes tucked, slowly straighten your legs, taking your hips skyward as you do in Downward Facing Dog.
- Keep your knees bent at first, paying attention to your spinal alignment: tilt your tailbone slightly, taking your sitting bones toward the sky to create length in the spine.
- With your forearms actively pressing down, lift up and out of your shoulder joint, away from the floor. Draw your shoulder blades down and spread them wide across your back (this will help keep your chest lifted, rather than sinking down between your shoulders).
- Knit your lower ribs together to keep your core muscles actively engaged. Keep your neck relaxed.
- You may choose to stay here, with your heels lifted, knees slightly bent, and stance soft. To deepen your Dolphin Pose, continue on with the following steps.
- Maintain length in your spine as your slowly straighten your legs and press your heels toward the floor. Once your legs are straight, pull up gently on your kneecaps to engage the thigh muscles and squeeze your inner legs toward your midline.
Important Alignment Check! If your upper back rounds as you do this, go back to the previous step and remain in Dolphin with knees bent and heels lifted. Check the tilt of your pelvis: if your hamstrings are tight, it’s likely your tailbone will tuck slightly when you straighten your legs. Back off a bit, bending your knees, and take your sit bones toward the sky. - Once you have arrived in your fullest expression of Dolphin Pose, you may hold it anywhere from a few breaths to a full minute.
- To exit Dolphin Pose, gently lower your knees to the floor and rest a few breaths in Child’s Pose.
From Downward Facing Dog
You can also enter Dolphin Pose directly from Downward Dog, which gives your upper arms a good workout as you lower your elbows and forearms to the floor. Here’s how:
- Begin in Downward Dog, with your entire body in the shape of an upside-down V. Your hands should be separated by a shoulder width, and your feet should be at a hip width distance between them.
- Keep your lower belly pulled in and up; maintaining core engagement will help you lower yourself to the floor with control.
- Feel your arm muscles (biceps and triceps) activate as your slowly lower yourself down to gently place your forearms on the floor. Keep your elbows hugging toward your midline as you lower down, with your forearms parallel to one another.
- Bring awareness to your spine and pelvis: keep your sitting bones pointing toward the sky as you move from Downward Dog to Dolphin.
- Follow the same specific alignment cues as detailed above, maintaining openness in the upper back, and length in the spine.
Up For a Challenge? Try to reverse this motion, and move back into your Downward Dog. Press away from the floor to straighten your arms.
From Forearm Plank
This transition from Forearm Plank to Dolphin Pose will give your entire core an extra workout. Try it out!
- Begin in Forearm Plank, with your forearms on the floor and shoulders directly over your elbows. Your legs should be extended behind you, feet separated at a hip width distance and heels stacked over the toes.
- Feel your shoulder blades spread wide across your upper back. Pull your lower belly in to engage your abdominal muscles and begin to lift your hips.
- Press the forearms firmly into the floor and begin to tiptoe your feet closer to your upper body, bringing yourself into the upside-down V shape of Dolphin Pose.
- Once you are in the correct body position, remember to check your alignment as detailed above, and make any adjustments necessary to maintain optimal posture (for example, bending the knees slightly to keep the spine straight).
Each of these ways to enter Dolphin Pose offers a distinct perspective of the posture. Try out each one, and notice how your experience differs each time.
If you prefer audio and video instructions, watch this Dolphin Pose tutorial:
Contraindications
Dolphin Pose is typically safe for most yoga students to practice, and is appropriate for all levels, especially since it is easily modified. However, in certain specific medical situations, you should skip Dolphin Pose until cleared by a medical physician. These include:
- Recent or current shoulder injuries or surgery.
- Back or neck injury
- High blood pressure – practice with caution
Dolphin Pose Modifications and Variations
There are many options to modify your Dolphin Pose, whether you’re looking to make it more accessible or a bit more challenging. No matter what level you are in your yoga practice, there is a version of Dolphin Pose that will work exactly for you!
Modify Your Dolphin Pose with Yoga Props

You can use a yoga block to bring awareness to your alignment and muscle engagement. Hold a block between your hands to practice keeping your forearms parallel; or, try squeezing a block between the inner thighs to give your legs an extra workout.
A folded blanket can be useful in a couple of ways: place it under your forearms and elbows if you plan to hold Dolphin pose for a longer time; or, try a folded blanket underneath the heels to support the feet (but remember, it is not necessary for your heels to completely touch the floor!)
Vary Your Body Position
If you are pregnant (2nd or 3rd trimester), have a weak lower back or weak knees, practice Dolphin Pose with a wider stance and keep the knees bent.
To build up strength in weak shoulders, try a supported version of Dolphin Pose against a wall. Stand 2 or 3 feet from a wall, facing it. Hinge at your hips to come into a half forward fold. Reach your arms forward and place your palms and forearms against the wall, as they would be on the floor in regular Dolphin.
Want to work towards a forearm balance? Come into your fullest expression of Dolphin Pose, then tiptoe your feet closer to your upper body. As you bring your feet closer, your hips will also move forward to be in a more vertical line with your shoulders (rather than at a diagonal). Hold your core engagement and lift your right leg up. Hold for a breath or two, then lower your leg down with control and try the other side.

Preparatory Poses to Warm Up for Dolphin
Dolphin Pose uses the whole body, and calls for equal parts strength and openness. Each of these preparatory poses will help focus your attention on specific areas of the body used in Dolphin Pose.
Standing Forward Bend

Practice this hamstring stretch to open the backs of your legs in preparation for Dolphin.
- Stand with your feet at a hip width distance and ground down through the four corners of your feet.
- As you inhale, reach your arms up and grow taller through the crown of your head. With your exhale, dive forward and bring your hands towards the floor.
- Let the crown of your head hang and keep your neck relaxed. If your hamstrings are tight, you can keep your knees slightly bent.
- Take a few easy breaths; then, either return to standing, or move on to your next pose.
Puppy Pose

You might have difficulty getting into or holding your Dolphin Pose if your shoulders are tight. Puppy Pose will help open your shoulders and chest.
- Begin in a Table Top position, with your knees directly under your hips and hands placed under your shoulders. Keep your navel drawn in and up so your deepest core muscles are engaged.
- Walk your hands forward, keeping your arms straight, and bring your forehead to the floor.
- Let your shoulder blades drawn together and allow your chest to sink down towards the floor.
- Hold here for several breaths, then walk your hands back in towards your knees and return to Table Top;.
Downward Facing Dog Pose

Downward Dog will help you lengthen and open the entire back side of your body before progressing to Dolphin. For a refresher in correct alignment of Downward Facing Dog, check out our Down Dog pose breakdown!
Forearm Plank

Use this pose to wake up your shoulders, activate your core, and practice correct arm alignment, as your arms are in the same placement in Dolphin Pose.
- Begin in a Table Top position. Lower yourself down to your forearms, with your elbows aligned underneath your shoulders and your middle fingers pointing directly forward.
- Pull your navel in and up to engage your core. Step your right foot back, extending your leg behind you; then, step your left foot back.
- Stack your heels over your toes and pull up on your kneecaps to engage your thigh muscles.
- Keep your body in a straight line, hips level with your shoulders. Gaze down so your head stays aligned with your spine.
- Try to hold your Forearm Plank for at least 30 seconds, then gently release your knees down to your mat and take a rest in Child Pose.
Follow Up Poses
Your choice of follow up pose may depend on how you choose to use Dolphin Pose in your yoga practice. For example, if you have held Dolphin pose to practice strength and endurance, you might choose a counterpose that helps relax your upper back, shoulders, and arms. On the other hand, Dolphin Pose might be your warm up for a more advanced asana like a forearm balance. Here are a few ideas for you to try!
Child’s Pose
After holding your Dolphin Pose for several breaths, let your upper body relax with Child’s Pose. To give your arms a rest, you can lay them next to your body with your palms facing up. For step-by-step instructions and correct alignment, view our Child’s Pose tutorial page here.
Bridge Pose

This a perfect counterpose option following Dolphin Pose, as it opens the front side of the body — especially the torso and hip flexors. For a reminder on proper Bridge Pose alignment, visit our pose guide!
Forearm Stand (Pincha Mayurasana)

Once you are able to hold your Dolphin Pose for a solid minute, try taking it a step further by playing around with a forearm balance! Here’s how to set yourself up for success, using a wall for a bit of extra support:

- Place your mat with the short end against a wall. Come into Dolphin Pose, with your fingertips a foot or two away from the wall.
- Lift your heels and tiptoe your feet as close to your elbows as possible. Shift your weight slightly forward, so that your hips are more or less stacked over your shoulders.
- Gaze slightly forward, between your hands. Lift your right leg straight up, bringing it into a straight line with your hips and shoulders.
- Then, bend your left knee slightly and press off the ball of the foot; bend your left knee to to tuck your foot in, the bring it back down to the floor. Try a few of these tiny hops to feel your center of gravity.
- Now, try to press off the ball of your left foot and hold your balance. When you feel stable, extend your left leg up to meet your right. Since you have the wall in front of you, you don’t need to worry about falling over yourself into a backbend. If your legs come forward into the wall, simply work backwards, bringing one leg off of the wall at a time to re-establish your balance.
For an excellent demonstration on how to work your way into Forearm Stand, watch this video:
Dolphin Pose is a fantastic strength builder and warm up for many other inversions like Scorpion Pose and even Headstand. For more ideas of advanced inversions to practice after Dolphin, check out these 11 Inspiring Advanced Poses!
Common Questions About Dolphin Pose
Why can’t I get my heels to the floor in Dolphin pose?
If your hamstrings or lower back are tight, it’s likely your heels will not touch the floor in Dolphin Pose. However, there’s nothing wrong with this! Remember that the intention of Dolphin Pose is to keep the spine long, chest open, and shoulders wide — your legs do not have to be completely straight, nor do your heels ever have to touch the ground.
How long should I hold Dolphin Pose?
To build strength for Forearm Balance or other inversions, try to hold Dolphin Pose for 10-15 breaths, or at least one minute. If you’re moving through Dolphin as part of a yoga sequence, follow your natural breath or the directions of your yoga instructor.
What is the main difference between Downward Facing Dog and Dolphin?
The alignment for Down Dog and Dolphin are quite similar, in that they both focus on lengthening the spine and opening the back side of the body. The main difference is that Dolphin is practiced on the forearms, bearing more weight in the shoulder girdle, while Down Dog is practiced with the hands on the floor and arms extended.