
Key Takeaway
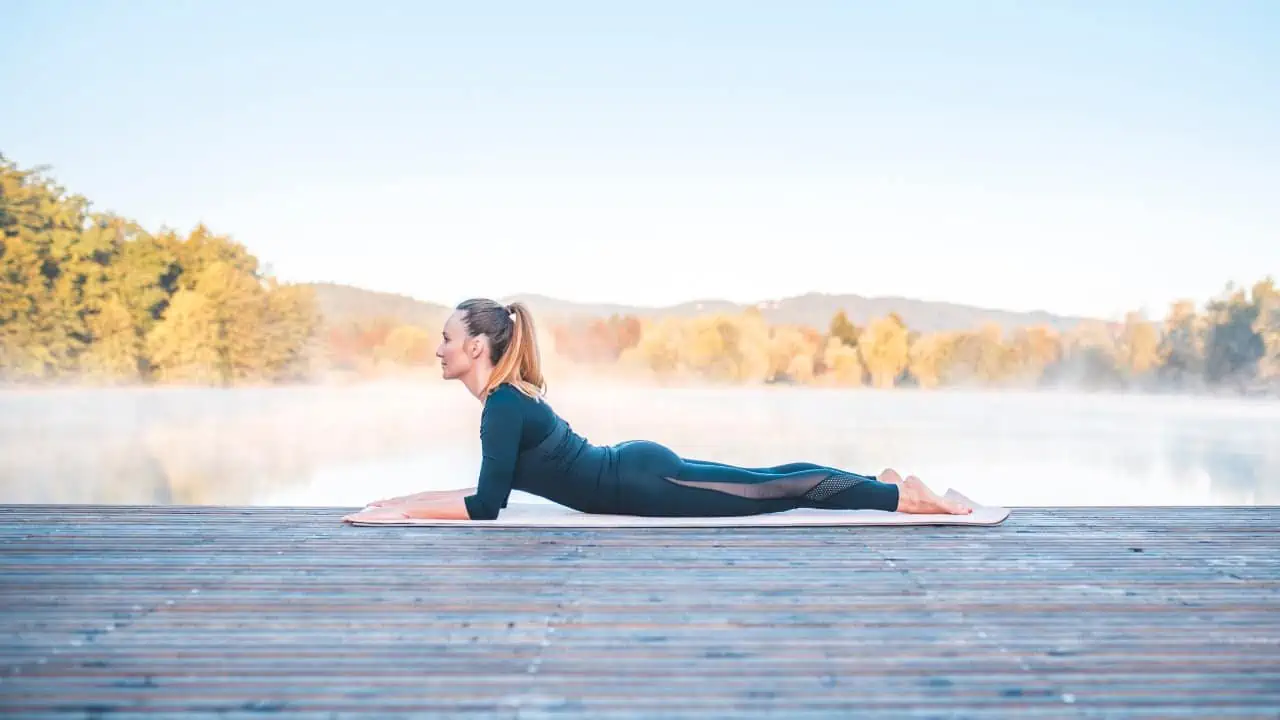
Sphinx Pose (Salamba Bhujangasana) is a gentle backbend that stretches the spine, strengthens the back, opens the chest, and calms the mind, making it a beneficial practice for both physical and mental well-being.
| SPHINX POSE | |
|---|---|
| Alternate name: | Salamba Bhujangasana |
| Difficulty level: | Beginner |
| Pose category: | Backbend |
| Muscle groups: | Erector spinae (back) Latissimus dorsi (back) Trapezius (back) Rhomboids (back) Serratus anterior (chest) Pectoralis major (chest) Deltoids (shoulders) Triceps (arms) |
| Physical benefits: | Increases flexibility in the spine, strengthens the back and shoulders. |
| Therapeutic applications: | Back pain, Anxiety |
| Preparatory poses: | Child's Pose (Balasana) Cobra Pose (Bhujangasana) Downward-Facing Dog Pose (Adho Mukha Svanasana) |
| Counterposes that follow well: | Child's Pose (Balasana) Downward-Facing Dog (Adho Mukha Svanasana) |
| Chakras activated: | Heart Chakra (Anahata Chakra) |
| Most helpful prop: | —Proper Form, Variations, and Common Mistakes sphinx pose 1") Folded blanket under hips - supports lower back, enhances comfort. See latest price |
Hey there, yogis! Ready to channel your inner sphinx and stretch out your spine? Let’s dive into the magic of Sphinx Pose!
As a yoga teacher, I’ve seen the amazing benefits of Sphinx Pose (Salamba Bhujangasana) firsthand. It’s a gentle yet powerful backbend that can work wonders on your spine, shoulders, chest, and even your mental state. But let’s be real – it can also feel a little awkward at first, right? Don’t worry, we’ve all been there.
In this article, we’ll break down the step-by-step instructions for Sphinx Pose, and I’ll share some common mistakes to avoid, modifications to try, and even some fun variations to spice up your practice. Plus, we’ll go over some important precautions and contraindications to keep you safe and healthy.
Whether you’re a seasoned yogi or just starting out, Sphinx Pose is a wonderful addition to any practice. So let’s get ready to unleash our inner sphinx and dive into this pose together!
Watch our recommended steps for entering, holding, and exiting the pose.
Contents
Benefits of the pose
—Proper Form, Variations, and Common Mistakes sphinx pose 2")
Sphinx Pose, or Salamba Bhujangasana, is a gentle yet powerful pose that can bring a multitude of benefits to your body and mind. Here are just a few:
- Stretches the spine: the pose gently stretches and lengthens the spine, helping to relieve tension and improve flexibility in the neck, back, and hips.
- Strengthens the back: By engaging the muscles of the back and shoulders, Sphinx Pose can help to build strength and endurance in these areas, improving your posture and reducing the risk of injury.
- Opens the chest: It can help to open up the chest and improve breathing, which can be especially beneficial for those who spend a lot of time sitting or hunched over a computer.
- Calms the mind: As you focus on your breath and lengthen through your spine in the Pose, you may find that your mind starts to calm and your stress levels decrease.
- Reduces anxiety: By reducing stress and calming the mind, Sphinx Pose can also help to reduce feelings of anxiety and promote a sense of inner peace.
Overall, it’s a great asana for improving flexibility, building strength, and promoting relaxation and mental clarity. Whether you practice it on its own or as part of a larger sequence, it’s a valuable addition to any yoga practice.
What muscles does it stretch?
Mostly the spine! It’s the perfect pose to give your spine some much-needed love and attention. As a yoga teacher, I see so many people struggling with tension and discomfort in their back and shoulders. This pose is like a little massage for your back, but without the awkward small talk lol.
Sphinx Preparatory poses
Child’s pose
—Proper Form, Variations, and Common Mistakes sphinx pose 3")
- Begin on your hands and knees with your wrists directly under your shoulders and your knees directly under your hips.
- Lower your hips towards your heels and stretch your arms forward.
- Rest your forehead on the ground and relax your shoulders.
- Breathe deeply and hold for a few breaths.
Cobra pose
—Proper Form, Variations, and Common Mistakes sphinx pose 4")
- Begin by lying on your stomach with your hands under your shoulders and your elbows close to your body.
- Inhale and lift your head and chest off the ground while keeping your elbows close to your body.
- Press the tops of your feet and thighs into the ground and lengthen through your spine.
- Hold the pose for a few breaths.
Downward-facing dog pose
—Proper Form, Variations, and Common Mistakes sphinx pose 5")
- Begin on your hands and knees with your wrists directly under your shoulders and your knees directly under your hips.
- Tuck your toes under and lift your hips up and back.
- Straighten your arms and legs and press your hands and feet into the ground.
- Relax your head and neck and breathe deeply.
- Hold the pose for a few breaths.
These preparatory poses can help warm up and stretch the muscles of your back, chest, and shoulders, preparing your body for Sphinx Pose. It’s important to take your time and listen to your body as you move through these poses, modifying or skipping them if necessary.
Detailed instructions on how to perform Sphinx Pose:
Begin in a prone position
- Lie face down on your yoga mat with your legs extended behind you and your feet hip-width apart.
- Place your hands by your sides, palms facing down.
- Relax your entire body and take a few deep breaths.
Place your forearms on the ground
- Slowly lift your upper body and place your forearms on the ground parallel to each other and shoulder-width apart.
- Your elbows should be directly under your shoulders.
- Spread your fingers wide and press your palms and forearms firmly into the ground.
Press your pelvis into the ground
- Engage your lower abdomen and press your pelvis into the ground.
- Keep your hips and legs relaxed.
Lift your head and chest up
- Inhale and lift your head and chest up.
- Keep your elbows close to your body and your forearms pressing into the ground.
- Roll your shoulders down and away from your ears.
Lengthen through your spine
- Lengthen through your spine, reaching the crown of your head forward and your tailbone back.
- Keep your gaze forward and your neck relaxed.
Hold the pose for a few breaths
- Breathe deeply and hold the pose for a few breaths, relaxing your body and focusing on your breath.
- To release the pose, exhale and slowly lower your upper body back down to the ground.
Remember to avoid any pain or discomfort in the pose and to listen to your body as you move through it. With practice and patience, you can gradually deepen the stretch and enjoy the benefits of Sphinx Pose.
Common mistakes when practicing Sphinx Pose:
Arching the lower back
—Proper Form, Variations, and Common Mistakes sphinx pose 6")
- One of the most common mistakes is to arch the lower back, which can put pressure on the lumbar spine and cause discomfort.
- To avoid this, engage your lower abdomen and press your pelvis into the ground, lengthening through your spine.
Shrugging the shoulders
- Another common mistake is to shrug the shoulders towards the ears, which can cause tension and strain in the neck and shoulders.
- To avoid this, roll your shoulders down and away from your ears, keeping your neck relaxed.
Overworking the neck muscles
- Some people may also overwork the neck muscles by lifting the head too high or tensing the neck.
- To avoid this, keep your gaze forward and your neck relaxed, focusing on lengthening through your spine.
Placing the elbows too far apart
- Placing the elbows too far apart can also put pressure on the shoulders and cause discomfort.
- To avoid this, place your forearms on the ground parallel to each other and shoulder-width apart, with your elbows directly under your shoulders.
Tensing the glutes or legs
- Finally, tensing the glutes or legs can interfere with the stretch in the spine and create tension in the hips.
- To avoid this, relax your hips and legs and focus on lengthening through your spine.
By avoiding these common mistakes and focusing on proper alignment, you can practice Sphinx Pose safely and effectively. Remember to listen to your body and modify the pose as needed to avoid any discomfort or pain.
Sphinx pose modifications
Using a block under the forearms
—Proper Form, Variations, and Common Mistakes sphinx pose 7")
- If you have wrist or shoulder pain or find it difficult to keep your forearms on the ground, you can use a block or a folded blanket under your forearms for extra support.
Placing a folded blanket under the hips for extra support
- If you have lower back pain or find it difficult to press your pelvis into the ground, you can place a folded blanket under your hips for extra support.
Using a bolster or cushion under the chest for a deeper stretch
- If you want to deepen the stretch in your spine, you can use a bolster or cushion under your chest.
- Place the bolster or cushion under your chest and rest your forearms on the ground in front of it, allowing your spine to lengthen and your chest to open.
Resting on one side of the body
- If you have an injury or discomfort in one side of your body, you can rest on the opposite side of the body instead of placing both forearms on the ground.
- For example, you can place your left forearm on the ground and rest on your left side, while keeping your right arm by your side or extending it overhead.
Remember to listen to your body and use modifications as needed to make Sphinx Pose more comfortable and accessible for your individual needs. Modifications can also help you deepen your practice gradually and safely over time.
Sphinx Pose variations for you to try
Supported Sphinx pose with props
- Place a bolster or a rolled-up blanket under your chest and rest your forearms on the ground in front of it.
- Relax your body onto the props and allow your spine to lengthen and your chest to open.
- Breathe deeply and hold the pose for a few breaths.
Cobra pose with arms extended
- Begin in Sphinx Pose with your forearms on the ground.
- Inhale and lift your chest up, straightening your arms and coming into Cobra Pose.
- Keep your elbows close to your body and your shoulders relaxed.
- Breathe deeply and hold the pose for a few breaths.
Seal pose with arms extended
—Proper Form, Variations, and Common Mistakes sphinx pose 8")
- Begin in Sphinx Pose with your forearms on the ground.
- Inhale and straighten your arms, lifting your chest and coming onto your fingertips.
- Press your palms into the ground and lift your chest up even higher.
- Keep your elbows close to your body and your shoulders relaxed.
- Breathe deeply and hold the pose for a few breaths.
Remember to approach variations with caution and only try them when you feel comfortable and stable in the basic Sphinx Pose. Variations can help you deepen your practice and explore new sensations in your body, but it’s important to listen to your body and avoid any pain or discomfort.
Precautions and contraindications
Recent back injury or chronic back pain
- If you have a recent back injury or chronic back pain, it’s best to avoid Sphinx Pose or modify it with the help of a qualified yoga teacher.
- Practicing Sphinx Pose incorrectly or without proper support can worsen your condition.
Neck problems
- If you have neck problems such as cervical spine issues or neck pain, it’s important to be cautious when practicing the pose.
- Avoid lifting your head too high or tensing your neck muscles, and keep your gaze forward and your neck relaxed.
Pregnancy
- If you are pregnant, it’s best to avoid this asana after the first trimester or modify it with the help of a qualified yoga teacher.
- The pressure on the abdomen can be uncomfortable or harmful to the developing fetus.
High blood pressure or heart problems
- If you have high blood pressure or heart problems, be cautious when practicing the pose or avoid it altogether.
- It can create pressure on the chest and increase your heart rate, which can be unsafe for some people.
Remember to always listen to your body and modify or avoid Sphinx Pose if you experience any pain or discomfort. Consult a qualified yoga teacher or healthcare professional if you have any questions or concerns about practicing Sphinx Pose or any other yoga poses.
FAQ
What is the Sphinx pose good for?
Sphinx Pose is great for stretching and lengthening the spine, strengthening the back and shoulders, and opening up the chest. It can also help to improve posture, reduce stress and anxiety, and promote mental clarity.
What is the difference between cobra and sphinx pose?
While both Cobra Pose and Sphinx Pose are backbends, there are a few key differences between them. In Cobra Pose, your arms are extended and your hands are on the ground, while in Sphinx Pose, your forearms are on the ground and your elbows are directly under your shoulders. Sphinx Pose is also a gentler pose that is often used as a precursor to Cobra Pose.
What is the Sphinx pose for beginners?
Sphinx Pose is a great pose for beginners, as it is a gentle and accessible backbend that can help to improve flexibility and build strength in the back and shoulders. To get into Sphinx Pose, simply lie face down on the ground with your forearms on the ground and your elbows under your shoulders. Lift your head and chest up and hold the pose for a few breaths.
What is the meaning of Sphinx yoga pose?
Sphinx Pose is also known as Salamba Bhujangasana in Sanskrit. “Salamba” means “supported”, “Bhujanga” means “snake” or “cobra”, and “asana” means “pose”. The name Sphinx Pose comes from the way the pose resembles the mythical creature of the Sphinx, which is part human and part lion.
How long should you hold Sphinx Pose?
Sphinx Pose can be held for several breaths, depending on your comfort level and experience. Beginners may want to start with holding the pose for 30 seconds to 1 minute, gradually increasing the hold time as they become more comfortable. More experienced practitioners may hold the pose for up to 3 minutes. It’s important to listen to your body and avoid holding the pose for too long or forcing yourself into discomfort. Remember to breathe deeply and relax your body while holding the pose.